Hello Everyone,
Today I am going to share my thoughts on getting deeper insights on email engagement with heatmap analytics in Dynamics 365 Customer Insights.

Let’s get’s started.
This enhancement provides marketers with a visual, data driven way to understand how recipients interact with your marketing emails allowing for smarter content decisions and more effective campaigns.
Email Heatmap?
Email heatmaps offer a visual representation of user engagement, such as where recipients are clicking within an email. By overlaying engagement data onto the email layout., heatmaps make it easy to identify which parts of your message are attracting the most attention.
With this feature, you can quickly see:
Which links and CTAs are getting the most clicks.
Which sections of your emails are being ignored.
Overall engagement patterns that may affect conversion rates.
Why Heatmaps Important?
Traditional email metrics like open and click-through rates give you a big picture view, but they don’t tell you where the engagement is happening. Heatmap analytics fill this gap by helping us:
Optimise content placement: Move important CTAs and key messages to high engagement areas.
Test design effectiveness: See how layout changes influence interaction.
Refine messaging: Identify what resonates most with our audience based on click behaviour.
How does it work In Customer Insights – Journeys:
Once your email campaign is sent, the new heatmap view becomes available in the insights tab. You’ll see a color-coded overlay of engagement levels across your email hot spots indicate high click activity, while cooler areas show less interaction.
You can also filter the heatmap by:
Audience segments
Devices (mobile vs. desktop)
Link performance over time.
These insights make it easy to iterate and improve your future campaigns based on real behaviour—not assumptions.
Start using heatmap analytics today:
This new feature is now available in Dynamics 365 Customer Insights—Journeys.
There’s nothing to install—just head to your email insights dashboard and look for the “Heatmap” tab.
By leveraging email heatmaps, you can go beyond basic metrics and truly understand how your audience engages with your content. it’s time to take the guesswork out of email optimisation.
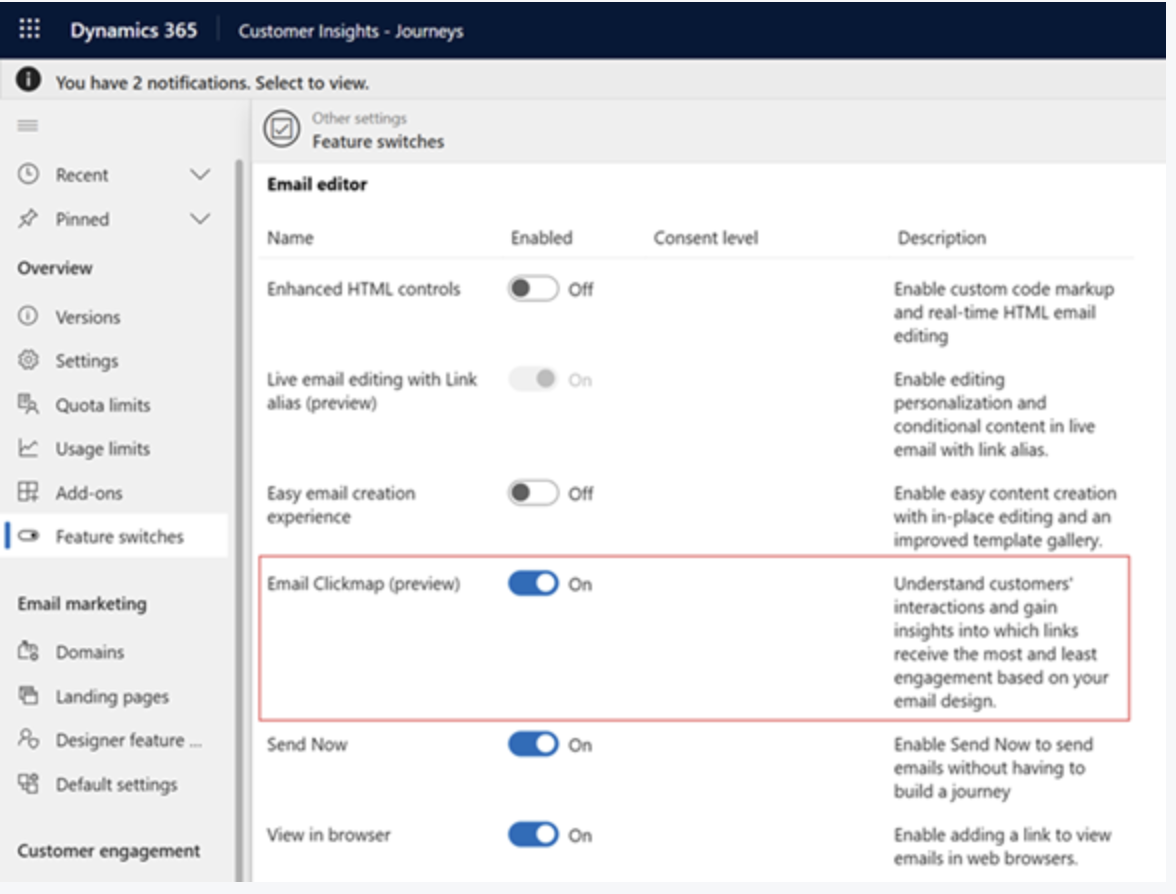
How to enable Heatmap?
Go to Dynamics 365 Customer Insights > Settings > Feature switchers > Email Clickmap(Preview)
That’s it for today.
I hope this helps.
Malla Reddy Gurram(aka UK365GUY)