Hello Everyone,
Today I am going to share my thoughts on Optimizing engagement and increase conversation rates with email A/B testing.

Let’s get’s started.
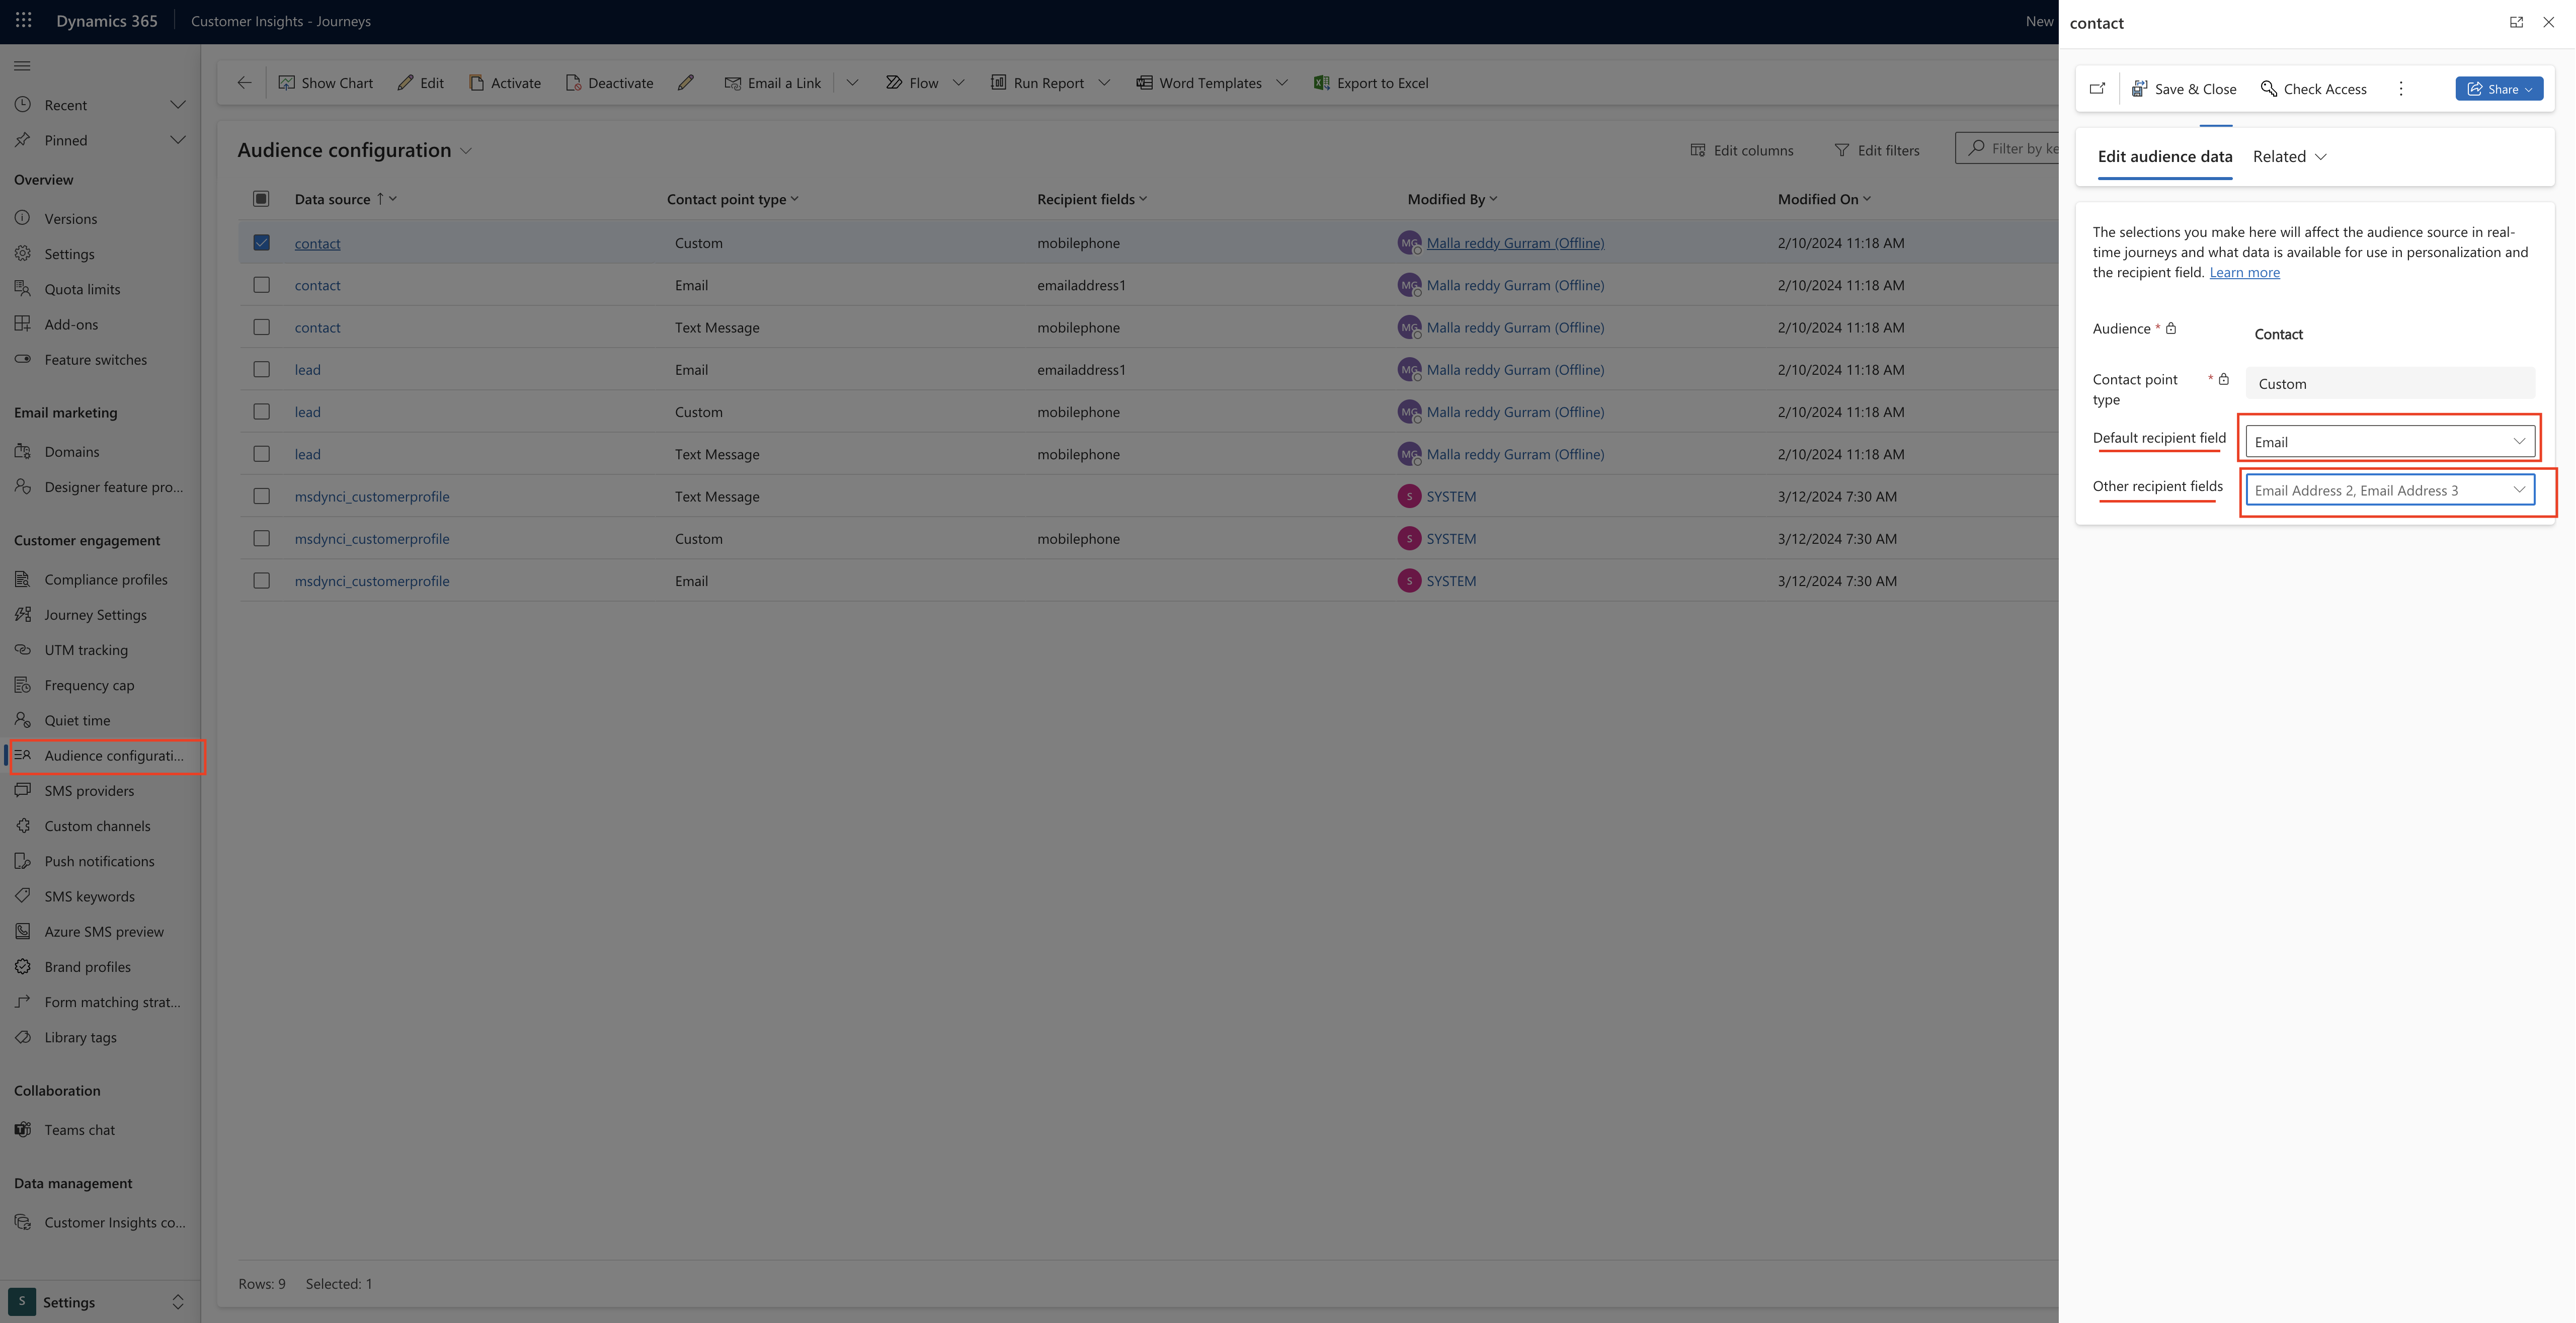
Advanced bot protection in Customer Insights – Journeys is a powerful feature that enhances the reliability of your insights and safeguards your business processes. Let’s delve into the details:

1. Enhanced Data Accuracy:
Bot protection: Ensures that the data you collect is accurate and represents real human interactions.
By preventing bot clicks on your emails, it avoids inflated engagement metrics, incorrectly triggered journeys and skewed analytics.
It also protects web form visits, clicks and submissions ensuring that only legitimate form submissions are recorded and no false journeys are triggered.
Additionally bot protection ensures accurate event attendance by filtering out any false check- ins caused by bots.
2. Elevated Customer Experiecne:
Minimize disruptions caused by mailcious bots, thereby enhancing the quality of your insights.
with the confidence of reliable data, your business decisions become more informed and effective.
Remember, bot protection is critical for marketing campaigns and it empowers your businesses to thrive by maintaining the integrity of your data and operations.
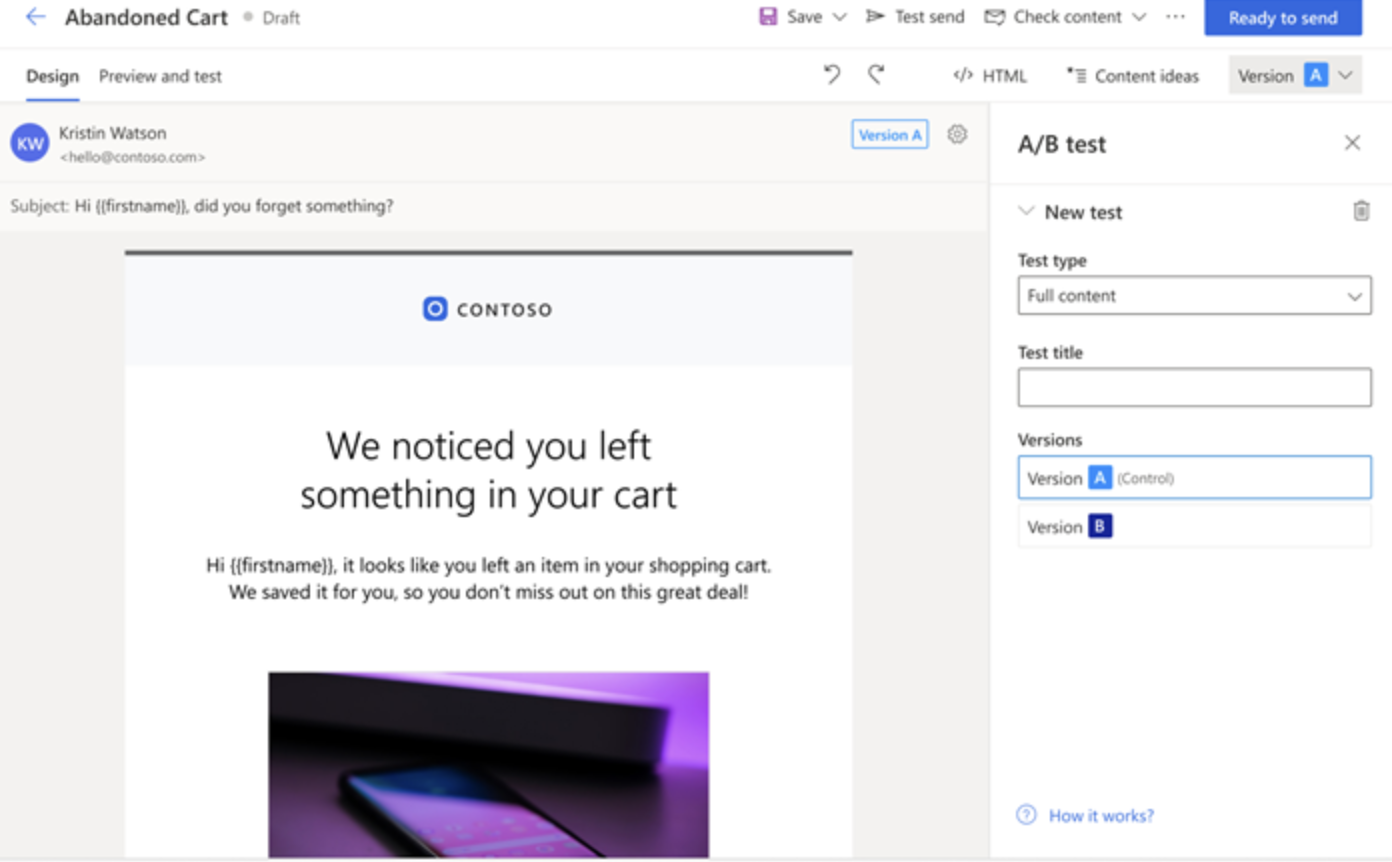
Now, let’s talk about email A/B testing. This technique allows you to compare and test variations of your emails on different subsets of recipients to determine which version performs better, Here’s how it works.
1. Create Alternate Versions:
In real-time journeys, you can easily create alternate email versions by changing elements such as the subject, body, or sender address directly in the Customer Insights – Journeys email editor.
Optimize your content for your specific audience by tweaking these elements.
2. Types of A/B Tests:
Define different types of A/B tests by changing the subject, from email address or email body.
For example, you can test different subject lines, wording variations or offers.
3. Test and Analyze:
Preview and test-send version A and version B of your email.
Easily identify a winner based on performance metrics (e.g open rates click through rates) and analyze the results in journey and email insights.
By leveraging A/B testing, you can fine tune your email campaigns, optimize engagement and increase conversion rates. Remember data driven decisions lea d to better outcomes.
That’s it for today.
I hope this helps.
Malla Reddy Gurram(@UK365GUY)
#365BlogPostsin365Days