Menu Close

Author: uk365guy

How to switch to different directory from Power Apps maker portal

Hello Everyone,

Today i am going to share how to switch directories from Power Apps Maker Portal.

Lets gets started.

Login into www.make.powerapps.com

Click on the little gear icon – settings on the right handside of the maker portal and then click on the Power apps settings.

Then click on the directories and choose the appropriate directory to work.

Thats it for today.

I hope this helps.
Malla Reddy(@UK365GUY)
#365BlogPostsin365Days

Share this:

Power Apps for Windows desktop

Hello Everyone,

Today i am going to show new feature on Power Apps for Windows.

Lets gets started.

Turn on your windows desktop.

Now you can download the Power Apps from windows appstore as well as Sales Hub.

How do you do that?

Just search for Power Apps and download and then you can pin it to your task bar.

Next time you can access power apps from the task bar directly.

That’s it for today.

I hope this helps.
Malla Reddy(@UK365GUY)
#365BlogPostsin365Days

Share this:

How to check Model Driven App form sizes in real time on form designer view

Hello Everyone,

Today i am going to show different form sizes on model driven app form in a real time on modern UI in Dataverse.

Let’s gets started.

Login into www.make.powerapps.com

Go to the solution and select a table and create a new form.

Different form sizes:

Desktop (1920 x 1080)

Tablet (1024 x 768)

Phone (411 x 731)

Responsive (581 x 1021)

Above image is “Responsive (581 x 1021 ) when you select the size then automatically adjust in real time.

It will be very useful for the form designers.

Similarly when we select the Phone (411 x 731 )

Then if you select the Tablet (1024 x 768)

Finally Desktop (1920 x 1080) screen size looks like below screenshot.

So this screen size in real time designer view is really game changer for the designers.

That’s it for today.

I hope this helps.

Malla Reddy(@UK365GUY)
#365BlogPostsin365Days

Share this:

How to create a contact email column automatically on a form from dataverse

Hello Everyone,

Today i am going to share how to create a contact email column automatically if the table don’t have one.

Let’s gets started.

Login into www.make.powerapps.com

Open the solution and add the new table to it.

Check the “Can have a contact email” box, what it does is Rows in this table can have email addresses(for example, info@gmritsolutions.co.uk) if the table didn’t have an email column, one will be added.

That’s it for today.

I hope this helps.

Malla Reddy(@UK365GUY)
#365BlogPostsin365Days

Share this:

When to use Elastic Tables(Preview) in Dataverse

Hello Everyone,

Today i am going to show what is use of the Elastic Tables(Preview) in Dataverse.

Let’s gets started.

What are Elastic Tables in Dataverse?

Elastic table is managed by Microsoft Dataverse. Elastic table have same features as standard tables in Dataverse but they have a unique features and capabilities powered by Azure Cosmos DB.

Note: Elastic table data storage consumption come under the Dataverse database capacity use.

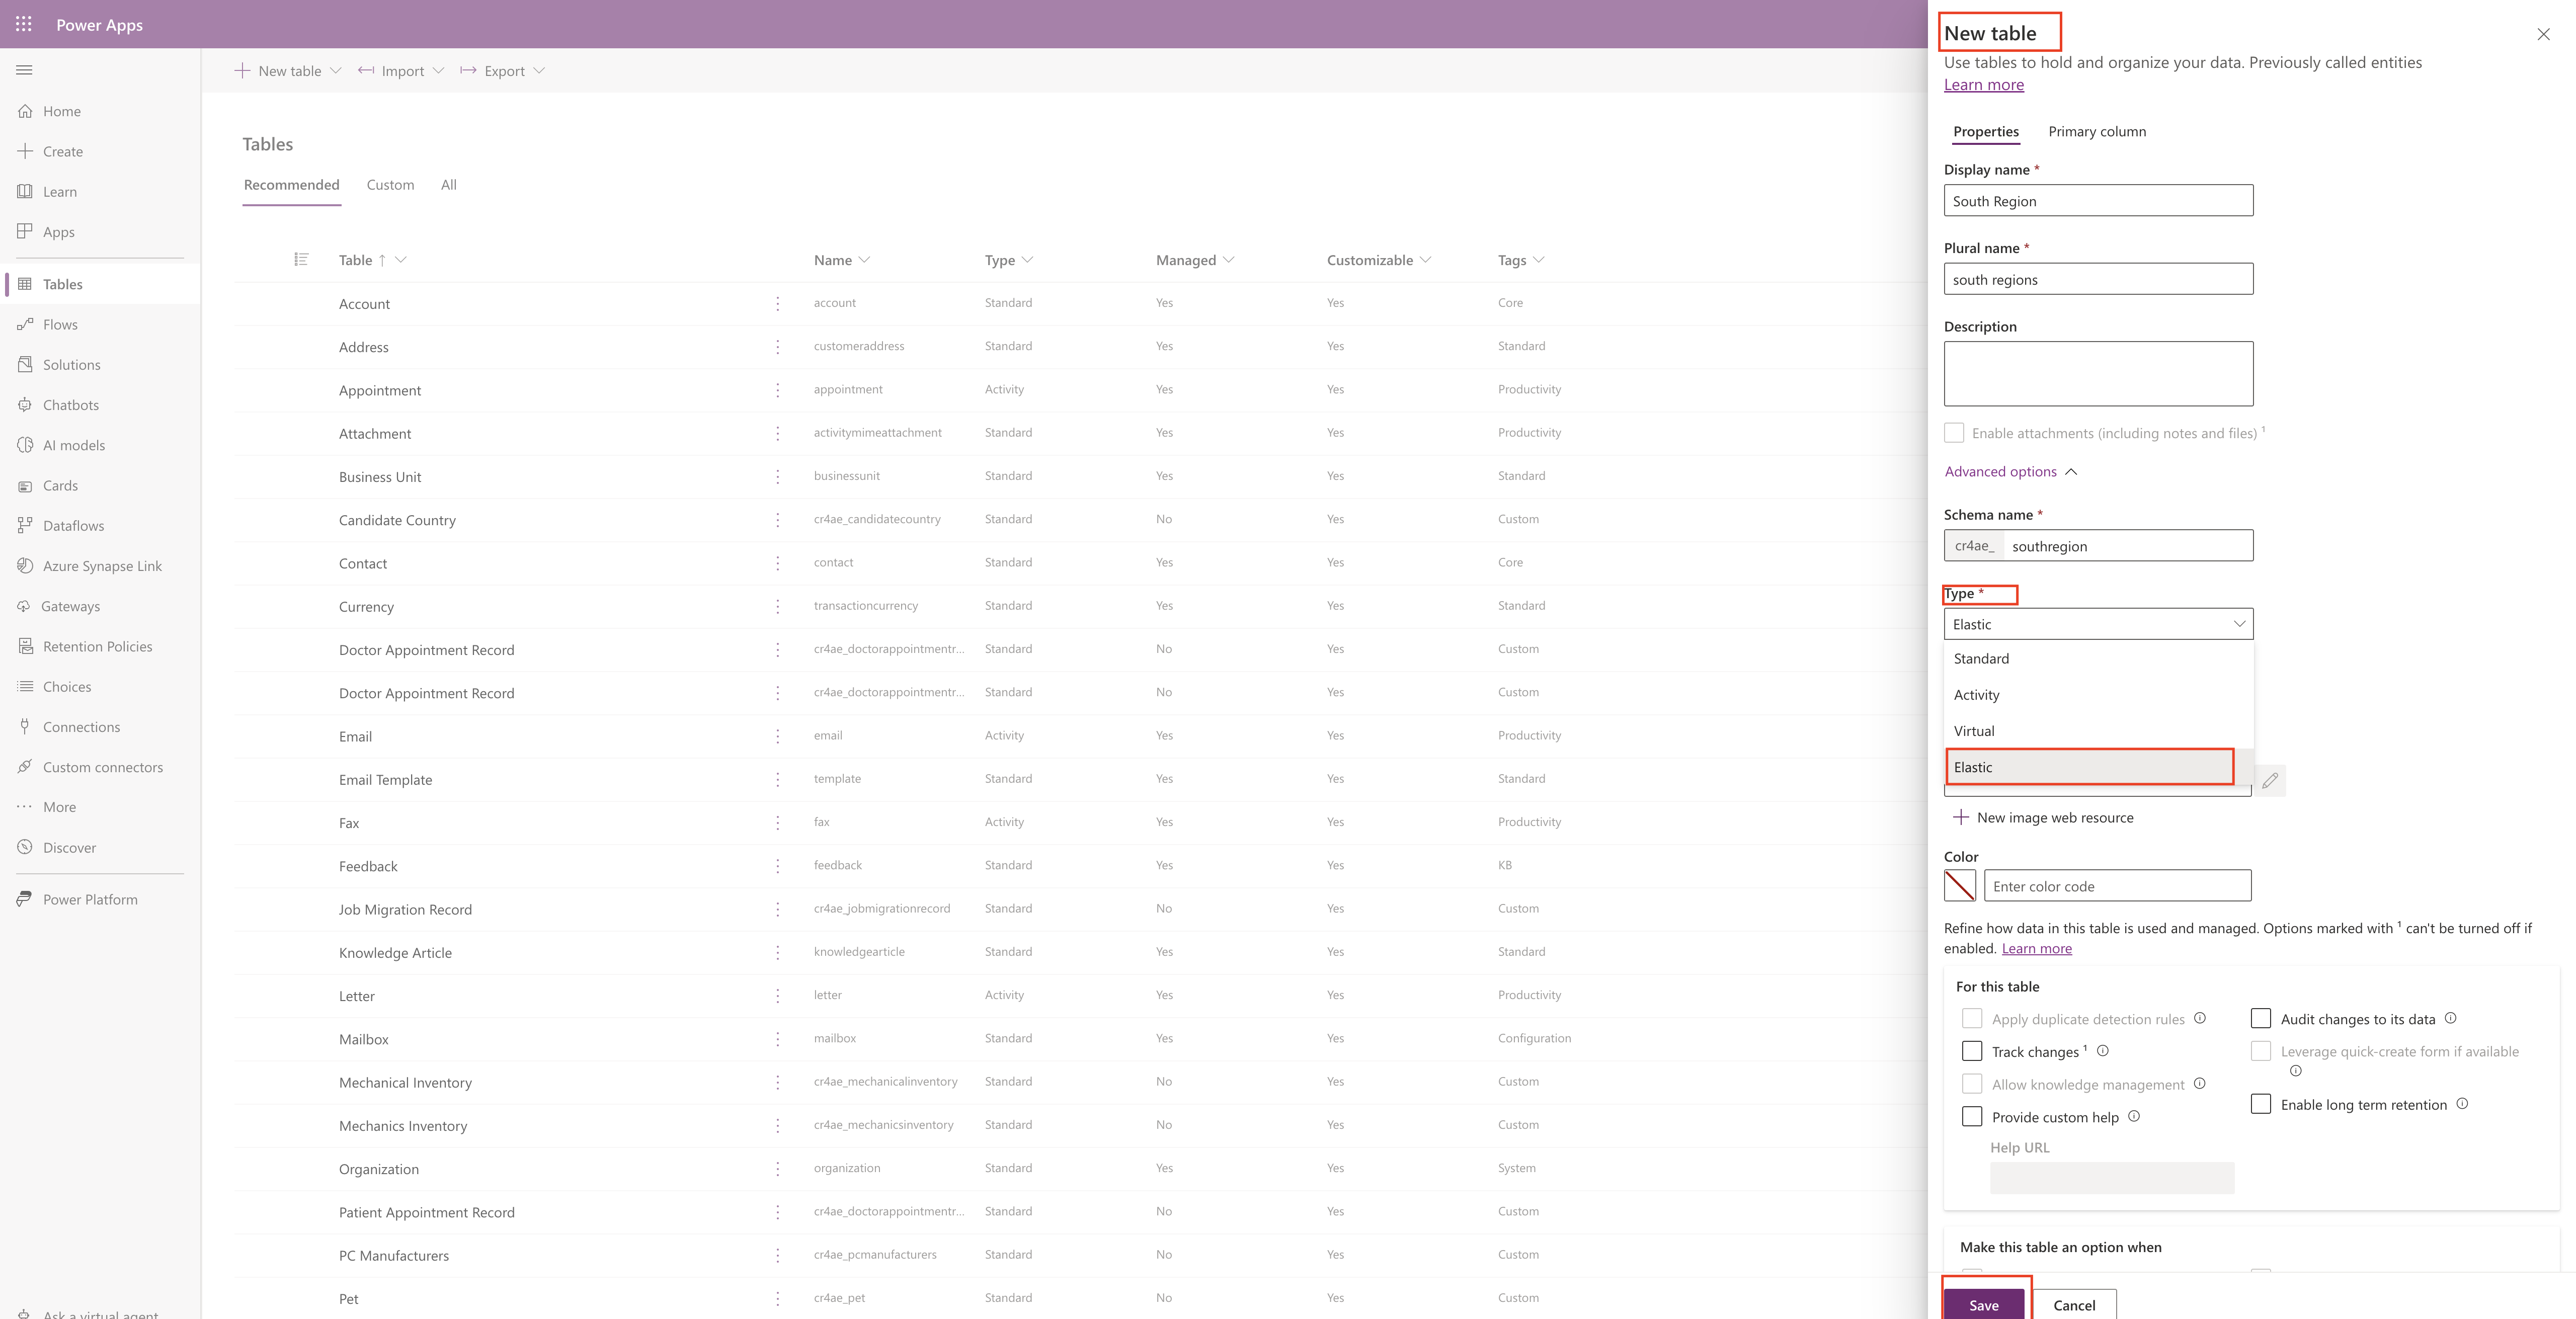
So what is the purpose of the Elastic tables?

Elastic tables are designed to handle large volume of data in real time. By using the elastic table we can import large volume of data and store analyze it without scalability, latency or any performance issues.

Elastic tables supports:

CRUD Operations(create, read, update, delete) including API Multiple operations bulk deletion and requests from plug-ins.

Relationships: One to many and many to one.

Record ownership, change tracking, auditing, mobile offline and Dataverse search.

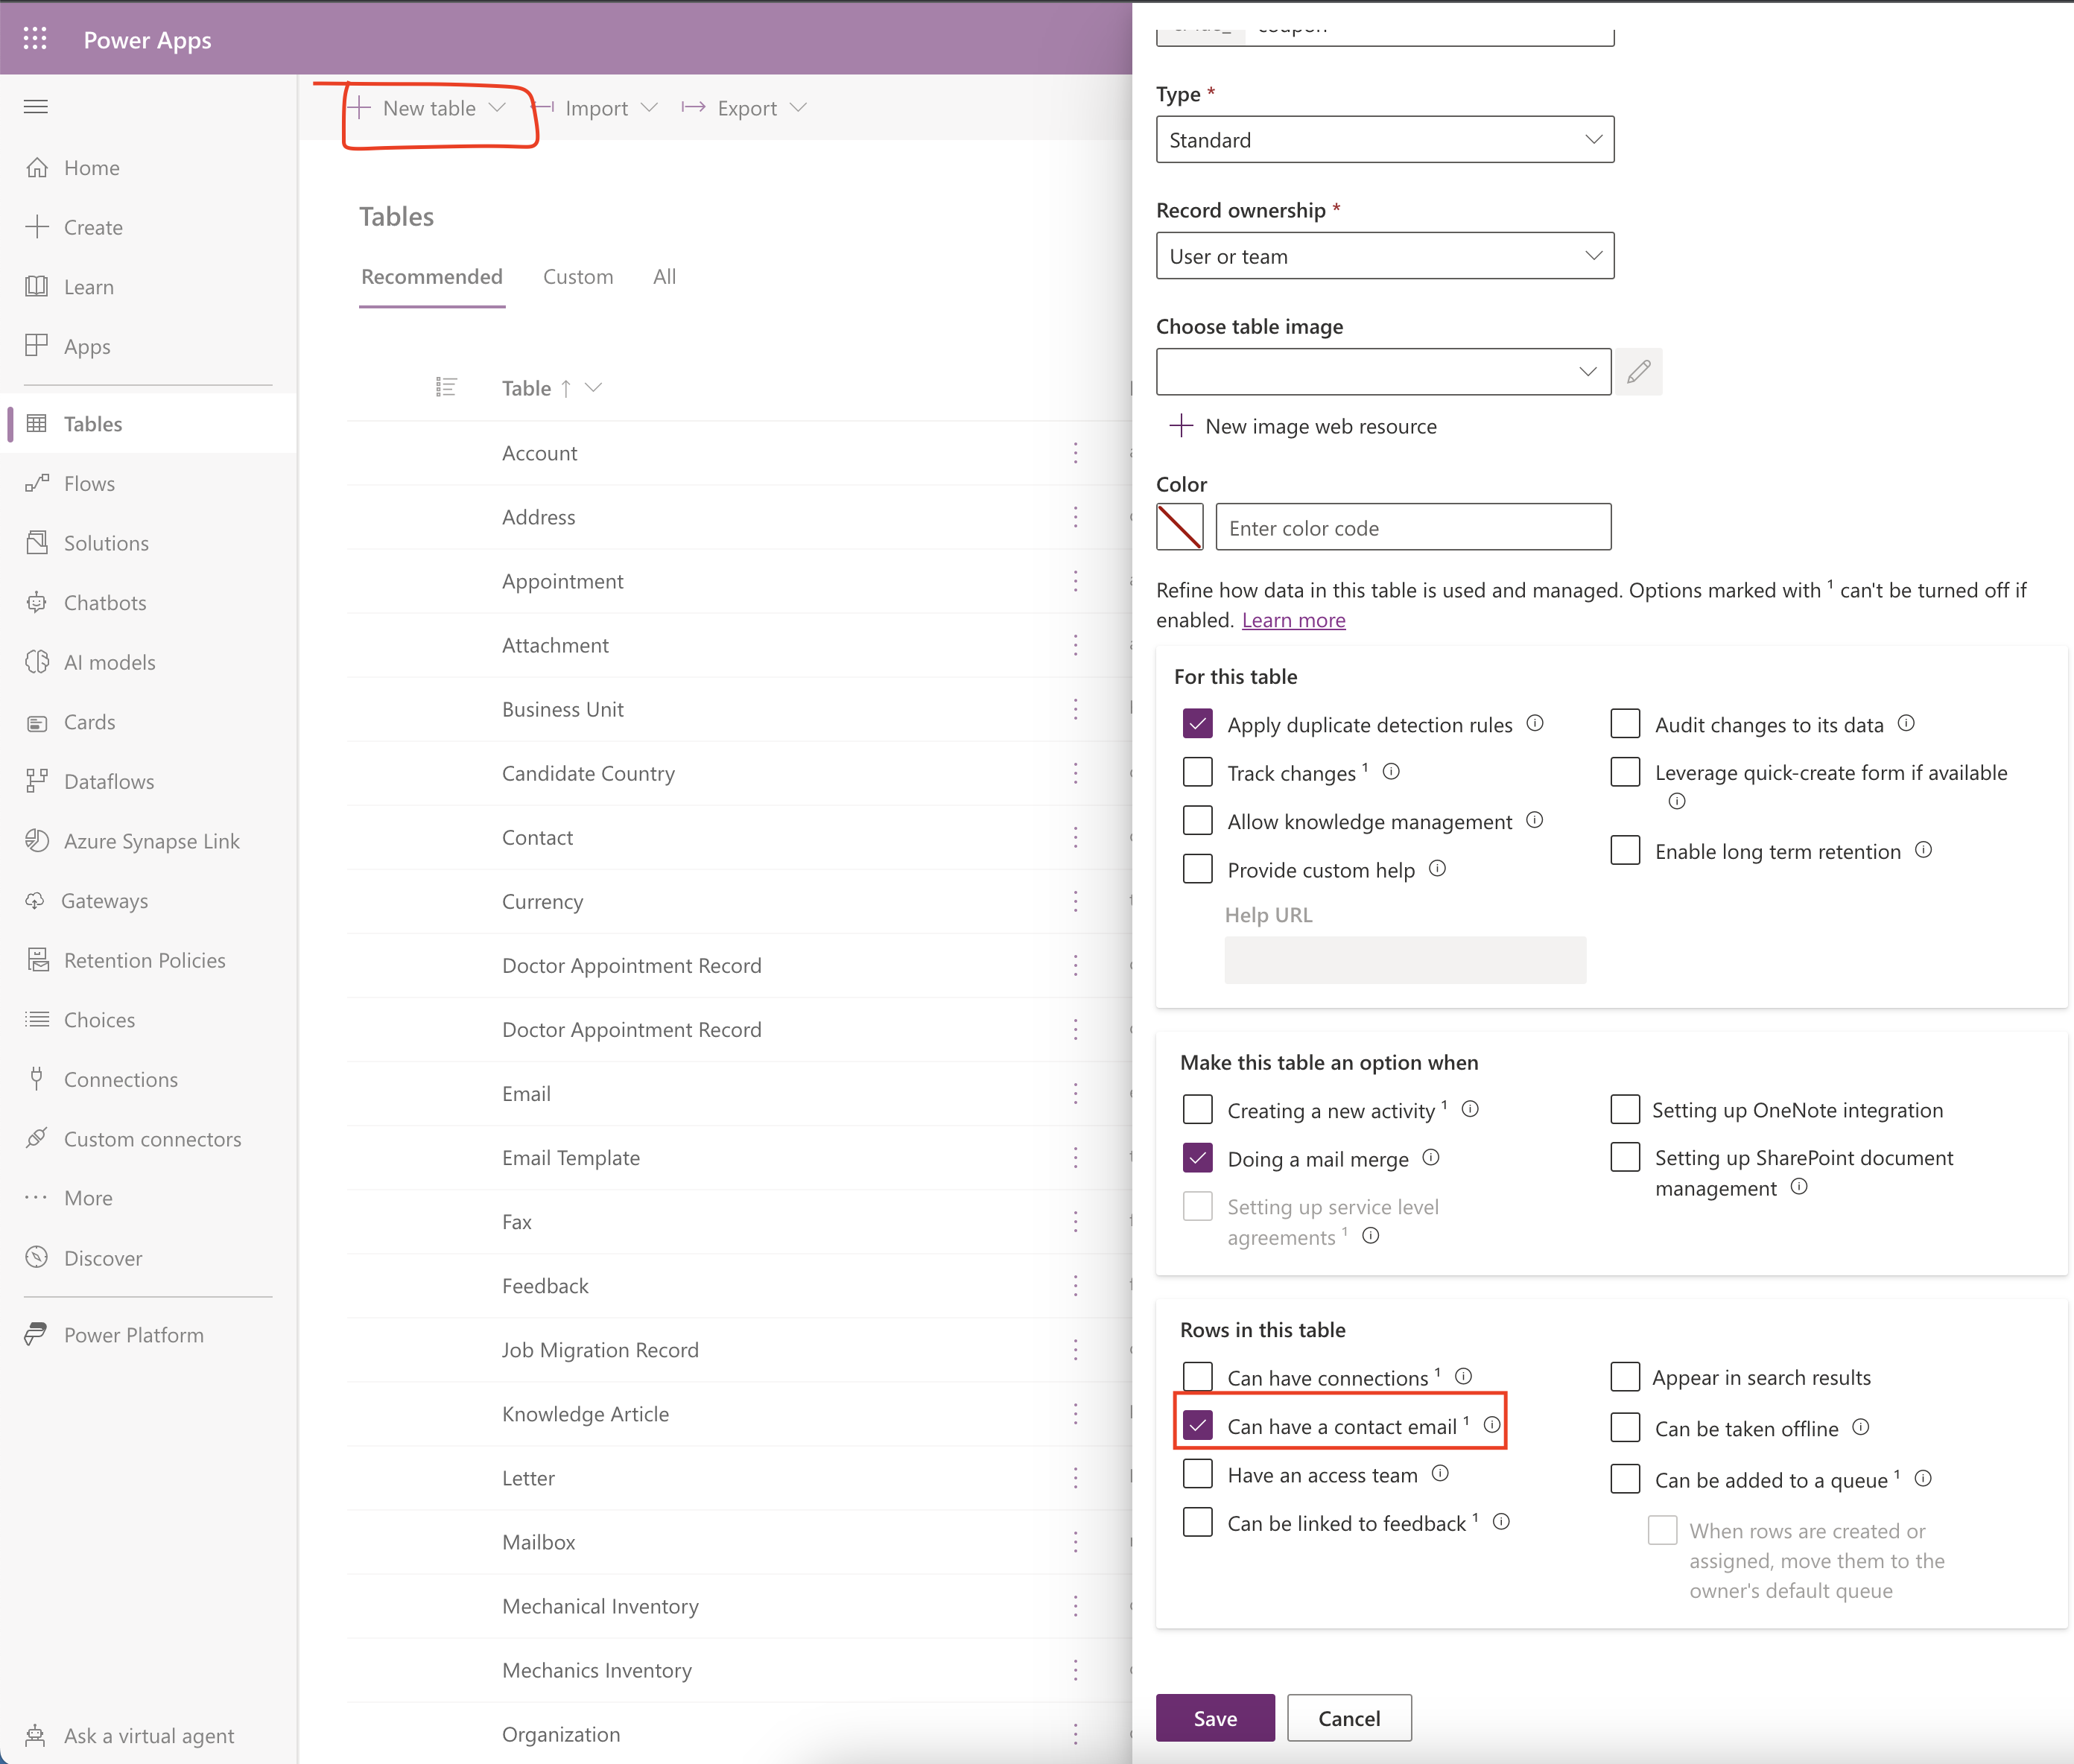
Security features support:

When creating elastic table you can set: Either user or organisation owned, field level security.

When to use Elastic tables and other information you can click here

Thats it for today.

I hope this helps.

Malla Reddy(@UK365GUY)
#365BlogPostsin365Days

Share this: