Menu Close

Tag: #365blogpostin365days

{How to }Make your copilot multilingual in Microsoft Copilot Studio

Hello Everyone,

Today I am going to show how to enable Microsoft Copilot Studio Multilingual.

Let’s get started.

To make your Microsoft Copilot (created in Copilot Studio) multilingual, you can add secondary languages to your agent and localize its content.

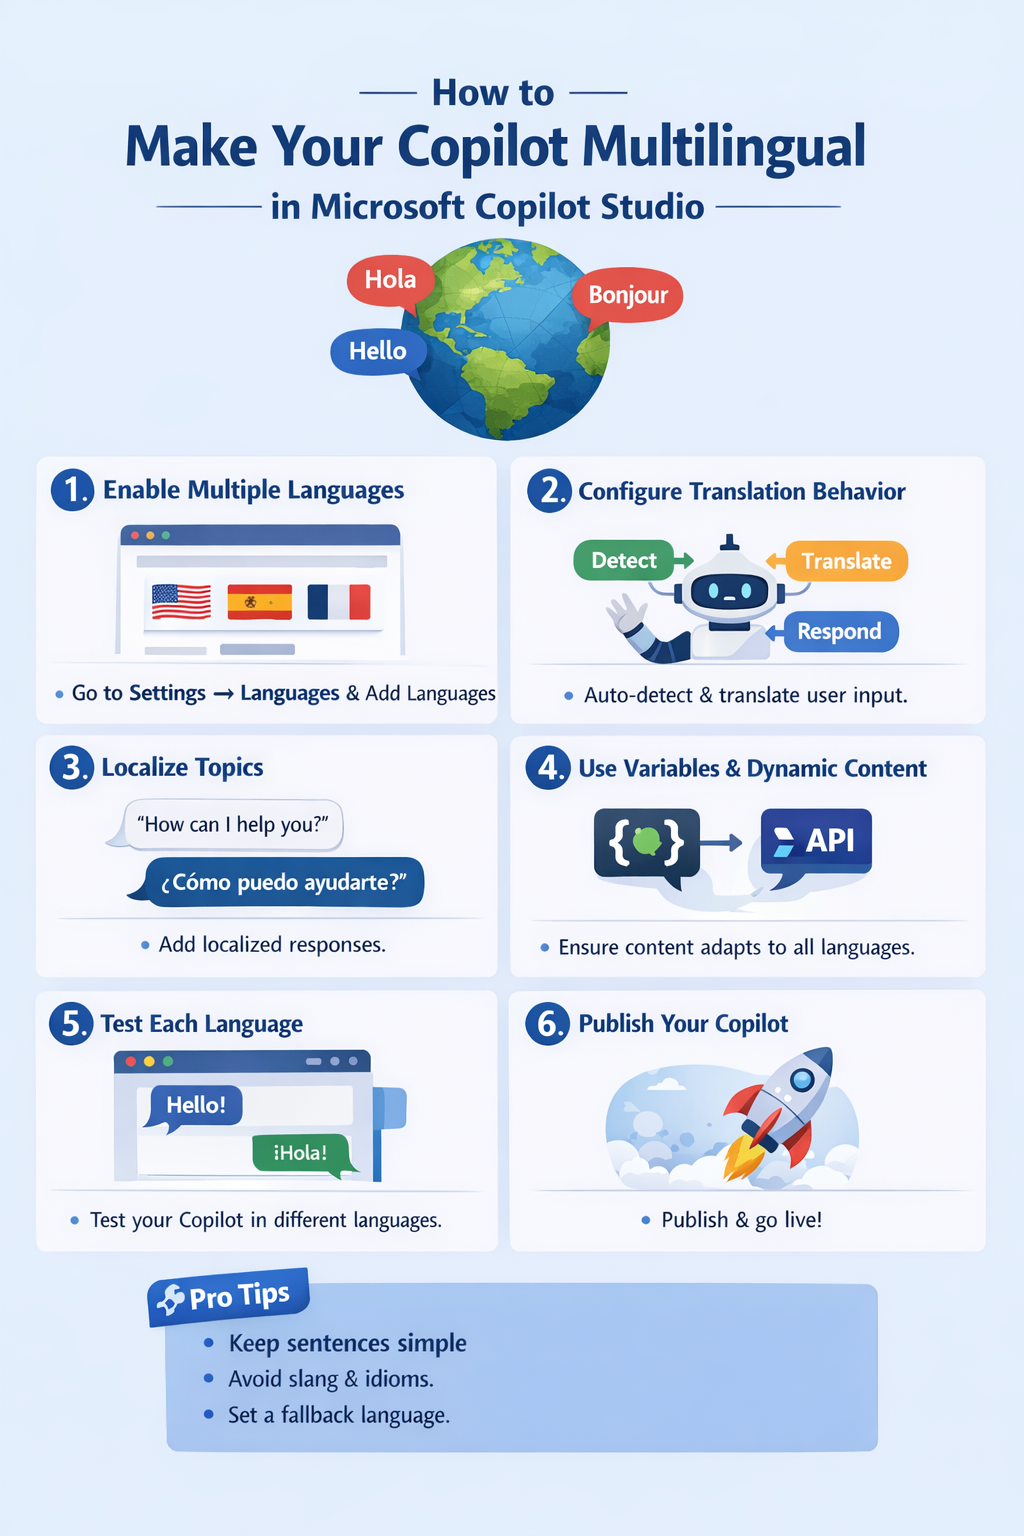
1. Add Secondary Languages:

When you create an agent, it has one primary language. You can add more by following these steps in Microsoft Copilot Studio.

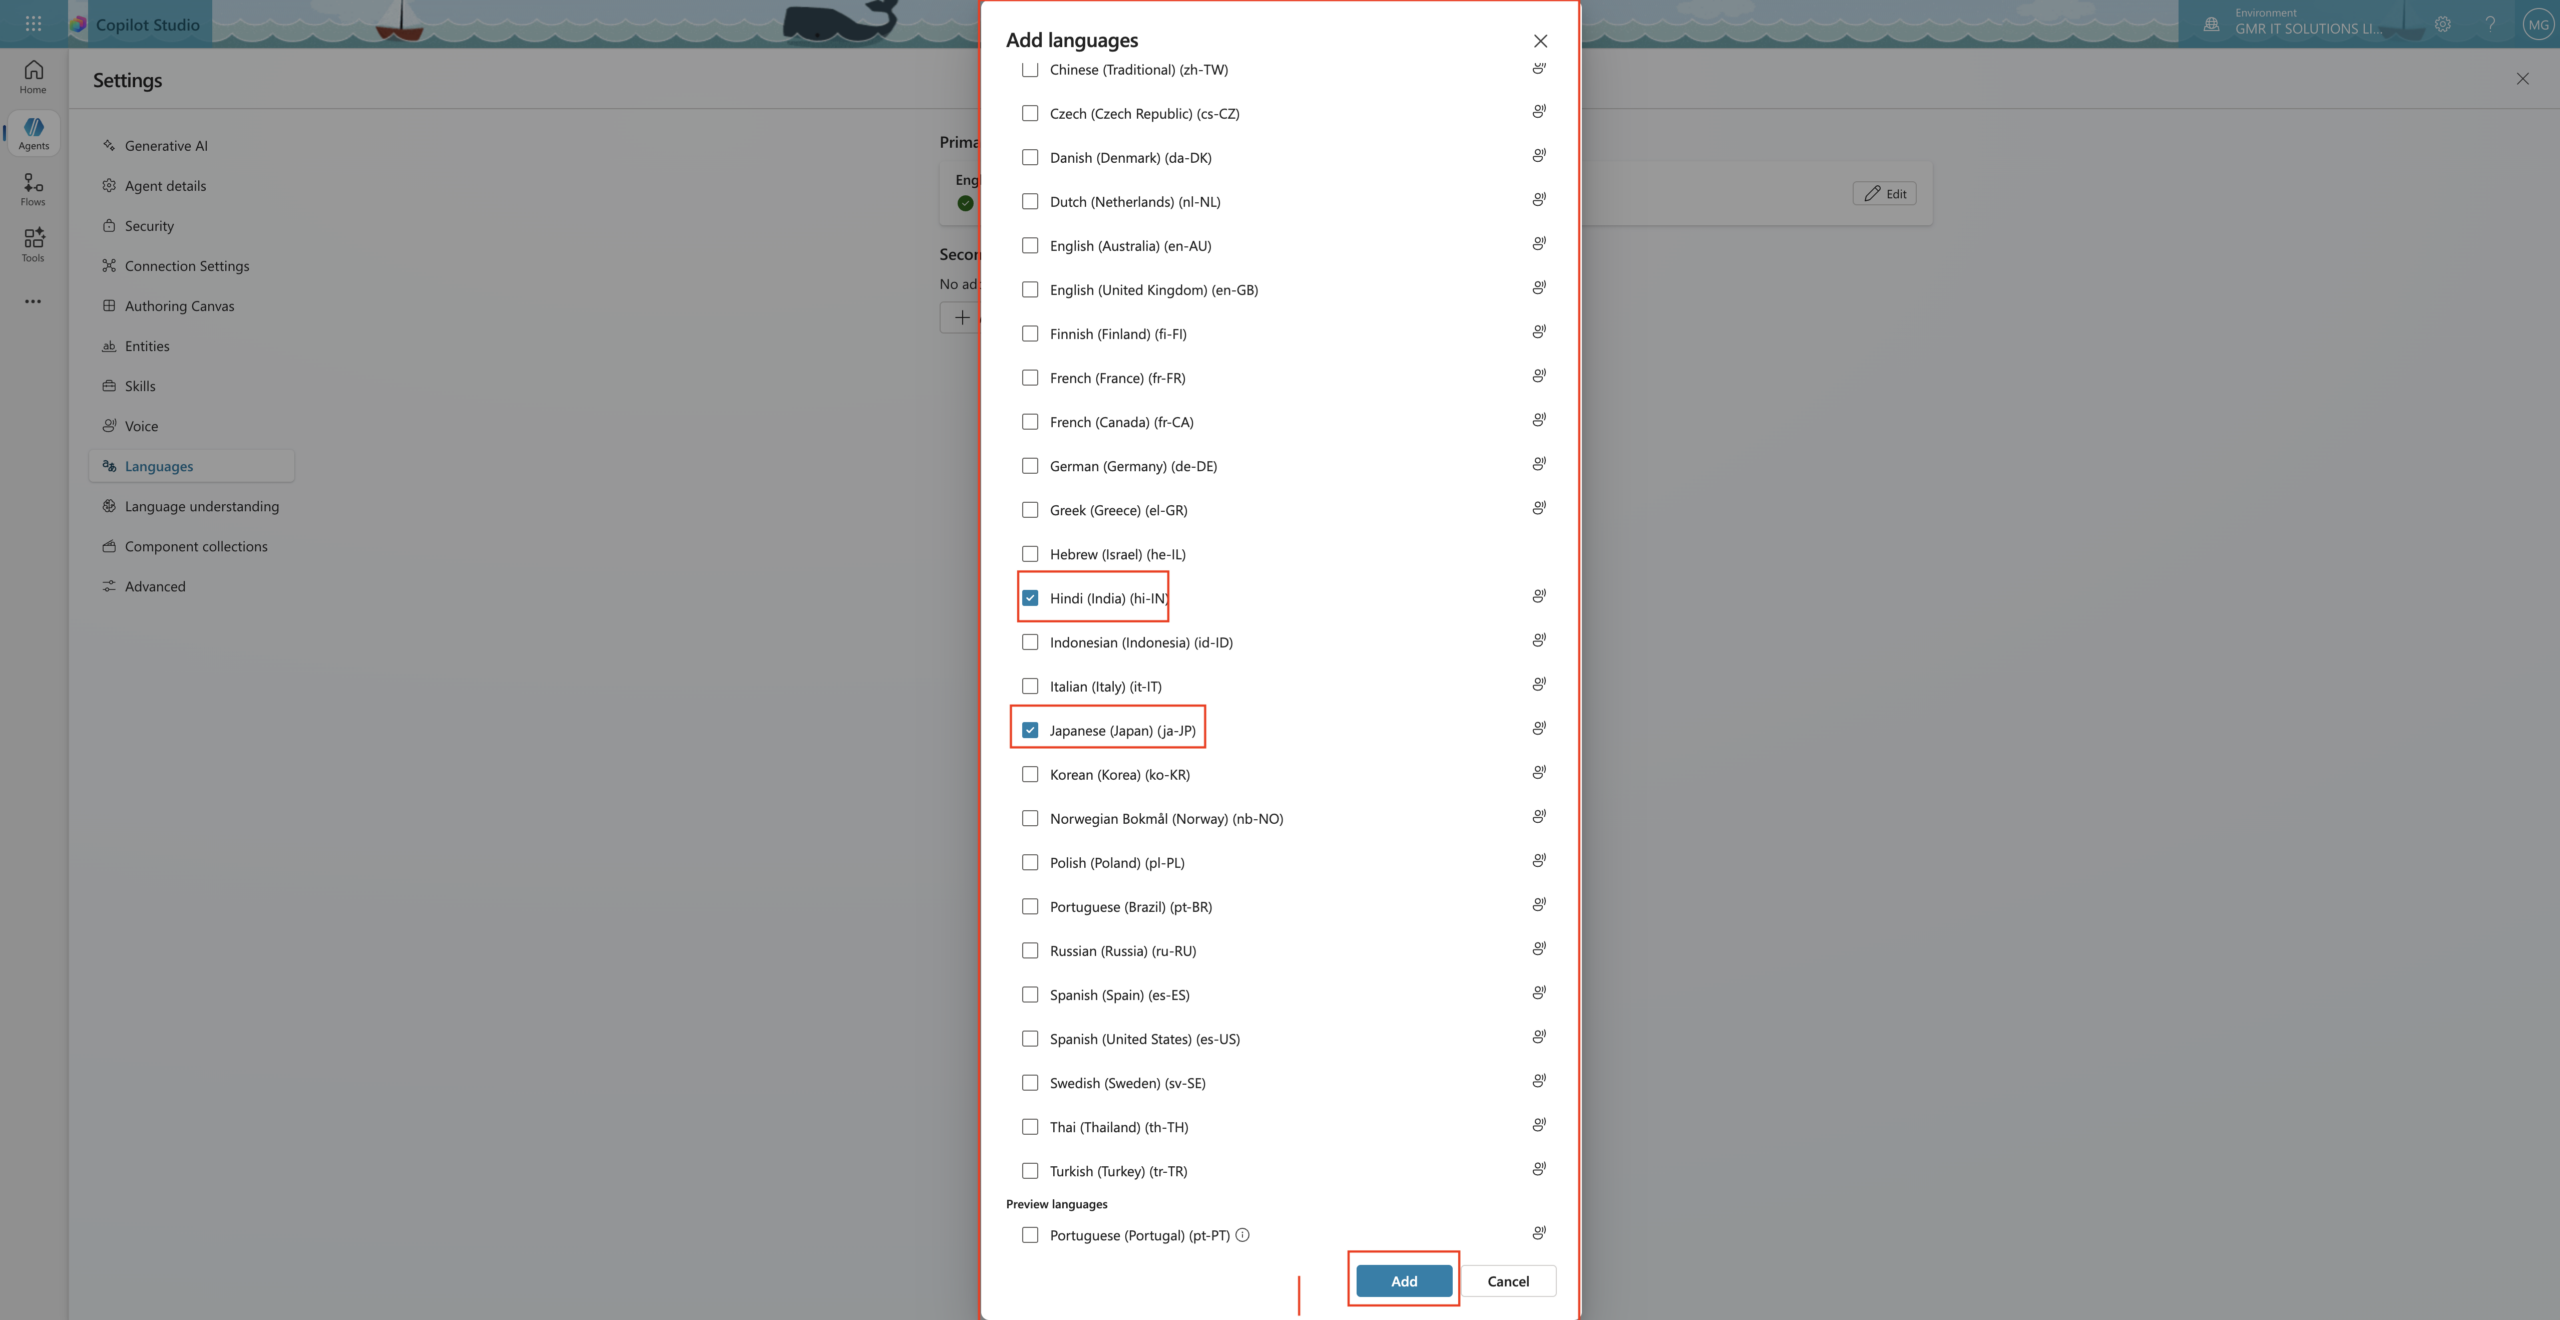
Open Settings: Go to the Settings page for your agent.
Select Languages: Click on the Languages tab.
Add Language: Select Add language, choose the languages you want from the list, and click add.
Publish: Your agent must be published for the changes to take effect.

2. Manage Localization & Translations

Content in your agent, like topic messages, does not translate automatically unless you use generative orchestration. For other content:

Download Localisation File: In the Languages Settings, select Upload for a secondary language and download the current strings in JSON or ResX format.
Translate strings: Open the file and replace the primary language text with your translated versions.
Upload Translations: Upload the modified file back to the agent’s settings.
Manual Authoring: Some elements, like Starter Prompts, must be manually authored in each secondary language directly in the canvas.

3. Language Switching Logic

You can configure how the agent decides which language to use:

Browser-Based Detection: By default, the agent tries to match the language specified in the user’s browser or client. If no match is found, it falls back to the primary language.
Dynamic Language Switching: You can create a topic that uses the User.Language system variable to switch languages mid-conversation based on user input or AI-detected intent.
Generative Orchestration: If needed, your agent can dynamically switch languages turn by turn to follow the flow of the conversation.
These guides detail how to configure Microsoft Copilot for Multilingual capabilities, covering language addition, localization and language-switching logic.

That’s it for today.

I hope this helps.

Malla Reddy Gurram aka @UK365GUY

Share this:

{How to} Get smart actionable insights to improve your copilot agent performance

Hello Everyone,

Today I am going to share my thoughts on getting the actionable insights to improve copilot agent performance.

Let’s get started.

1. Enhanced Analytics Dashboard: The Analytics page now offers comprehensive insights into agent performance, including key metrics such as answer rate, usage, and error rates. This allows for a deeper understanding of how agents are performing and where improvements can be made.

2. Autonomous Agent Performance Metrics: For agents utilising autonomous capabilities, new analytics features provide visibility into how knowledge sources are used during each run. This helps in assessing relevance, adjusting content, and improving performance over time.

3. Unanswered Questions Analysis: Copilot Studio now categorises and highlights unanswered user questions, grouping them by themes and conversation contexts. This feature aids in identifying content gaps and refining agent responses.

4. Action Usage Insights: Enhanced visibility into how users utilise actions within an agent is now available. Metrics such as answer rate, action usage rate, and error rate provide a comprehensive view of user interactions, helping to identify areas for improvements.

5. Customer Satisfaction Feedback: The Customer Satisfaction tab offers detailed insights into user feedback, including average CAST Scores and satisfaction levels based on user queries. This data helps in understanding user sentiment and areas needing attention.

6. Evaluation Test Workflows: Copilot Studio Introduces structured, Automated testing workflows that simulate real user interactions; Makers can evaluate agents before going live, identifying weak spots and ensuring reliability.

7. Billing and Consumption Analysis: New billing analysis features allow makers to assess agent efficiency and cost breakdowns by event types. This helps in optimising operations and understanding the financial impact of agents.

That’s it for today.

I hope this helps.

Malla Reddy Gurram (aka @UK365GUY)

Share this:

{How to } Resolve There was an issue delivering notifications. Refreshing the browser might help resolve the issue on Dynamics 365 Contact Center

Hello Everyone,

It’s been a while. I haven’t blogged.

Today i am going to show how to resolve this error message while accessing Dynamics 365 Contact Centre

There was an issue delivering notifications. Refreshing the browser might help resolve the issue. If this continues to exist, please have your admin contact Microsoft Support with Client Session ID: b0355776-6018-4800-83af-f2930d40a1fb. User a61d2c5e-0d24-f011-8c4e-6045bd0f8f2d doesn’t have required persona or roles

Error message is Users don’t have appropriate security roles assigned, as the Dynamics 365 Contact Centre has specific security roles which need to be assigned, even to the system administrator and system customiser roles assigned to the user.

The following are the security roles related to Dynamics 365 Contact Centre.

Assign the above roles to the user, and then the user will not get any error notifications on the screen when logged into Dynamics 365 Contact Centre.

That’s it for today.

I hope this helps.

Malla Reddy Gurram(@UK3655GUY)
#365Blogpostsin365days

Share this:

{How to} Act on your data efficiently with new grid features in Power Apps

Hello Everyone,

Today I am going to share my thoughts on how to act on your data efficiently with new grid features in Power Apps.

Let’s get’s started.

In the 2024 Release Wave 2 for Power Apps, Microsoft introduced new grid features designed to enhance data interaction and efficiency within model driven apps,

Key Enhancements:

Column Management: User can now reorder columns through drag and drop actions and set specific column widths, allowing for personalized data views.

Data Grouping and Aggregation: The new grid features enable grouping of data and performing aggregate calculations directly within the grid, facilitating quick data analysis.

Improved List Mode Styling: Updates to the list mode align with Fluent design principles, enhancing readability and user experience.

Enhanced Sorting in List Mode: A new header row with sorting options allows users to define sort columns and directions, streaming data organization.

Command Bar for Nested Grids: Nested grids now display the appropriate command bar when a row is selected, improving navigation and functionality.

Select All with Infinite Scroll: The ‘select all’ option is available by default on modern grids, supporting selection of up to 1000 records even with infinite scrolling enabled.

These enhancements empower users to interact with their data more effectively, leading to improved productivity and a more intuitive experience within Power Apps.

That’s it for today.

I hope this helps.

Malla Reddy Gurram(@UK365GUY)
#365blogpostsin365days

Share this:

{Do you know} Use workflows on Calendar events in Teams and Outlook.

Hello Everyone,

Today I am going to share my thoughts on use workflows on calendar events in Teams and Outlook.

Let’s get’s started.

Certainly! You can use workflows on calendar events in Microsoft Teams and Outlook to automate repetitive tasks and processes. This feature which is part of the Microsoft Power Automate platform, allows you to create flows that can be triggered at the start or end of a meeting.

For example:

Here’s how you can set up and use the workflows:

1. Select Apps from the left side of the Teams.

2. Scroll and select Workflows from the navigation on the left.

3. Choose a workflow that fits your needs.

4. Follow the prompts to set it up.

Once added, the workflow will run automatically based on the triggers you’ve configured. For instance, you could have a workflow that notifies a channel when a Planner task changes status or starts an approval process when a SharePoint list is modified.

This functionality is expected to be generally available in August 2024. It is designed to boost productivity by automating tasks related to calendar events, saving you time and effort.

That’s it for today.

I hope this helps.

Malla Reddy Gurram(@UK365GUY)
#365blogpostsin365days

Share this: