Hello Everyone,
Today I am going to share my thoughts on how to create lead scoring on Dynamics 365 Marketing.

Let’s get’s started.
Suppose you have a requirement to create a brand new lead scoring matrix on Dynamics 365 Marketing.
How do you do that?
In Dynamics 365 Marketing, Lead scoring helps you prioritize and qualify leads based on their interactions and attribites. Let’s dive into hoe you can set up lead scoring models:
1. Navigate to Scoring Models:
Go to Outbound marketing > Lead management > Scoring Models.
Here, you’ll find a list of existing models. You can create, delete, search, sort or filter items in the list.
To create a new model, select New.

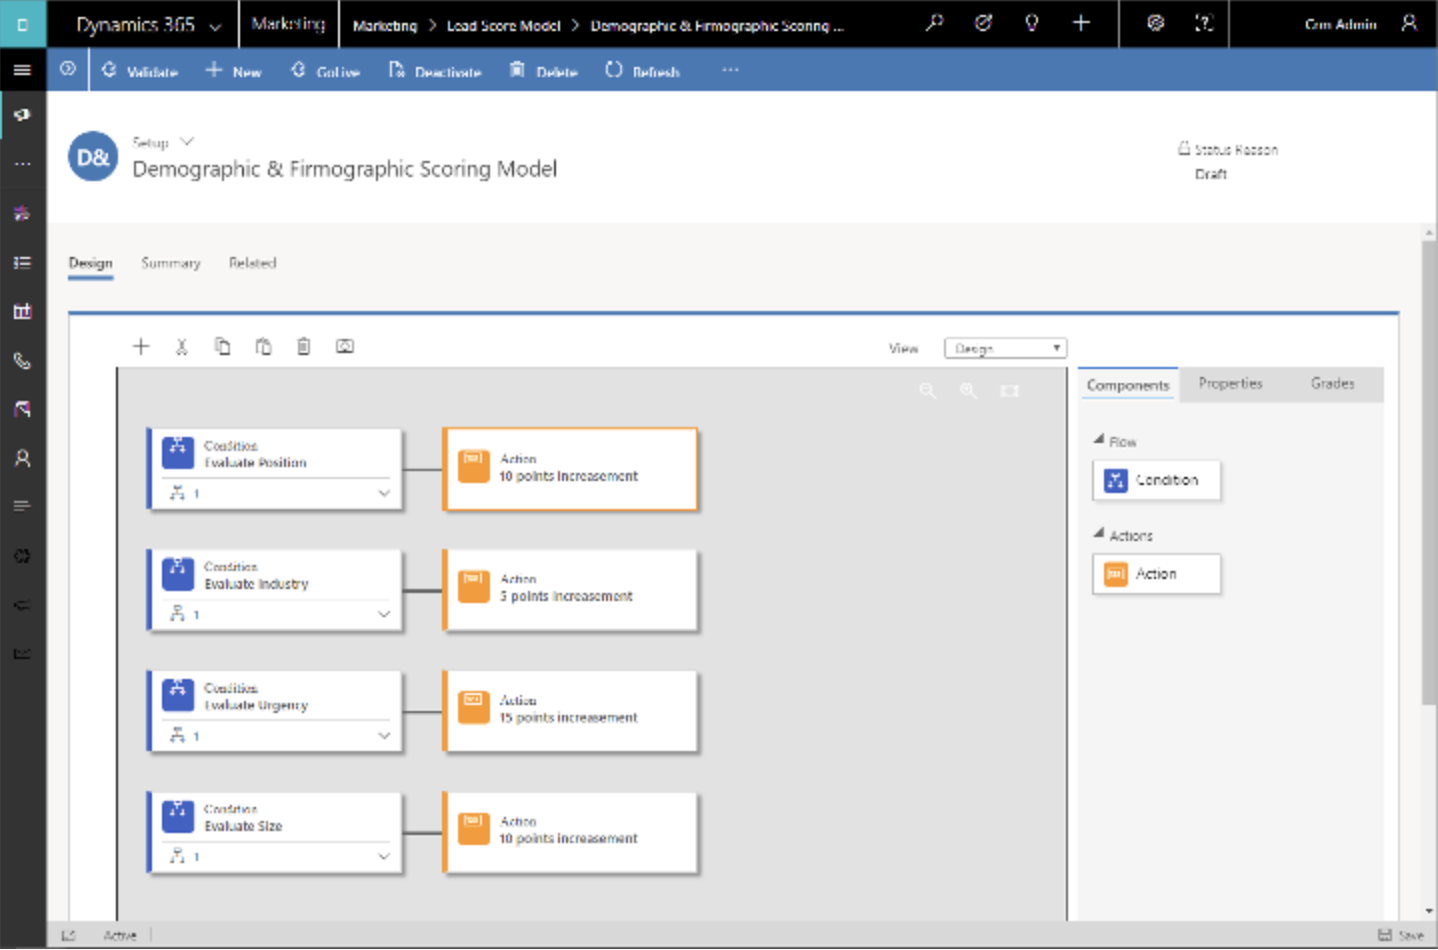
2. Design Your Scoring Model:
When creating a new model, you’ll be taken to the Design tab.
Use a combination of condition/action tile pairs to build your scoring models.
Conditions define the criteria for scoring(e.g email opens, webiste visits, form submissions).
Actions determine how points are assigned based on interactions(e.g.. +10 points for clicking an email link).
Actions determine how points are assigned based on interactions (e.g., +10 points for clicking an email link).
Connect these tiles to create a flow that calculates scores for leads.
3. Set Threholds:
Each scoring model includes a sales-ready threshold.
When a lead’s score surpasses this threshold, it’s marked as sales-ready.
This can trigger other events within Dynamics 365, such as advancing the lead through its business process or alerting salespeople.
4. Privacy Considerations:
Automatic lead scoring can introduce data privacy issues.
Ensure compliance with relevant data privacy regulations when using lead scoring features.
Remember, lead scoring is a powerful tool, but thoughtful design and testing are essential for effective lead management.
That’s it for today.
I hope this helps.
Malla Reddy Gurram(@UK365GUY)
#365BlogPostsin365Days