Menu Close

Tag: #365blogpostsin365days

[How to] Copilot to customize Dynamics 365 Field Service Work Order views for Teams and Outlook

Hello Everyone,

Today I am going to share my thoughts on how to customize work order views for Teams and Outlook.

Let’s get’s started.

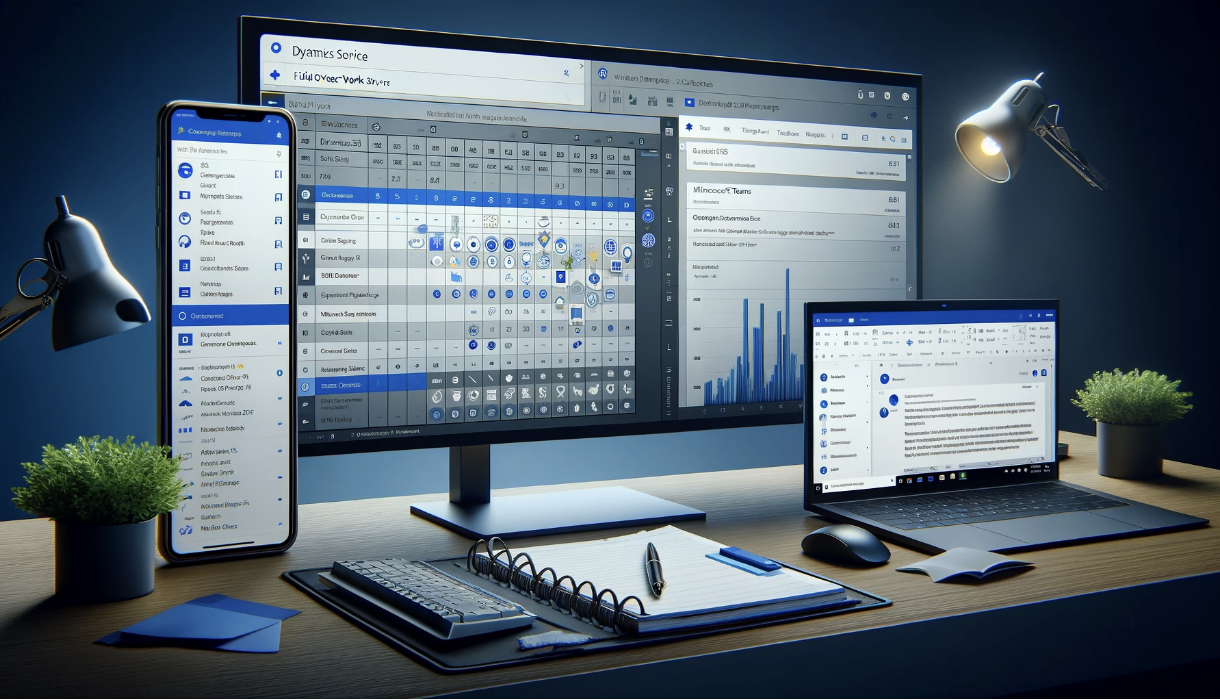
The image visualizes a digital workspace with customized Dynamics 365 Field Service work order views, seamlessly integrated with microsoft teams and outlook. It showcases how these applications can work together, offering a unified and efficient platform for managing work orders and related communication.

Customizing work order views for Microsoft Teams and Outlook using Copilot in Dynamics 365 Field Service involves a blend of Integration and customization strategies.

Here is detailed approach.

Initial Setup and Integration

1. Integrate Dynamics 365 with Microsoft Teams and Outlook:

Access the Dynamics 365 Admin Center.
Enable Integration with Microsoft Teams and Outlook.

2. Configure Teams and Outlook Integration:

In Dynamics 365 Navigate to the integration settings for teams and outlook,

Set up appropriate permissions and select entities(like work orders) for integration.

Customizing Work Order Views

1. Modify work order Entity for Teams and Outlook:

Go to Field Service Settings in Dynamics 365.

Customize the work order entity to ensure it includes relevant fields for Teams and Outlook.

2. Create and Customize Views:

Utilize the Dynamics 365 Customization interface.

Develop specific views for work orders with necessary filters and columns.

Save and publish these custom views.

Utilizing Copilot for Enhanced Customization

1. Engage Copilot for Advanced Customization:

Use Copilot to get suggestions on advanced customizations and best practices.

Apply Copilot’s recommendations to enhance the usability and functionality of the work order views.

2. Automate Workflows with Copilot:

Implement automated workflows using Copilot to streamline operations between Dynamics 365 Teams and Outlook.

Ensure these workflows are reflected in the work order views.

Team and Outlook Integration

1. Create Teams Tabs for Work Orders:

In Microsoft Teams, establish dedicated tabs in relevant channels.

Connect these tabs to the Dynamics 365 custom work order views.

2. Synchronize with Outlook:

Make sure the custom work order views are accessible in Outlook via the Dynamics 365 App.

Testing and Training

1. Conduct Testing:

Perform comprehensive tests to ensure functionality and data synchronization across Dynamics 365, Teams, and Outlook.

2. Organize Training Sessions:

Train team members on using the new features and custom views.

Provide resources and documentation for assistance.

Continous Improvement

Regularly update the custom views based on user feedback and evolvin requirements.

Keep an eye on new Dynamics 365 features that could be incorporated.

Through these steps, you can customize work order views in Dynamics 365 Field Service for Microsoft Teams and Outlook, leveraging Copilot for advanced suggestions and automations. This approach aims to enhance collaboration and efficiency in managing work orders within your organization.

That’s it for today.

I hope this helps

Malla Reddy Gurram(@UK365GUY)
#365BlogPostsin365Days

Share this:

{How to} Restrict and Protect Customer data on Dynamics 365 Customer Insights.

Hello Everyone,

Today I am going to share new feature benefits of how to protect customer data on Dynamics 365 Customer Insights.

Let’s get’s started.

Day to day businesses have difficulties to maintain the privacy of customer personal data.

Customer Insights now you can protect the personal data by restricting access and visibility of certain data fields in the Customer Profile, ensuring that data can be used for generating insights that needed across sales, service and marketing.

With this new feature your company can safely use the confidential data more efficiently,so your customers can trust you with data you can then use to better personalize their experience.

Restrict access to data:

1. Customer Profile fields for Dataverse roles can be restricted.

2. Dynamics 365 Customer Insights follows field level security set up in Dataverse, so you dont need to manage these for every Dynamics 365 app separtely.

3. Dynamics 365 Customer Insights marketing professional can continue to build segements based on the restricted fields without seeing the data of the field, such as the email address, in Dataverse and in Customer Insights.

4. Users can continue to use the fields to generate segments, measures and other insights or create personalized journeys and contents, however they will not see any data in those restricted fields.

That’s it for today.

I hope this helps.

Malla Reddy Gurram(@UK365GUY)
#365BlogPostsin365Days

Share this:

[Do you know] Move Specific Configurations between environments on Dynamics 365 Customer Insights

Hello Everyone,

Today I am going to share my thoughts on new feature – Move specific configurations between environments on Dynamics 365 Customer Insights.

Let’s get’s started.

Here is a graphical representation of a user interface for Dynamics 365 Customer Insights, illustrating the process of moving specific configurations between environments.

On Dynamics 365 Customer Insights – Data that might be used on different environments like dev, test, production.

So maintaining consistency between the environments requires the configurations to be continuously copied across different environments.

Now Customer Insights allows to copy the complete configuration.

With that Customer Insights -Copy Specific configuration like segments and measures between the environment within your tenant.

This allows you to manage more efficiently application lifecycle and test new configurations in lower environment more confidently.

Allowing them to production with automated deployments and Customer Insights pipelines.

Important points:

1. Customer Insights – Data Configurations for segments, measures all others are now solution aware in Dataverse.

2. Copy Solution aware configurations between environments using the solution import/export process in Dataverse.

3. Use Dataverse lifecycle management capabilities to build deployment automation pipelines and source control your configurations.

That’s it for today.

I hope this helps.

Malla Reddy Gurram(@UK365GUY)
#365BlogPostsin365Days

Share this:

{How to} Personalize omnichannel experiences with no code using Optimizely on Dynamics 365 Customer Insights

Hello Everyone,

Today I am going to show what are the benefits of personalize omnichannel experiences with no code using Optimizely.

Let’s get’s started.

Personalize omnichannel experiences with no code using Optimizely on Dynamics 365 Customer Insights involves leveraging the capabilities of both platforms to deliver tailored experiences to your customers,Here’s how you can achieve this:

Here is a graphical representation of a user interface showing the integration of Optimizely with Dynamics 365 Customer Insights. This image illustrates a dashboard that combines elements from both platforms, including customer segments from Dynamics 365 and personalization options from Optimizely. The design showcases a modern and user-friendly interface with distinct branding elements from both services.

1. Integrate Dynamics 365 Customer Insights with Optimizely:

Start by integrating Dynamics 365 Customer Insights with Optimizely. This integration allows you to access and use the Customer data stored in Dynamics 365 for personalization efforts in Optimizely.

2. Customer Data Unification:

Use Dynamics 365 Customer Insights to unify and centralize customer data from various sources, including CRM, transcation, history, website interactions and more. This creates a single customer view that can be leveraged in Optimizely.

3. Audience Segmentation:

Segment your customer base using Dynamics 365 Customer Insights based on demographics, behavior, Purchase history and other relevant attributes. These segments will serve as the foundation for personalization in Optimizely.

4. Content Personalization in Optimizely:

Use Optimizely’s no-code features to personalize content across various channels:

Website Personalization: Customize website content based on customer segments. For example, show different product recommendations or promotions to different segments.

Email Personalization: Create Personalized email campaigns using Optimizely, tailoring the email content, subject lines and timing based on customer insights from Dynamics 365 Customer Insights.

Mobile App Personalization: Customize in-app experiences, notifications, and offer for different customer segements.

Social Media Advertising: Optimize social media and campaigns by targeting specific customer segments with personalized content.

5. A/B Testing and Optimization:

Use Optimizely’s A/B testing capabilities to test different variations of personalized content and experiences. This helps you determine what resonates best with each segement and refine your strategies accordingly.

6. Real time Data Sync:

Ensure that data from Dynamics 365 Customer Insights is continuously synchronized with Optimizely to keep customer profiles up to date. This allows you to respond to changes in Customer behavior and preferences in real time.

7. Automation and Triggered Campaigns:

Set up automated triggers and workflows in Optimizely based on Customer Interactions and data from Dynamics 365 Customer Insights. For Instance, send automated follow-up messages or offer when customers take specific actions.

8. Analytics and Reporting:

Monitor the performance of your personalized omnichannel experiences through Optimizely’s analytics and reporting tools. Evaluate how different segments are responding to your campaigns and make data driven decisions for improvements.

9. Complaince and Privacy:

Ensure that your personalization efforts comply with data privacy regulations like GDPR or CCPA by using built -in compliance features in both Dynamics 365 Customer Insights and Optimizely.

By combining the capabilities of Dynamics 365 Customer Insights and Optimizely, you can deliver personalized omnichannel experiences to your customers without extensive coding, leading to improved engagement, conversions and customer satisfaction.

That’s it for today.

I hope this helps.

Malla Reddy Gurram(@UK365GUY)
#365BlogPostsin365Days

Share this:

{How to} Add Customer Insights Data for your trial or licensed environments

Hello Everyone,

Today I am going to show how to add Customer Insights data on your trial or licensed environments.

Let’s get’s started.

1. Login into Dynamics 365 Customer Insights.

2. On home page screen click on the ADD Customer Insights – Data

3. New window will be opened and load the data into the Customer Insights.

Where you can analyse the data.

That’s it for today.

I hope this helps.

Malla Reddy Gurram(@UK365GUY)
#365BlogPostsin365Days

Share this: