Hello Everyone,
Today i am going to show what are the benefits of Single Resource Optimization in Dynamics 365 Field Service Scheduling.

Let’s get’s started.
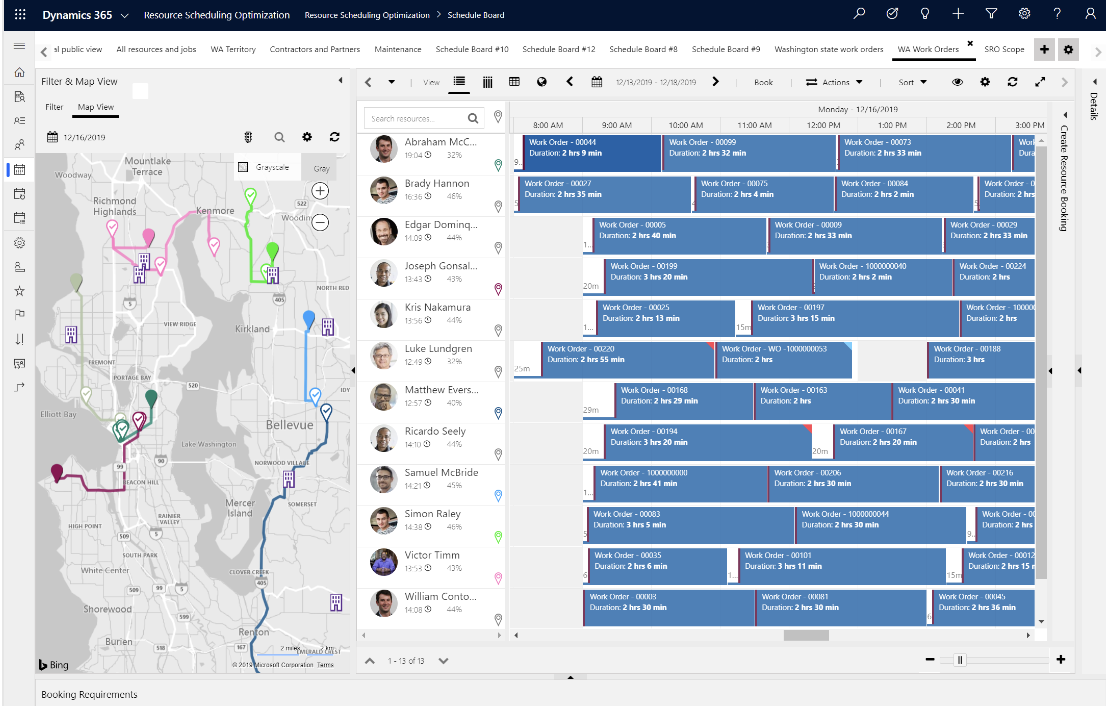
Sometimes disruptions and changes in a resource schedule can cause that schedule to become unbalanced.
Single resource optimization allows a dispatcher to automatically re-optimize the resource’s schedule.
This is the new feature looks to fill in gaps in a resource’s schedule using the organization’s optimization goals.
New feature details:
Disruptions or exceptions during the day that affects a resource’s schedule are fairly common:
1. A technician finishes a booking earlier then estimated, and now has idle before the next booking.
2. A technician is stuck in traffic and can’t make it to the next booking on time.
3. A customer cancels an appointment at the last minute, and now there’s gap in the resource’s schedule.

Dispatchers need an efficient way to fix such disruptions. This include re-optimizing exisiting bookings to make sure there’s no overlaps, or to schedule new work to cover idle time, or to optimize travel time.
This feature expands on our capabilities to optimize the schedule for a specific resource, allowing single resource optimization to pull in additional requirements to fill gaps in the technicians schedules, create a more optimized route, or address high priority requirements.
That’s it for today.
I hope this helps.
Malla Reddy Gurram(@UK365GUY)
#365BlogPostsin365Days