Hello Everyone,
Today i am going to show how to raise a support ticket from Power Platform Admin Center.
Let’s get’s started.
Login into www.admin.powerplatform.microsoft.com
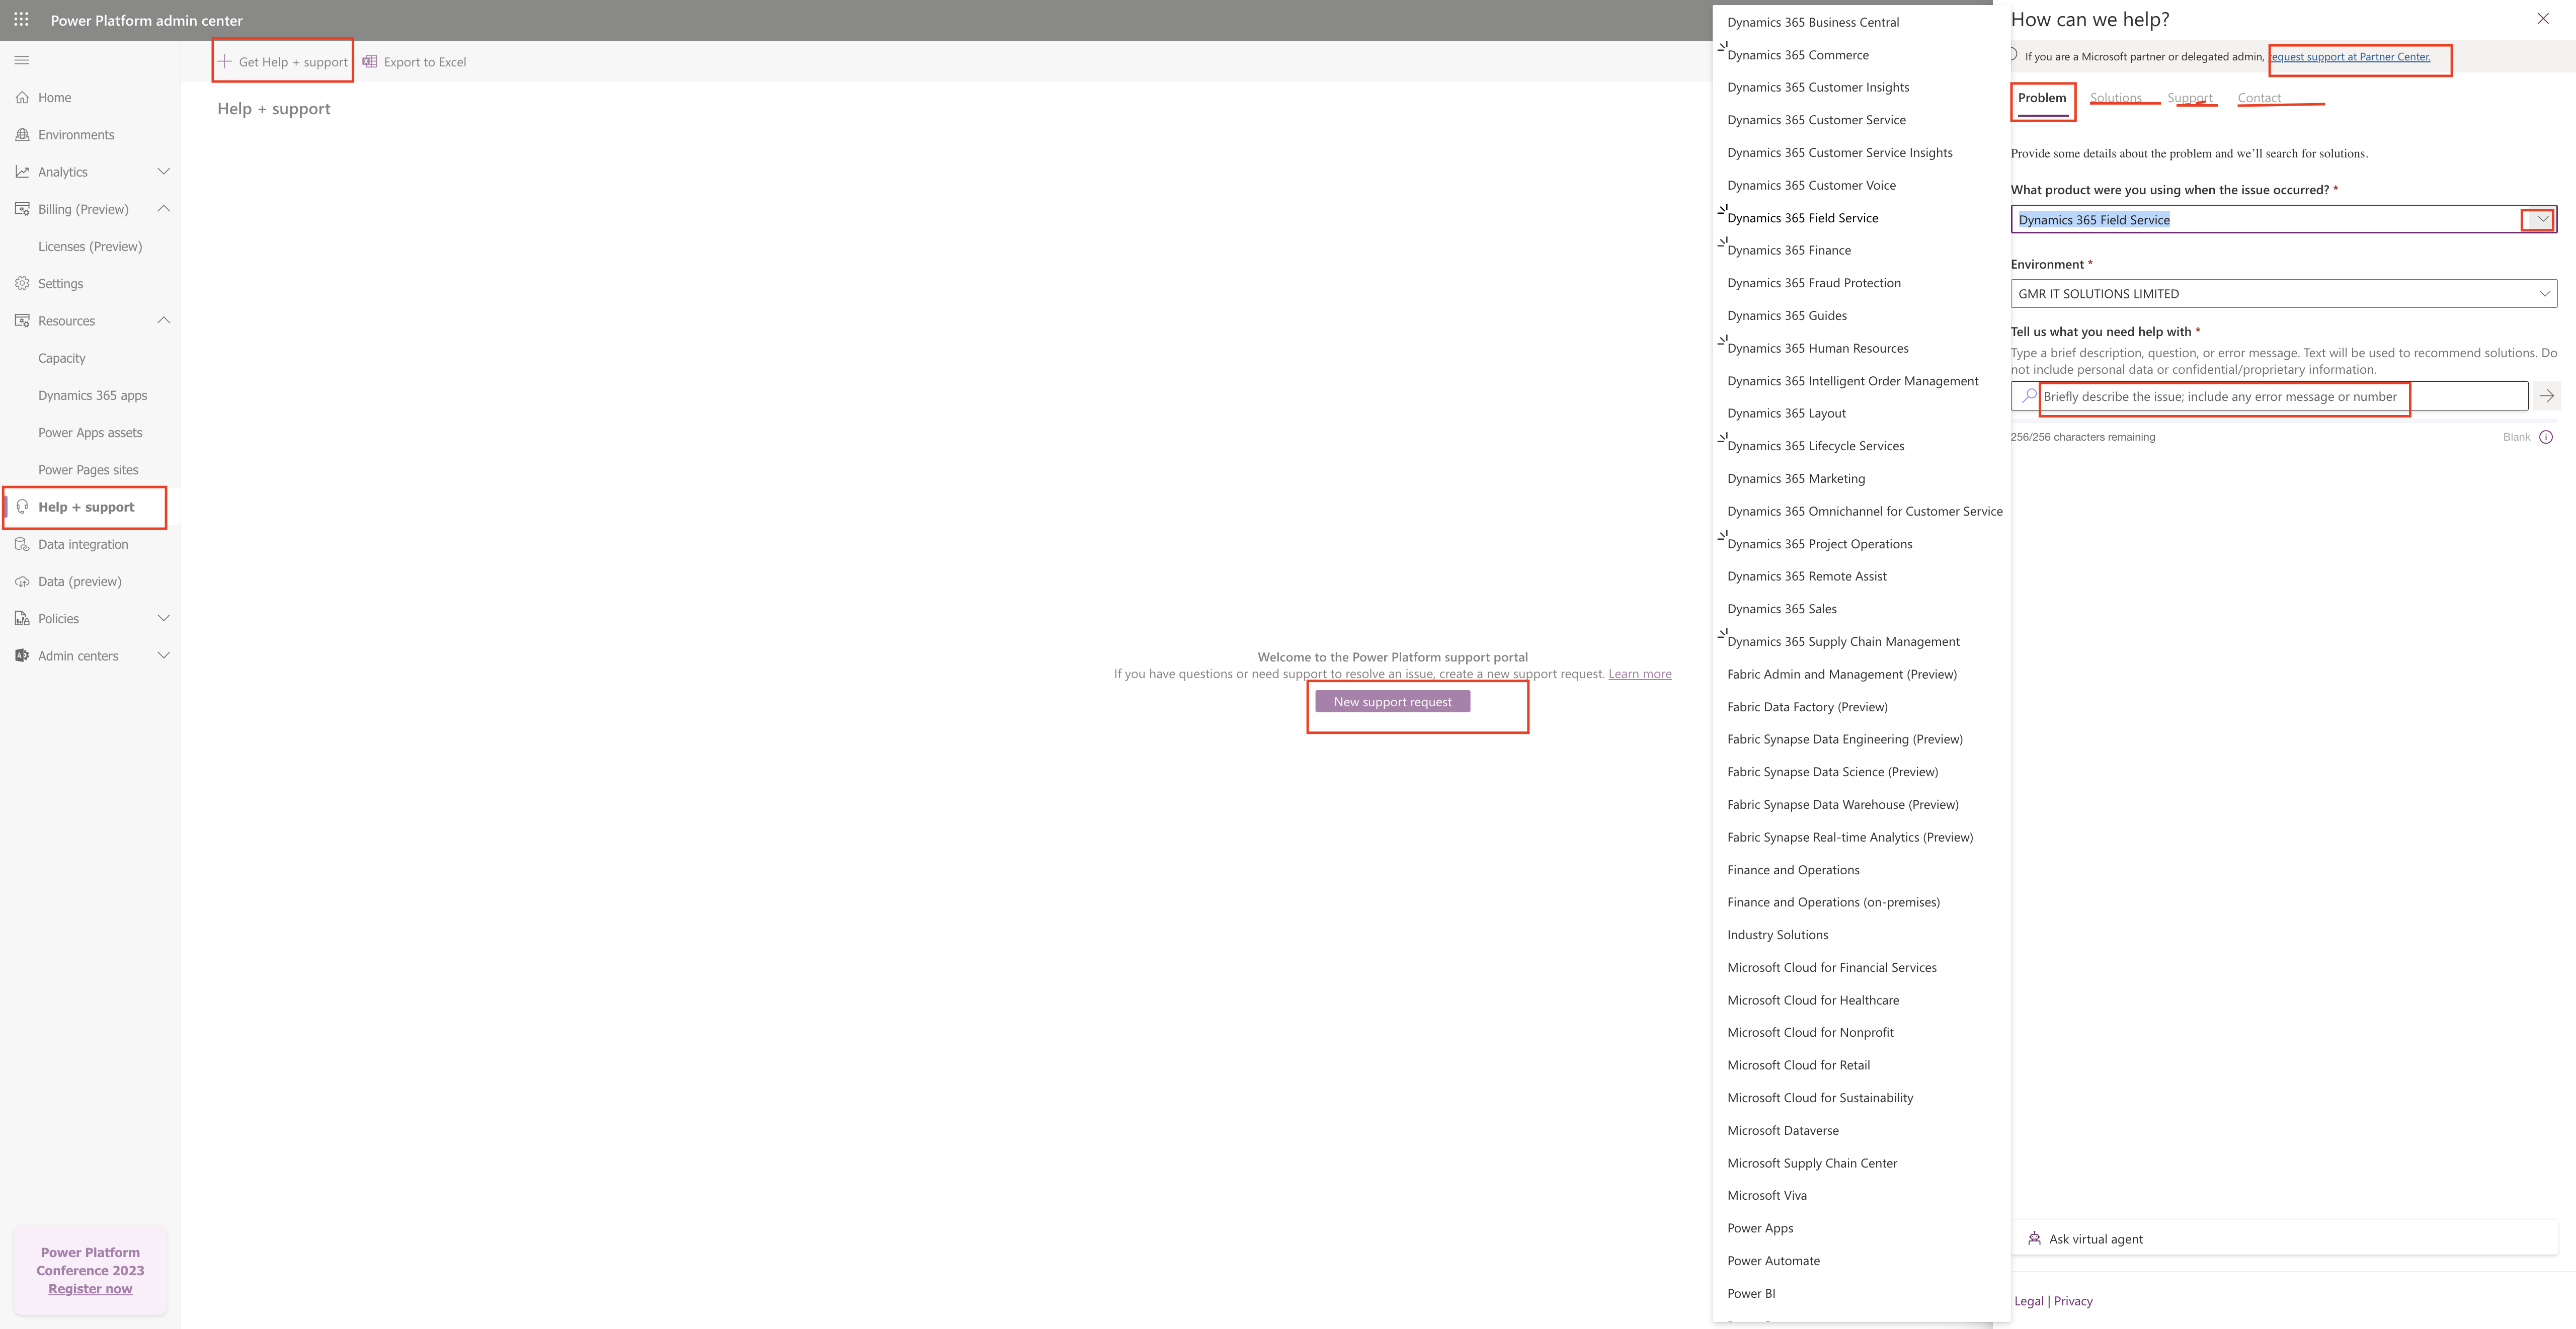
Expand the Resources and click on the Help + Support.
Then create a new support ticket so for that click on + “Get Help + Support”
Then a new side window will popup and there you need to select “problem”, you need to provide some details about the problem and we’ll search for solutions.
Choose what product were you using when the issue occurred from the drop down show in the screenshot above.
Then choose the Environment where you need support from Microsoft.
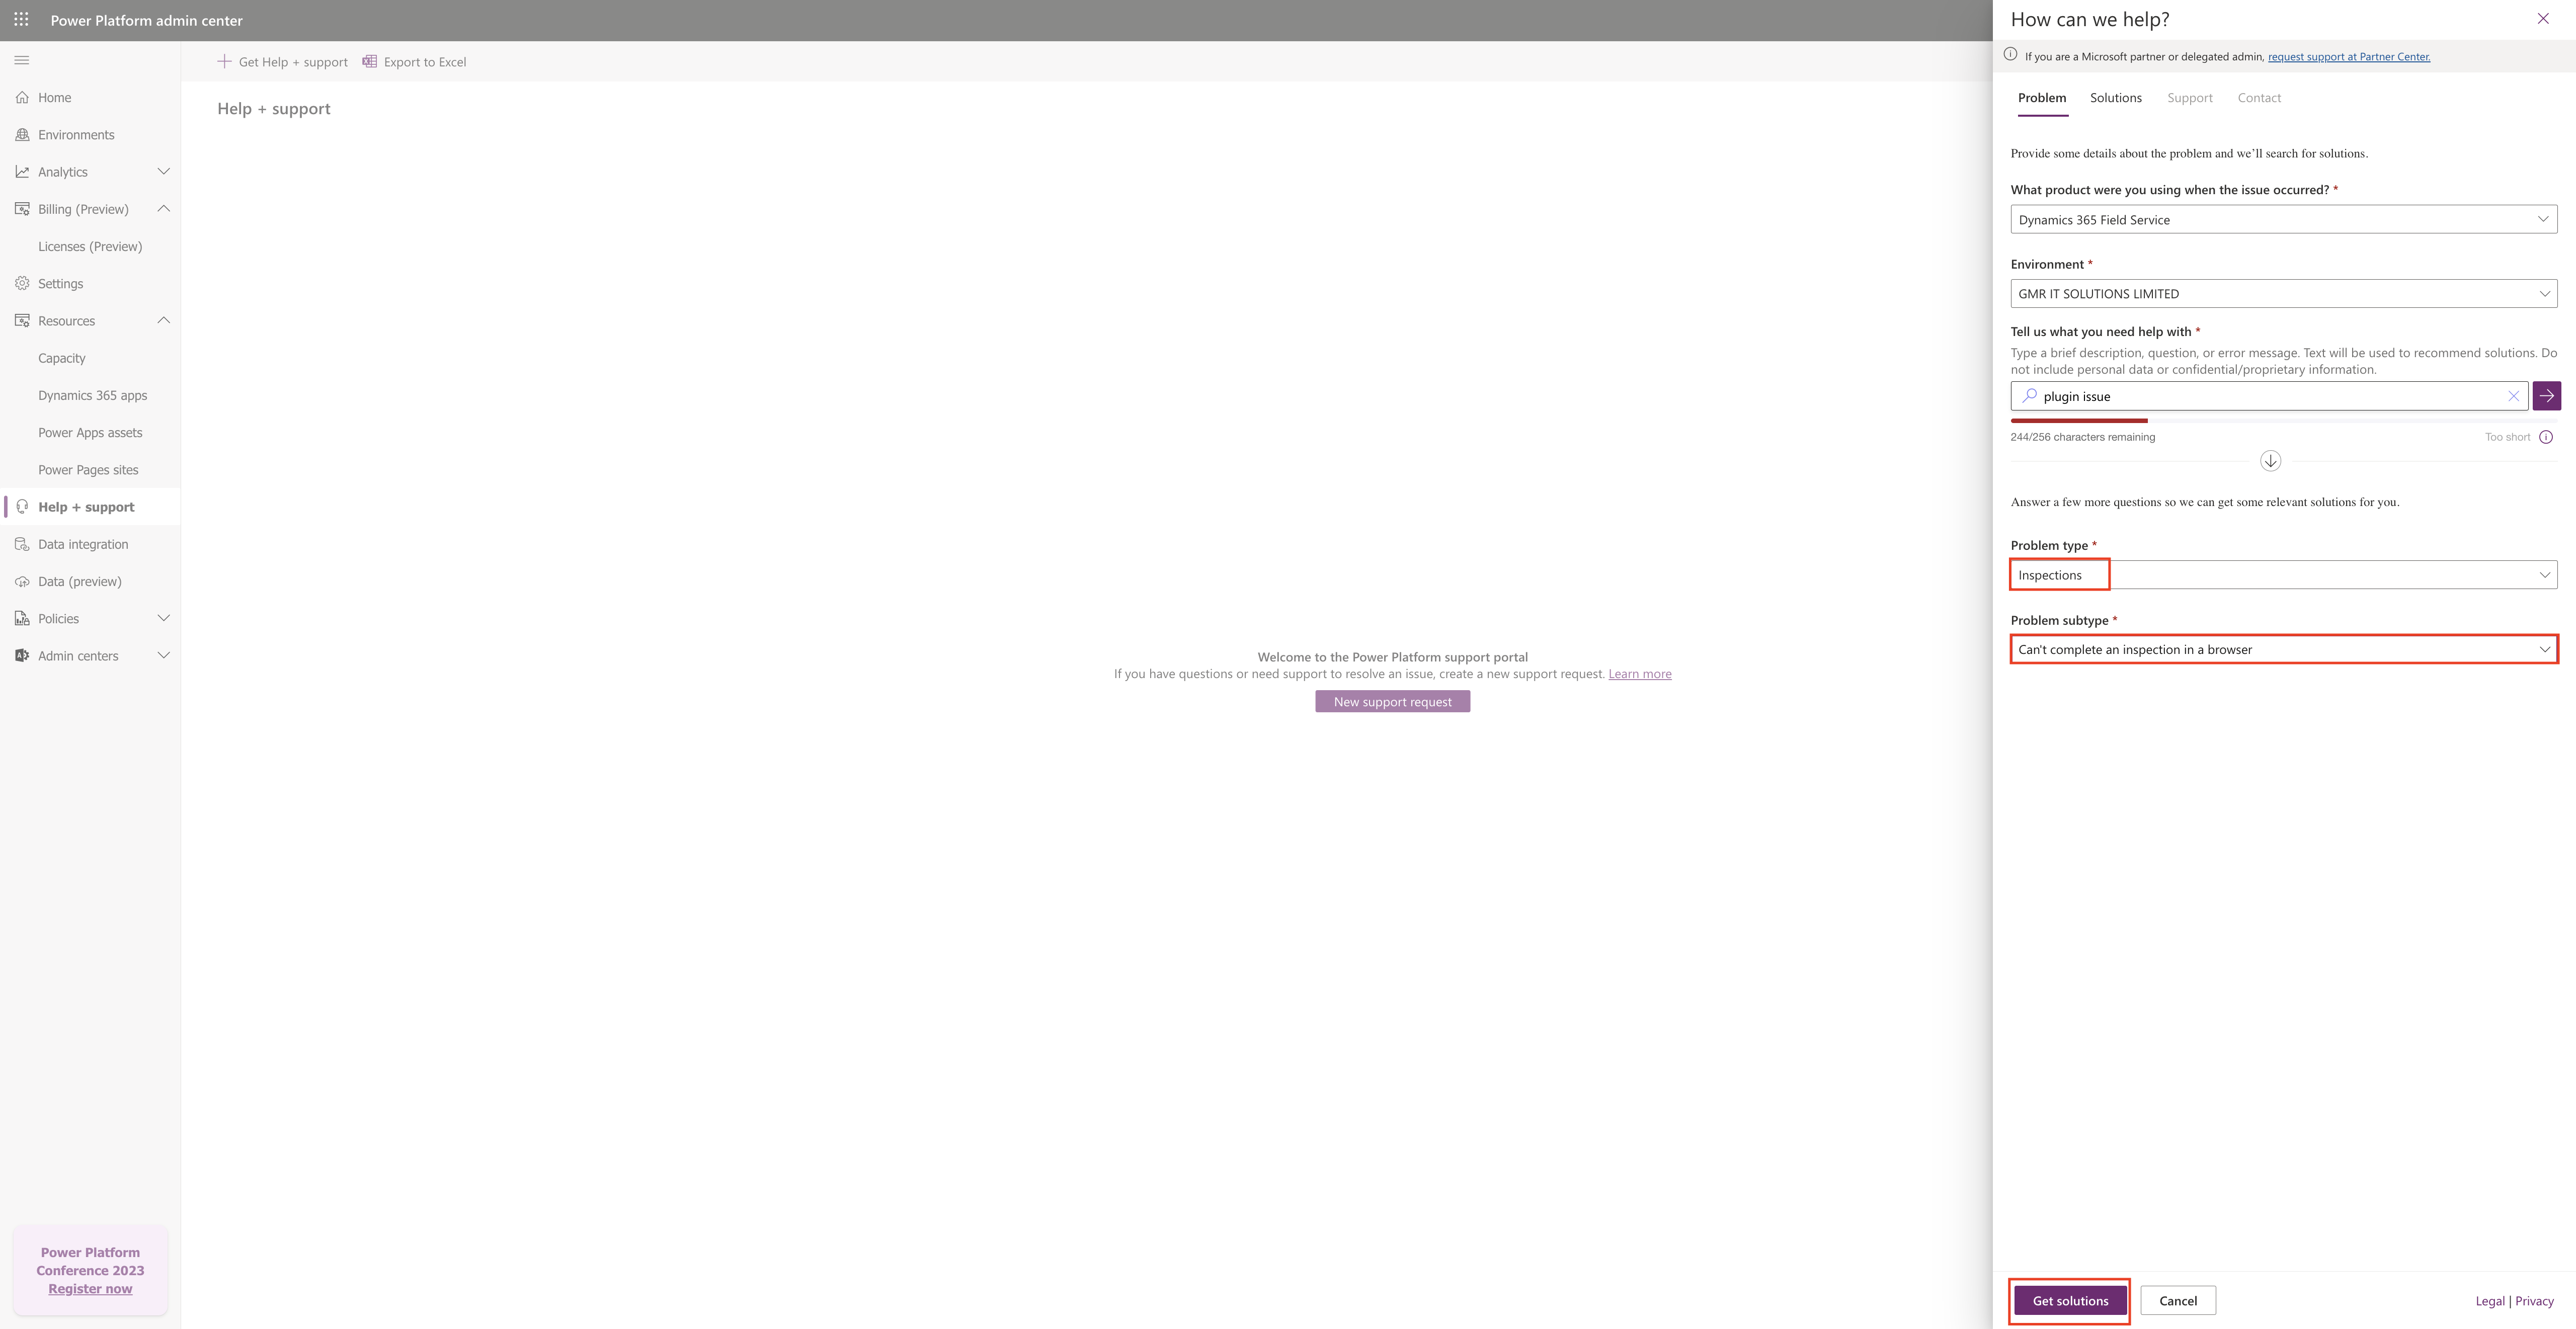
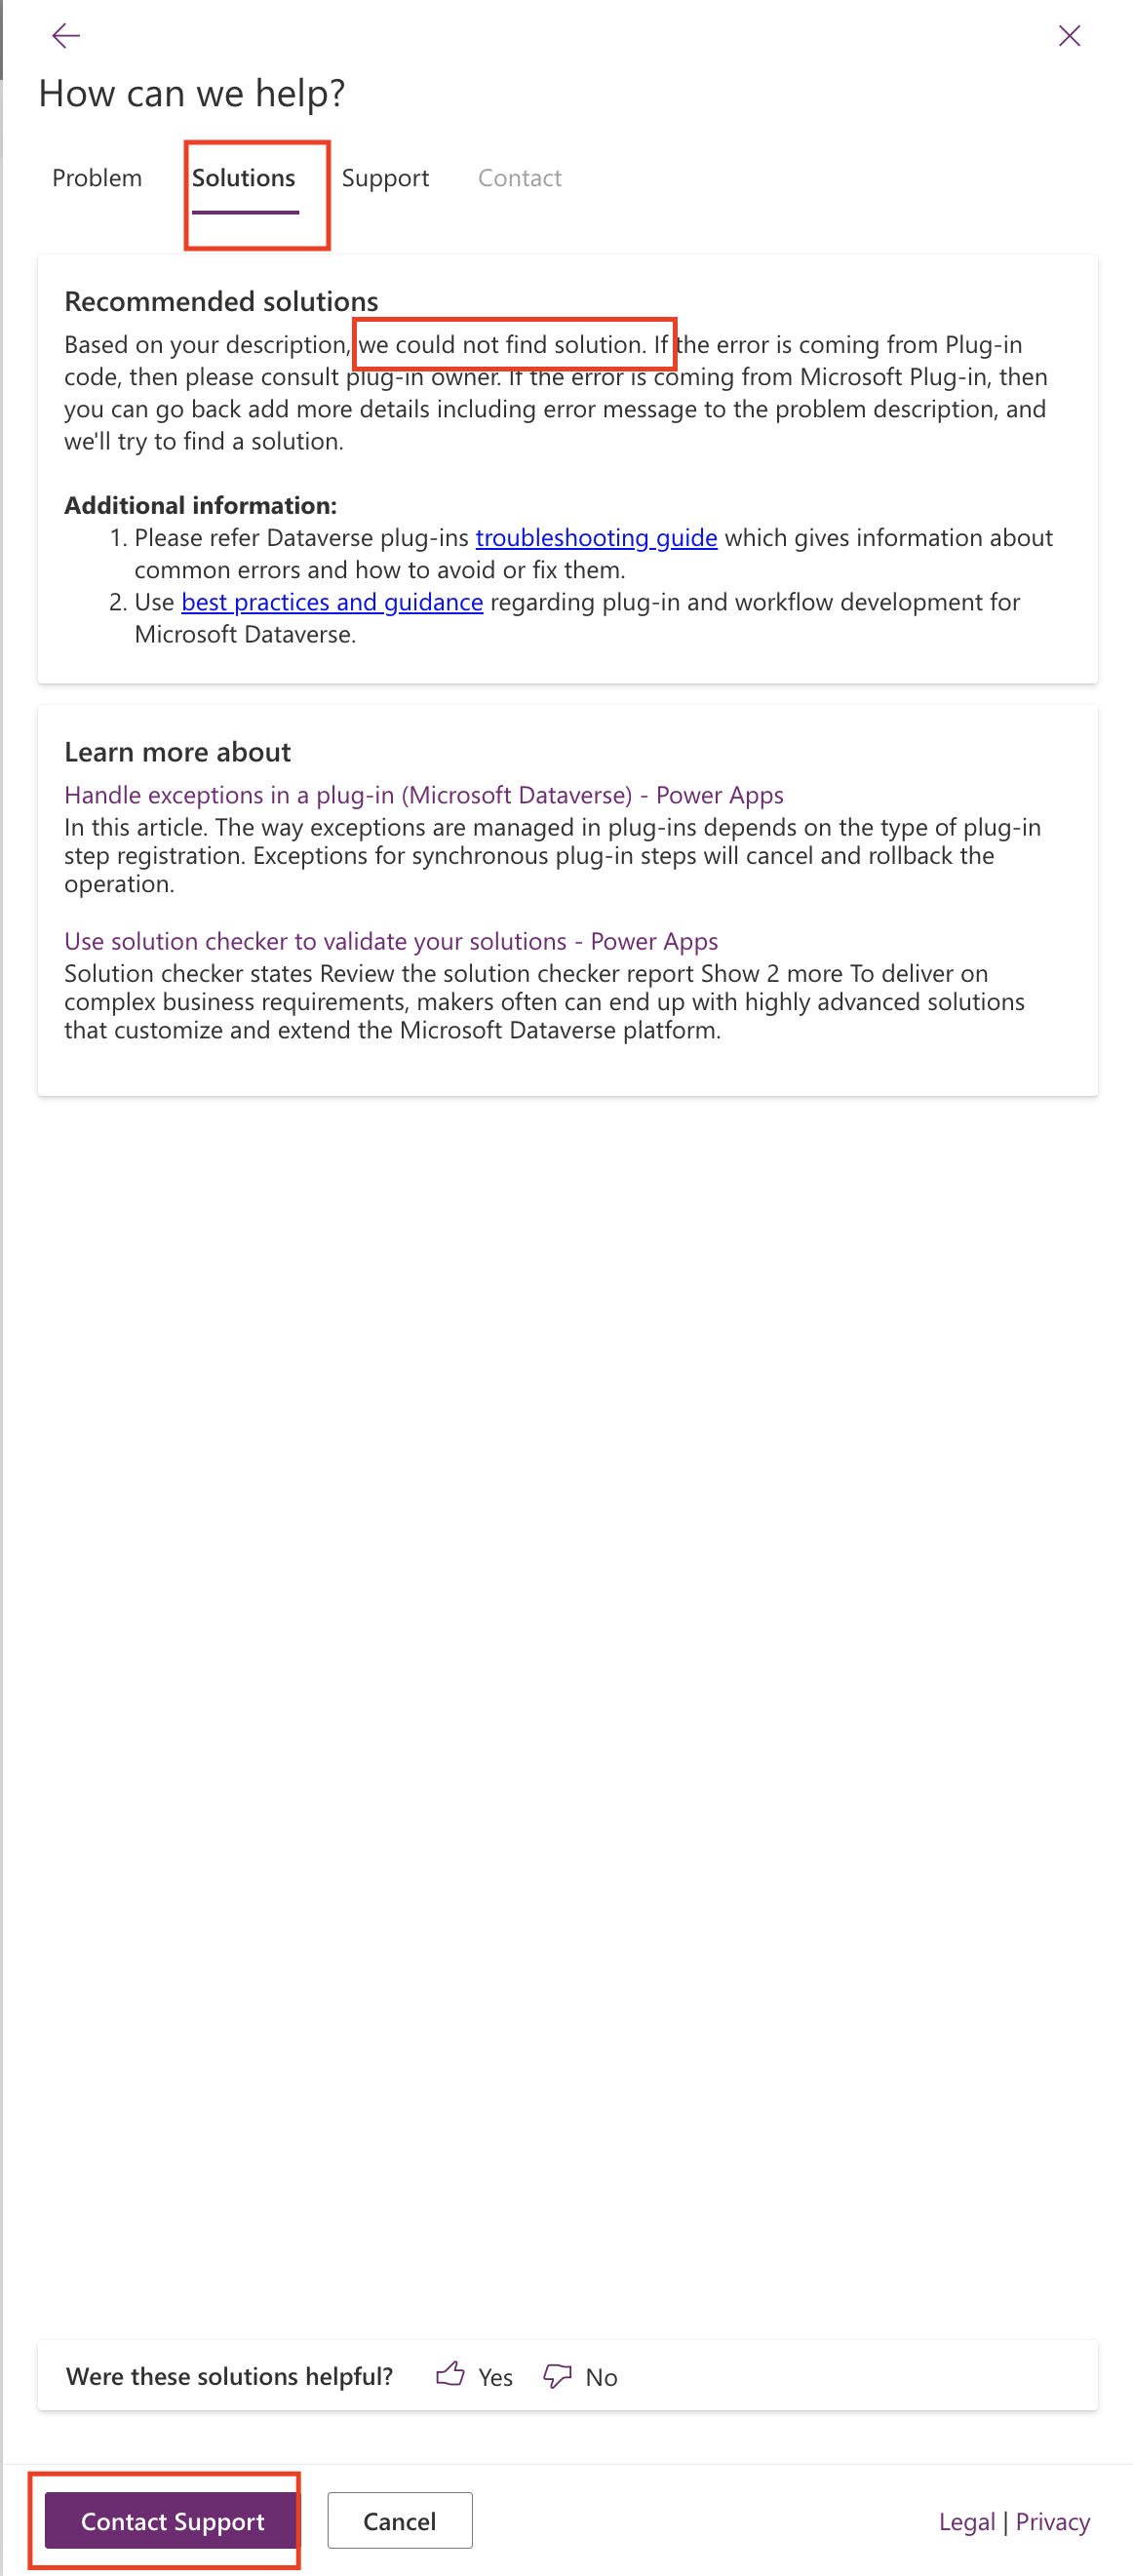
Also you need to describe the issue you have related to the apps and search for solution
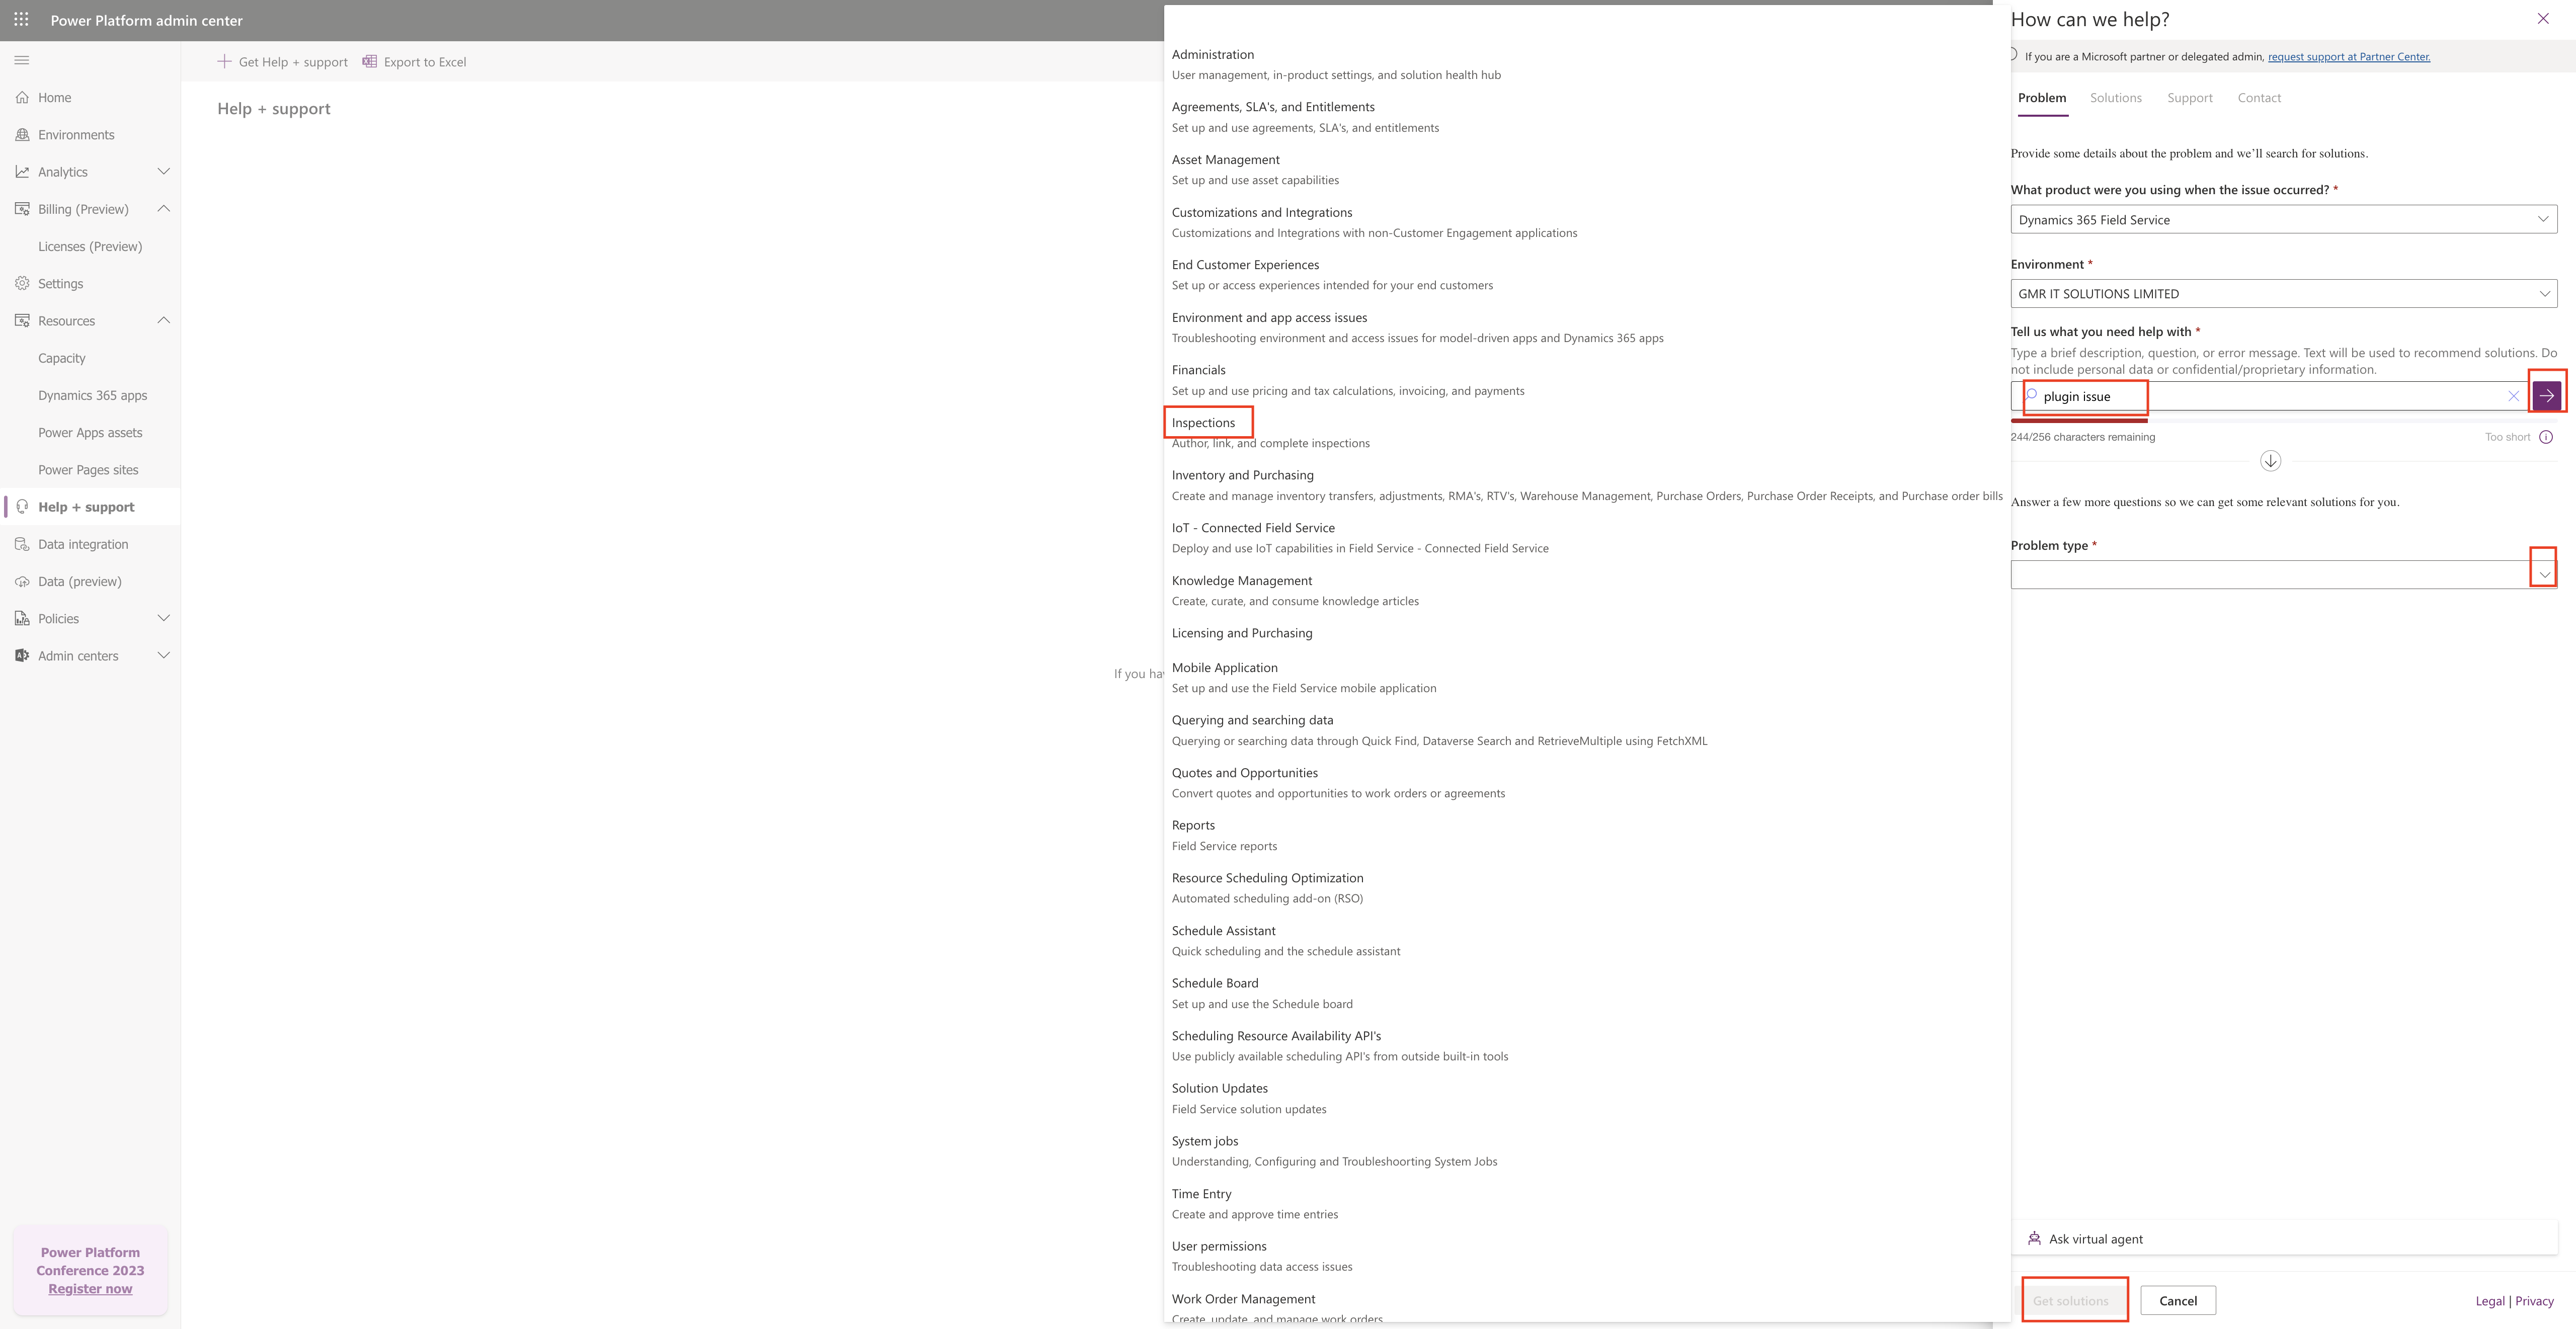
Click on the Get solution:
If the solution is not found from KB then Microsoft Recommends to contact support
Click on Support then a new window will popup there you need to select the related support plan you have with Microsoft, here in this example i have selected Dynamics Online.
Sipport request issue title : Plugin Issue, issue description, Issue start date you can you “Use current time” if it is started current time.
Also specify the problem you’re reporting related to a recent service change such as Release Wave, Service Update, N/A.
How severe is this issue?
You can select the options based on severity: Critical, Moderate, Minimal Impact.
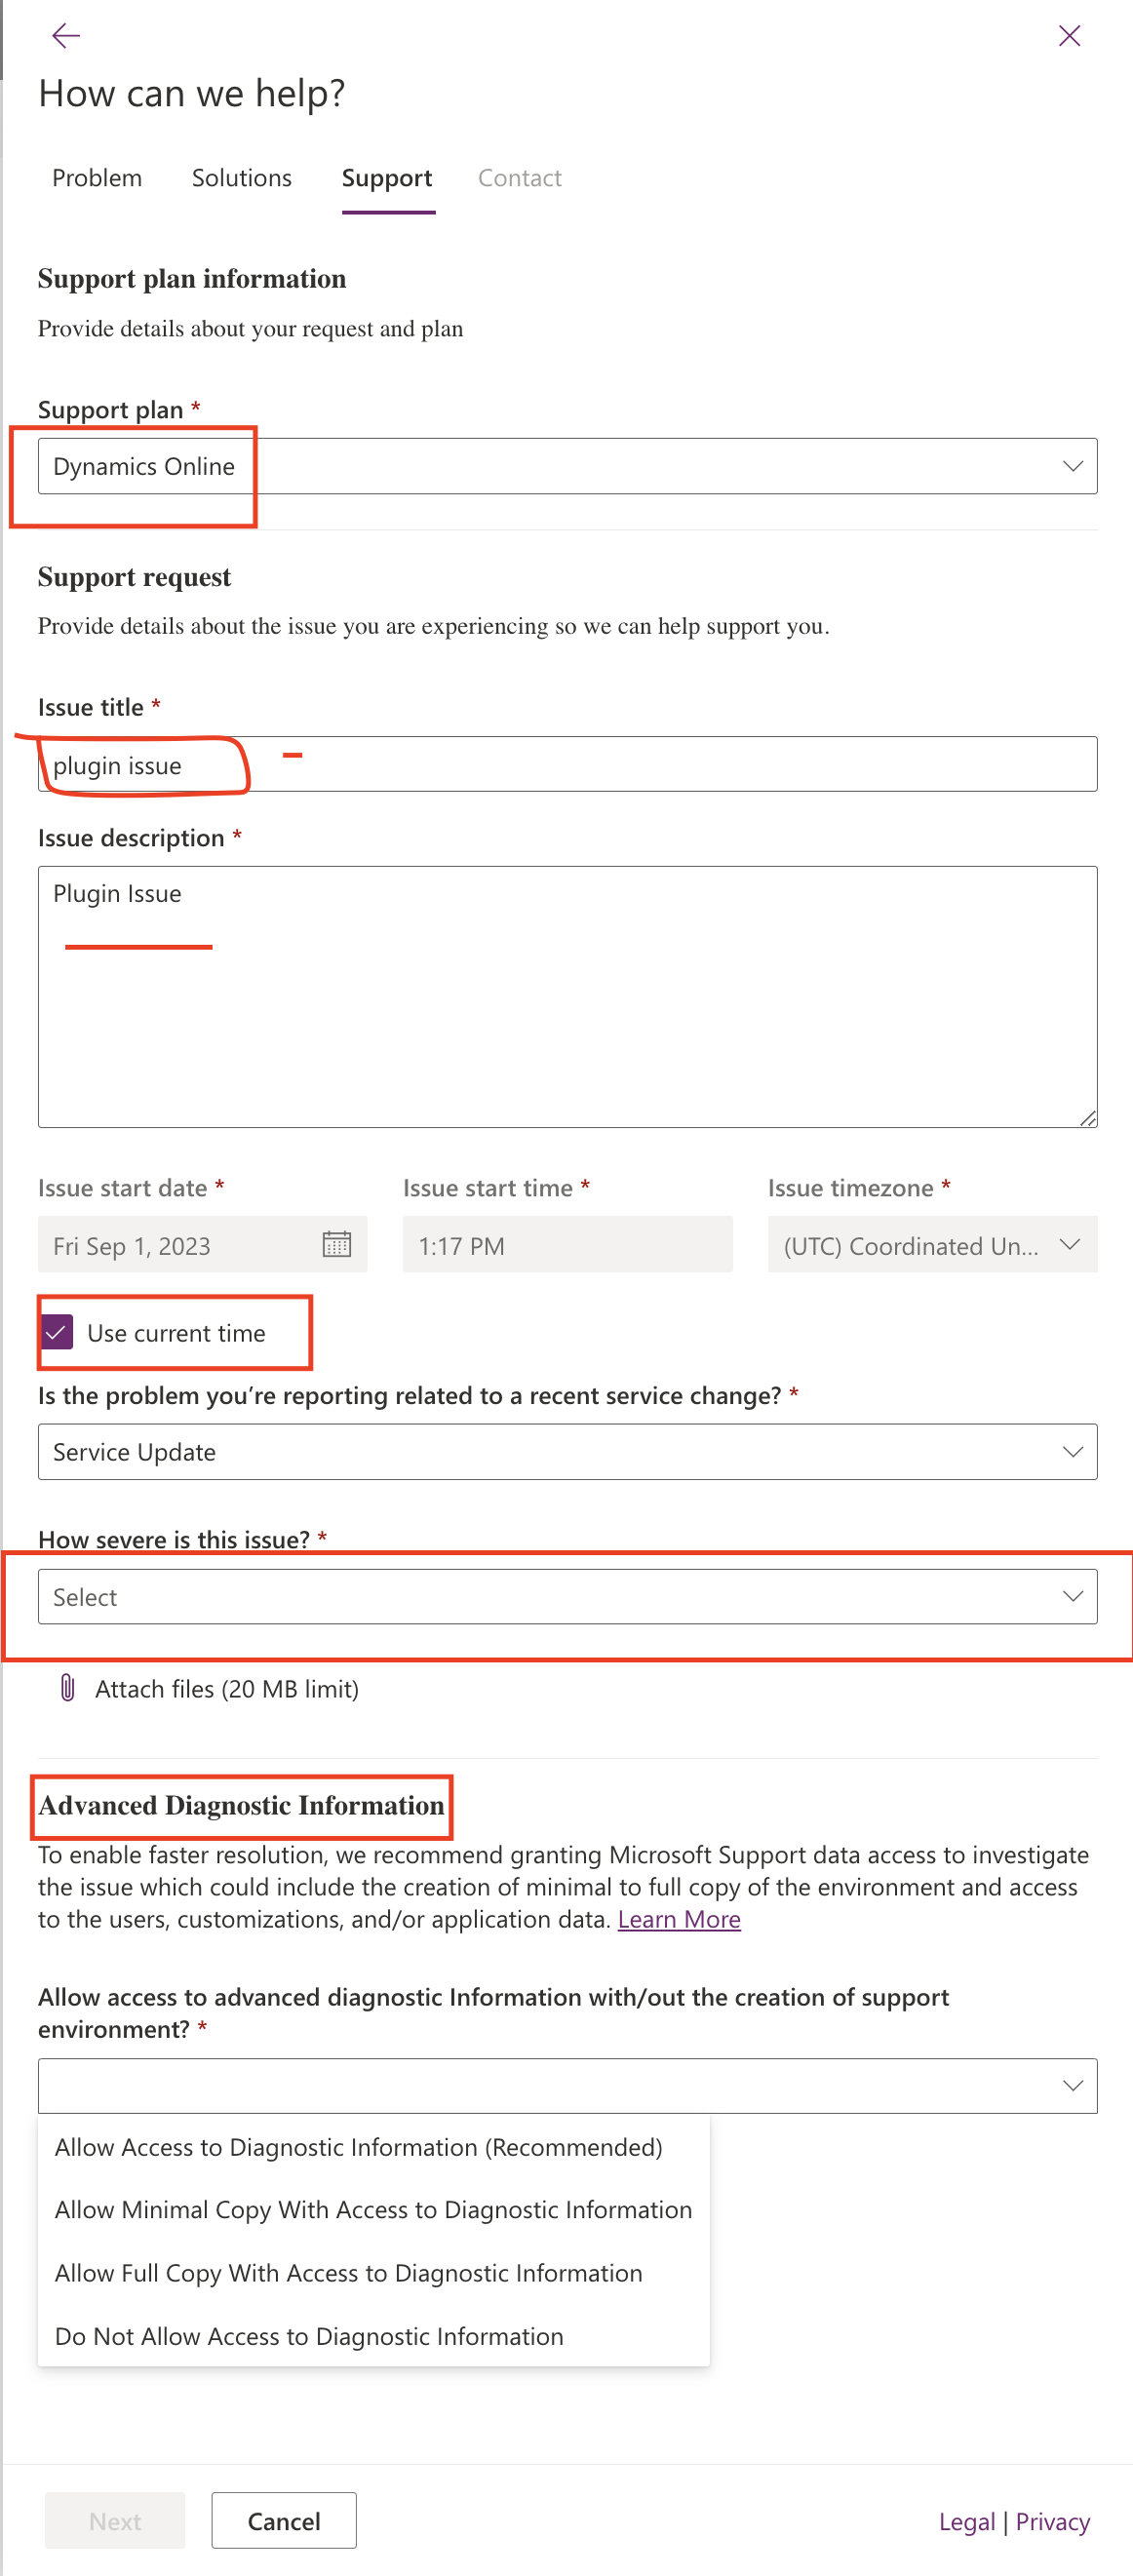
Advanced Diagnostic Information: You can give permission to Microsoft to create an enviornment inside your Tenant to diagnose the issue, so you can select based on your preferences: Allow Access to Diagnostics Information (recommended) by Microsoft.
1. Allow Access to Diagnostic Information(recommended)
2. Allow Minimal Copy With Access to Diagnostics Information.
3. Allow Full Copy With Access to Diagnostics Information.
4. Do not Allow Access to Diagnostics Information.
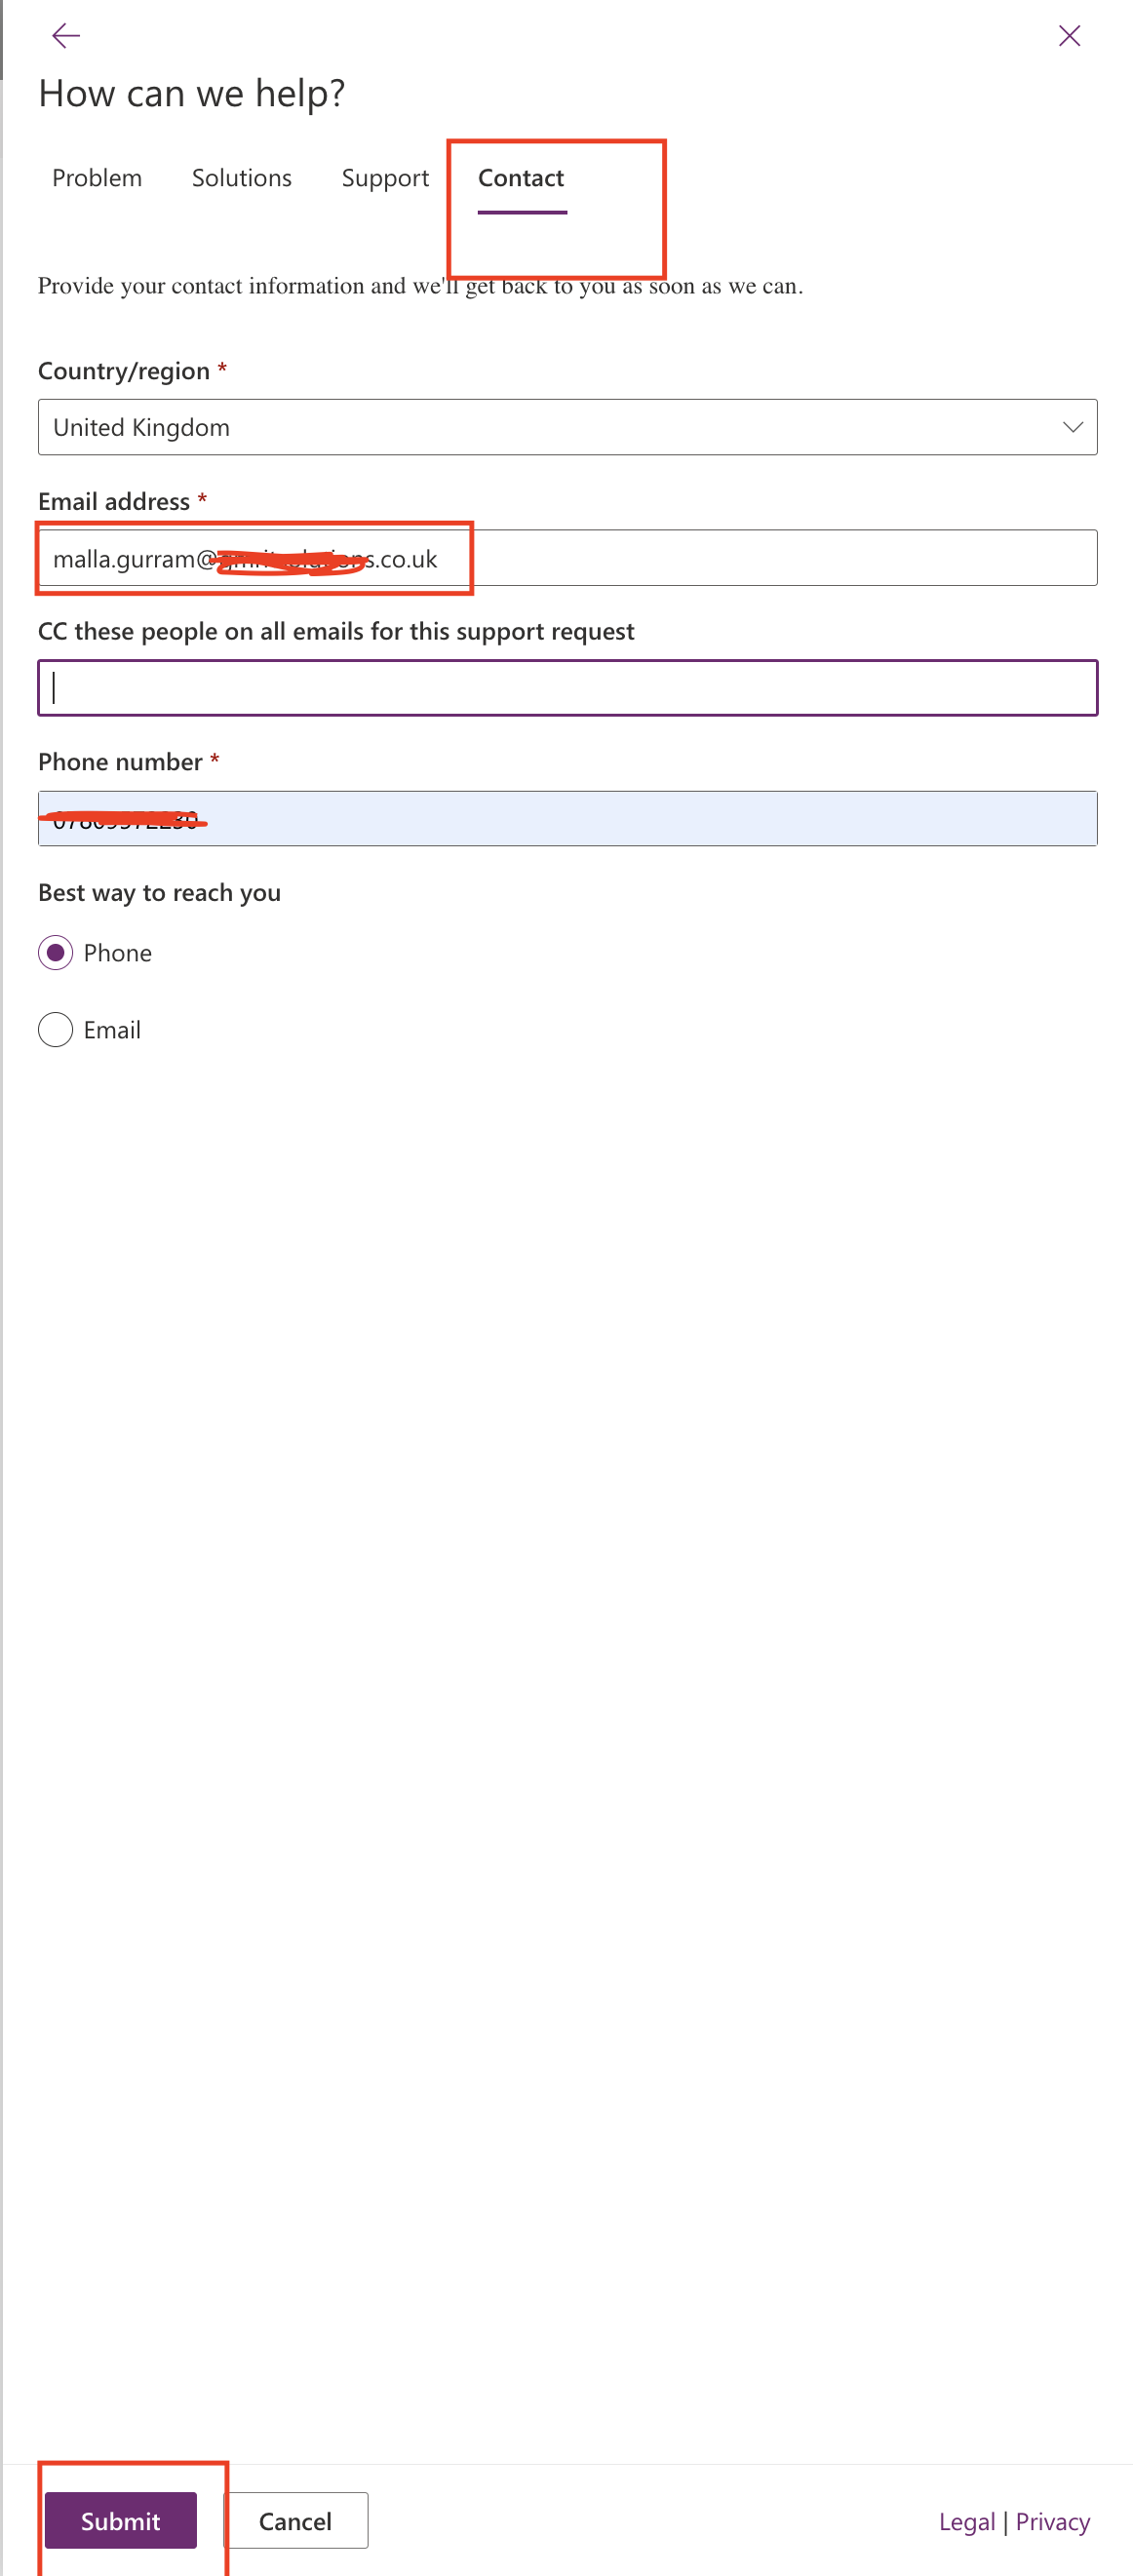
Final step is to provide your contact details like region, email address, phone number to reach you on.
That’s it for today.
I hope this helps.
Malla Reddy Gurram(@UK365GUY)
#365BlogPostsin365Days