Menu Close

Tag: #mallareddygurram

How to do bulk update records using Power Automate

Hello Everyone,

Today i am going to share my experience on how to update a invoice record where the option set field value needs to be updated in the lookup field on same invoice entity.
Scenario: Requirement to remove the Option set field and before that happens that option set value should be updated in the Lookup field which have same string value. The purpose of it is to do bulk update of all invoice records with business unit lookup value.
Lets gets started.
Login into Power Automate here
First choose manual trigger flow.
Then initialize variable “department” and choose Type as “string”.
Then select “List rows” which is for list invoices.
In the table name column choose “Invoices” and in the filter rows paste the “schema name” of the business unit field  not equal to null from the invoice.
As the business unit field is already exists in the invoice table, the purpose of this flow is o update the invoices records, copy the values from the department “option set” field value and update in business unit lookup field.
Once that’s done, choose the “apply to each” and then “set a variable” with the “department” which we already initalize before and the
set the value field from the “Expressions” with value: items(‘Apply_to_each’)?[‘gmr_department@OData.Community.Display.V1.FormattedValue’]

Then choose the List rows: List business units

select the Business units on the table name field, and filter rows by name eq “variables(‘Department’)”.
Then choose another “Apply to choose 2”, create a update rows – “Update Invoices”
Table name: Invoices  and row ID equal : items(‘Apply_to_each’)?[‘invoiceid’]
 
 
and business unit field with  –  items(‘Apply_to_each_2’)?[‘businessunitid’]


Finally save the flow and test it and all the invoices will be updated on business unit field.
I hope this helps.
Malla Reddy(@UK365GUY)
#365BlogPostsin365Days
Share this:

{How} to find out Tenant ID in Dynamics 365 CE Apps

Hi Everyone,

Today i am going to show how to find out the tenant id from Azure portal for Dynamics 365 CE Apps.
Lets gets started.
Note: You need to have System Administrator rights to access the azure portal and tenant wide priviliges to see the Tenant ID.
As you can see the below screen shot, the tenant which i have logged in from the azure portal.
Click on Azure Active Directory and click on the properties, check on the above screenshot.
I hope this helps
Malla Reddy(@UK365GUY)
#365Blogpostsin365Days
Share this:

{How to} Scheduling recommendations in the Outlook add-in for Dynamics 365 Field Service Resource Scheduling

Hello Everyone,

Today I am going to show how to schedule the recommeded resource from Outlook.
Let’s get’s started.

Resource schedular normally have daunting time when they need to schedule a resource for
emergency work order.

So an assistant recommends workers and time for the job, saving dispatchers time needed to validatted matched resources.

1. Frontline managers and dispatchers can get recommendations to choose technicians or frontline workers to schedule work orders based on attributes like availability, skills, or expertise.

2. The scheduling assistant based on the resource scheduling solution is now available in the Outlook add-in.
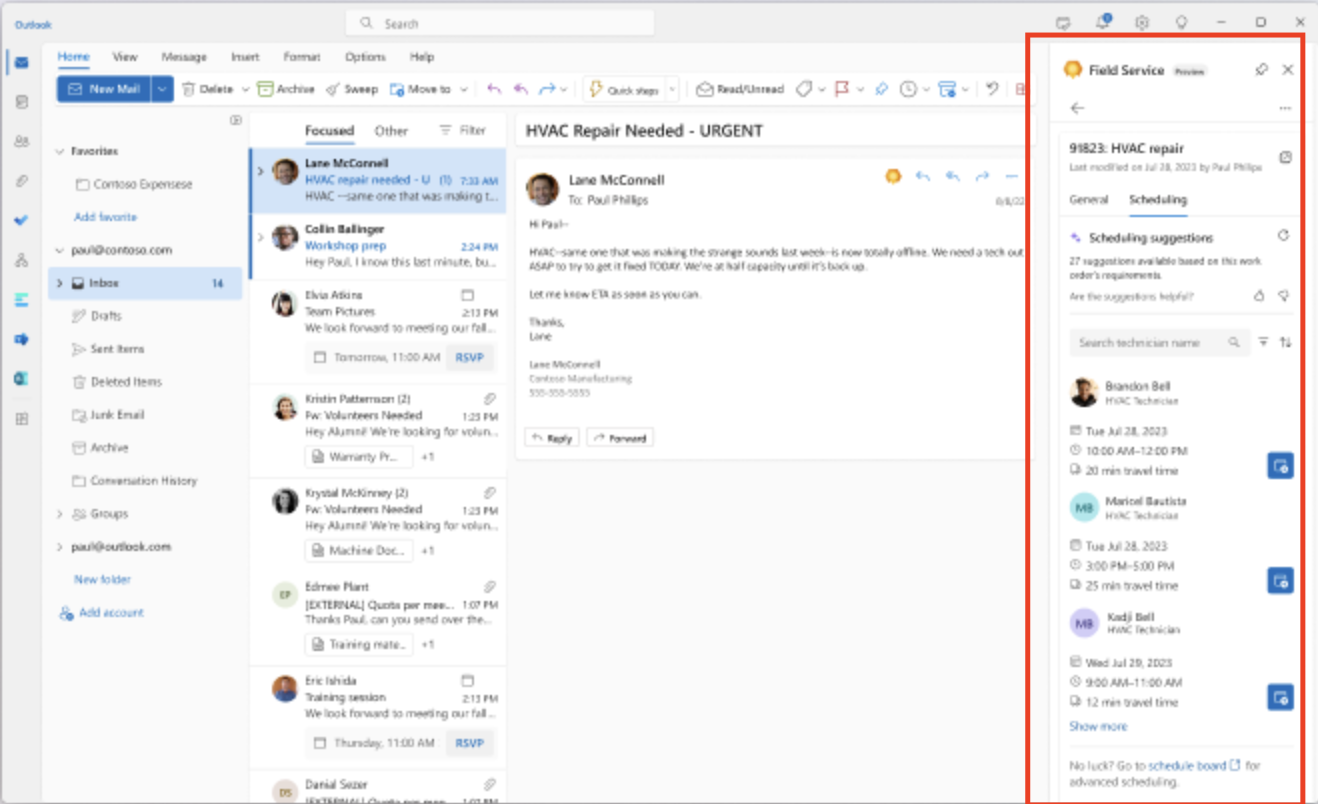
3. Which is part of Field Service Integartions for Microsoft 365 applications. The feature helps dispatchers schedule, reschedule, or move a booking for a work order. Scheduling suggestions are based on resource availability, skills, customer promised time windows, customer location proximity and business unit.

That’s it for today.

I hope this helps
Malla Reddy Gurram(@UK365GUY)
#365BlogPostsin365Days

Share this:

{How to} Set up Dynamics 365 Field Service for Outlook add-in with Microsoft 365

Hello Everyone,

Today I am going to show how to integrate and configure the Dynamics 365 Field Service for Outlook.

Let’s get’s started.

You will need Microsoft 365 global administrator role to configure Field Service add-in for your organisation.

1. Login to Microsoft 365 admin center as a global admin or exchange admin.

2. Select the settings > Integrated apps, and then select Get apps.
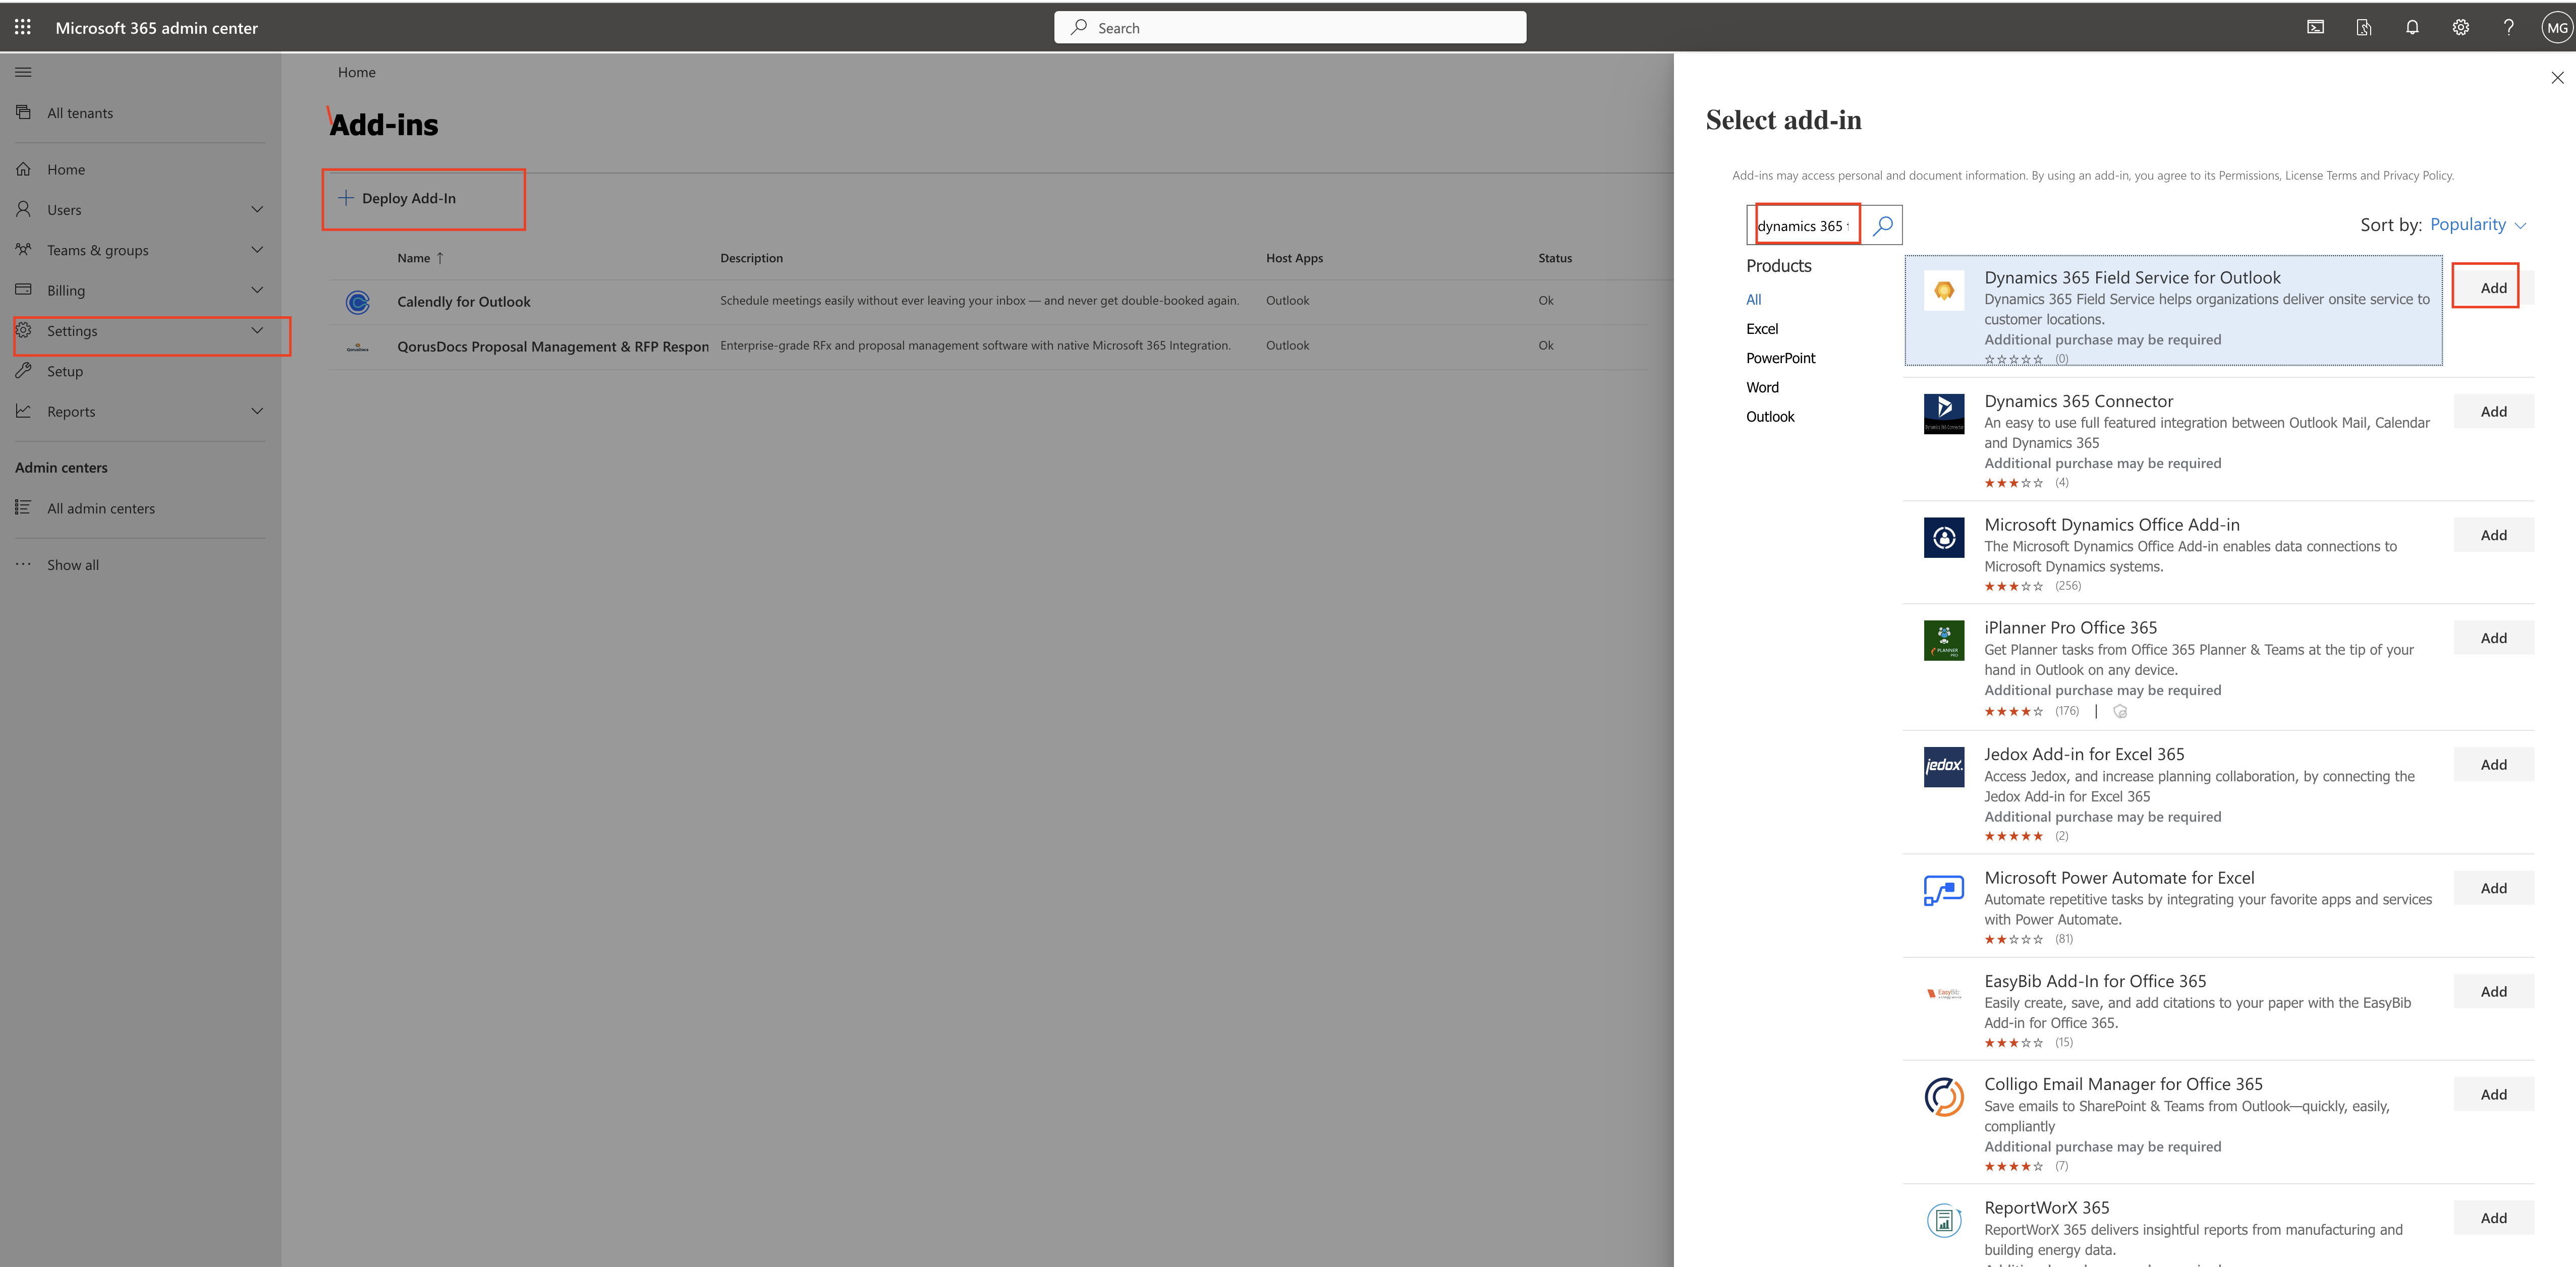
3. Choose for entire organisation or selected users or group, and deployment method – fixed default, available, optional.
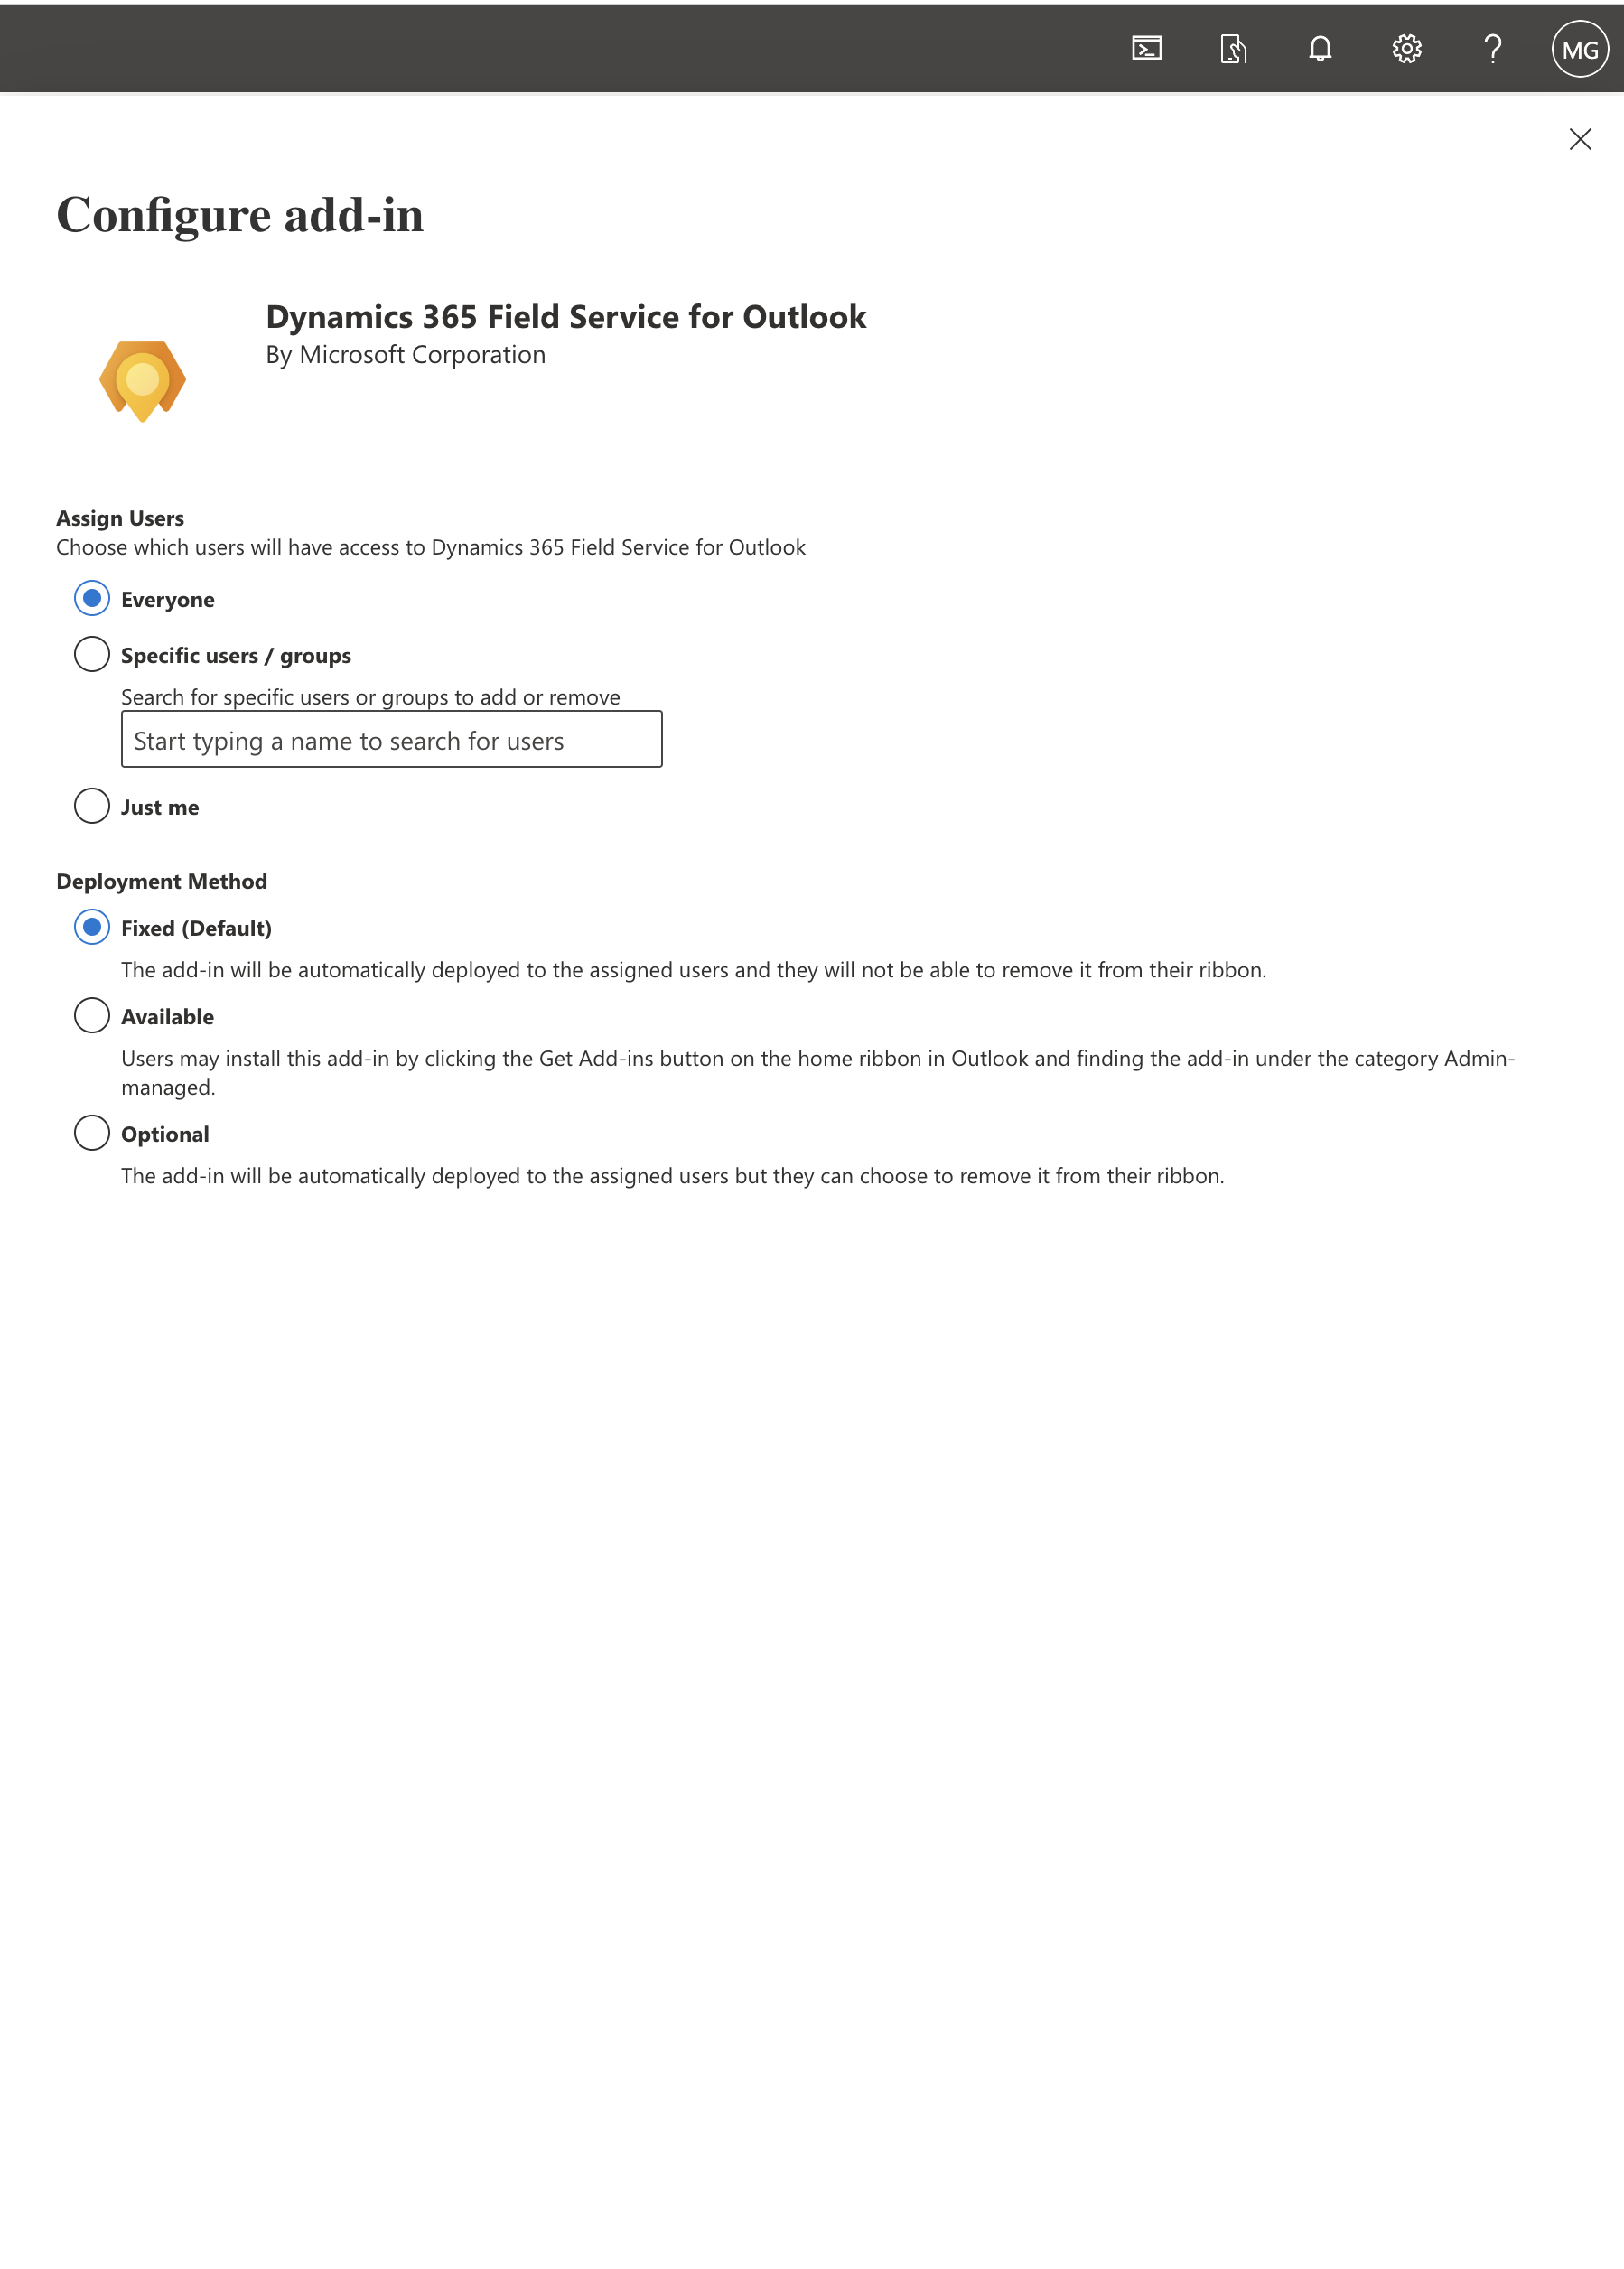
4. Save and the deployment will be successful.

It may take upto 12 hrs to appear the add -in,

Relaunch the Microsoft 365 app to see the add -in on the admin center.

That’s it for today.

I hope this helps.
Malla Reddy Gurram(@UK365GUY)
#365BlogPostsin365Days

Share this: