Menu Close

Tag: #uk365guy

{How to} Increase control when attaching to data in Dataverse on Customer Insights – Data

Hello Everyone,

Today I am going to share my thoughts on how to increase control when attaching to data in dataverse.

Let’s get’s started.

Certainly! The Microsoft Dataverse connector has undergone significant improvements, granting you more control and flexibility when importing data into customer insights -data. Here are the key enhancements.

1. Performance Improvements:

You can now smoothly import large dataverse tables into Customer Insights – Data, eliminating previous scale and performance limitations.

The connector has been optimized to handle substantial data volumes efficiently.

2. Selective Table Import:

Say goodbye to mandatory read-only table selections. with the updated connector, you decide which dataverse tables you want to use in Customer Insights.

3. Column-Level Customization:

You have full control over column selection. Choose the specific columns you want to process and output in Customer Insights.

In summary, the Microsoft Dataverse connector is now the fastest and easiest way to bring data from Dataverse into Customer Insights – Data.

Enjoy the newfound flexibility.

That’s it for today.

I hope this helps.

Malla Reddy Gurram(@UK365GUY)
#365blogpostsin365days

Share this:

How to block IP Address from accessing Dataverse in Dynamics 365 Environment

Hello Everyone,

Today I am going to show how to block the IP address from accessing the Dataverse.

Let’s get’s started.

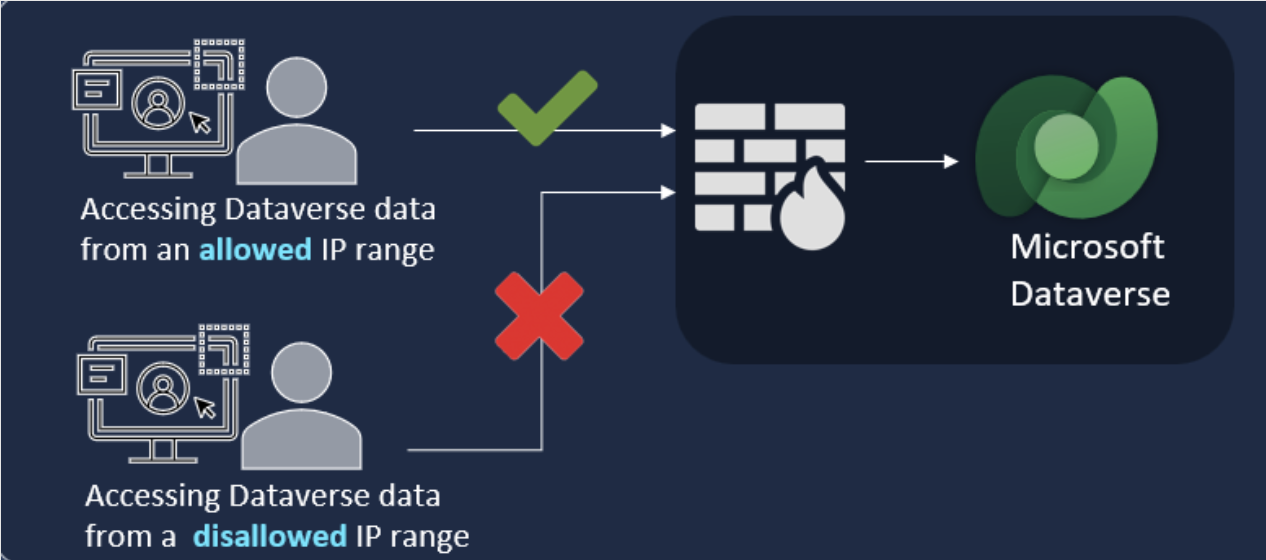
Suppose users might be looking to download data from tools like Excel or Power BI or try to access Dataverse from different network,Or if the user is trying to access the dataverse from public IP like Coffee shop or Open workspace thenif there no restrictions in place then users able to access the data as usual.

Then how do we restrict it?

Login into Power Platform Admin Center.

Go to the environment : Settings : Privacy + Security

Then : IP address settings:

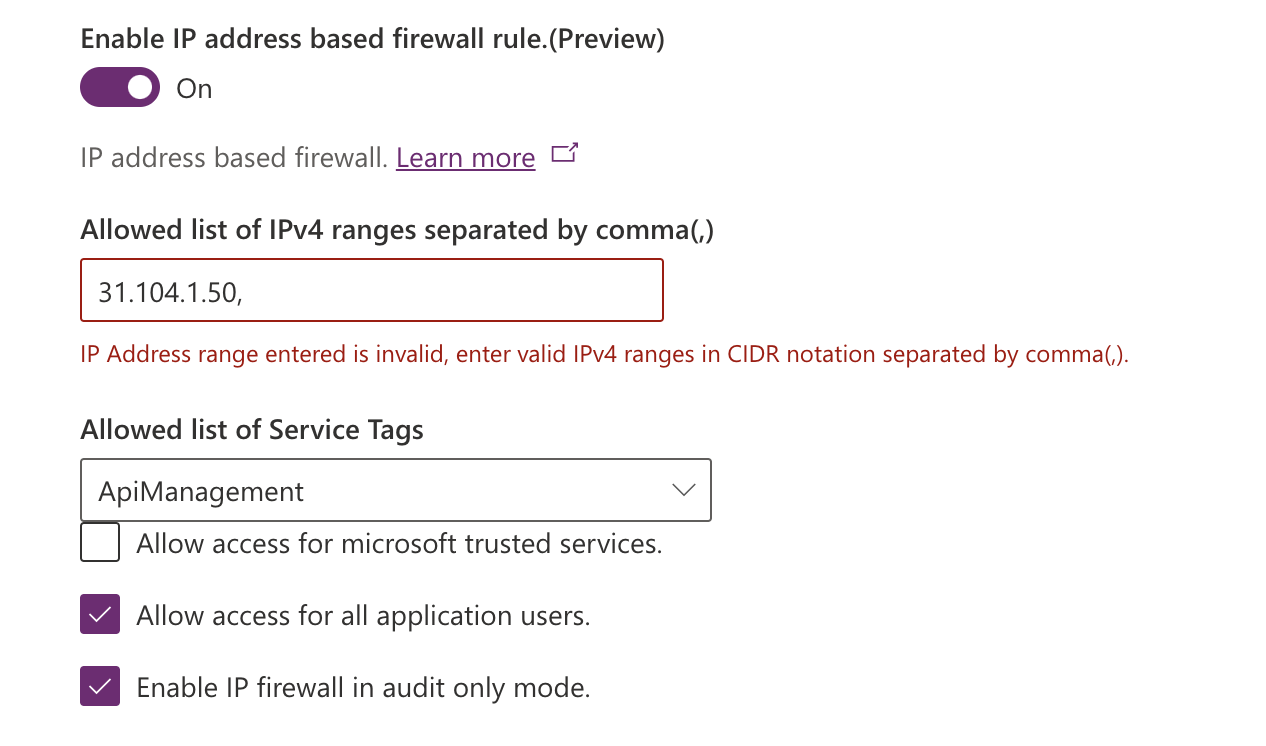
Enable IP address based firewall rule – which is currently in preview.

Paste the allowed List of IPv4 ranges separated by comma(,)

Also Select the Allowed list of Service Tags from the dropdown.

That’s it for today.

I hope this helps.

Malla Reddy Gurram(@UK365GUY)
#365blogpostsin365days

Share this:

Set privacy preference on Dynamics 365 CE Environment

Hello Everyone,

Today I am going to show how to set the privacy preference on Dynamics 365 CE environment.

Let’s get’s started.

Suppose when you are accessing the Dynamics 365 CE environment and you may get errors popped up on the screen and there are some options available to the user like:

1. Ask the user for permission to send an error report to Microsoft

2. Automatically send an error report to Microsoft without user interaction.

3. Never send an error report to Microsoft.

How do you set that?

Login into Power Platform Admin Center.

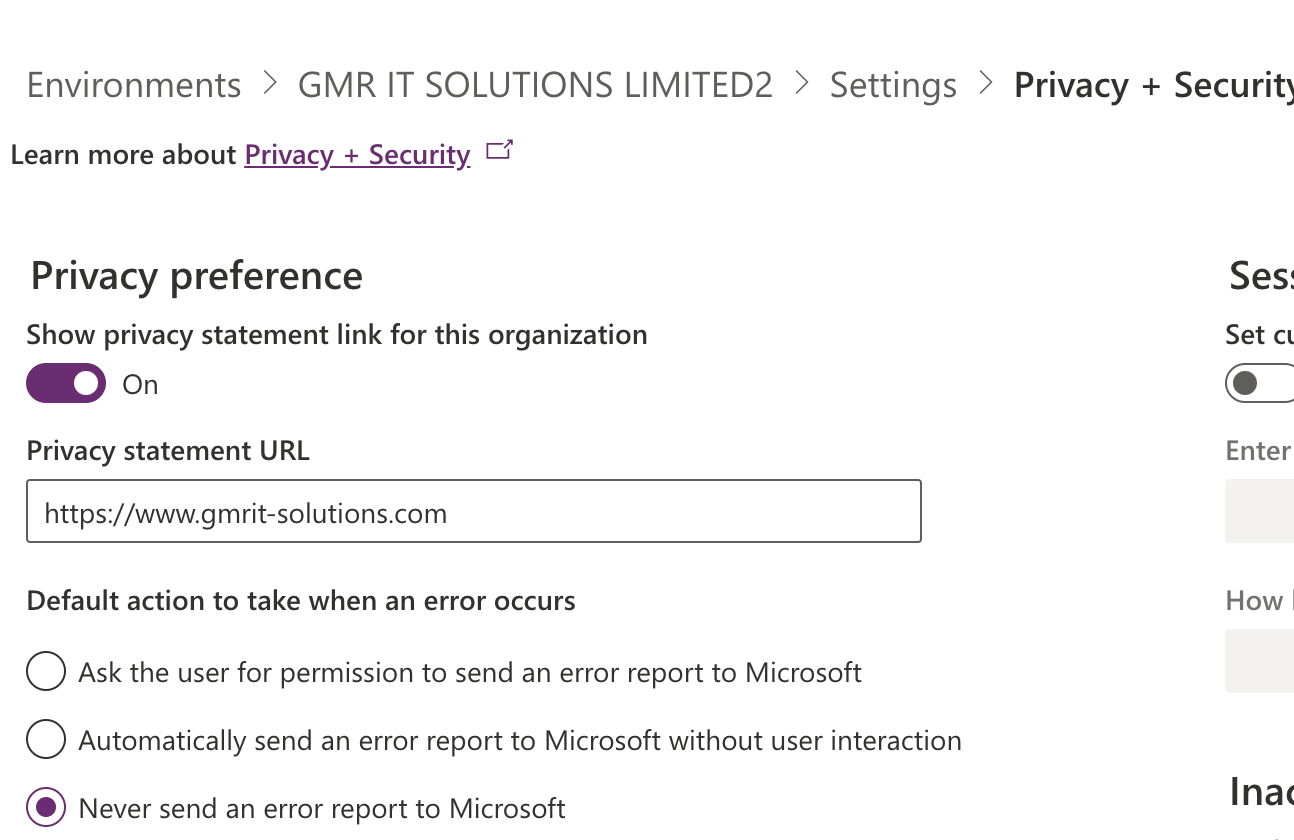
Go to Settings: Privacy + Security

Privacy Preferences : Turn ON the show privacy statement link for this organisation.

Then default action to take when an error occurs:

Choose one of the options from the above and SAVE the changes.

That’s it for today.

I hope this helps.

Malla Reddy Gurram(@UK365GUY)
#365blogpostsin365days
Share this:

{Model Driven App} How to switch to classic buttons in Power Apps

Hello Everyone,

Today I am going to show how to switch to classic buttons in Power Apps.

Let’s get’s started.

With the modern UI usage of Model Driven Apps sometime the users are want to switch back to classic UI, as the classic app, forms and view designers are deprecated.

You need to enable manually from settings.

Login into PPAC(www.admin.powerplatform.microsoft.com)

Choose the environment,

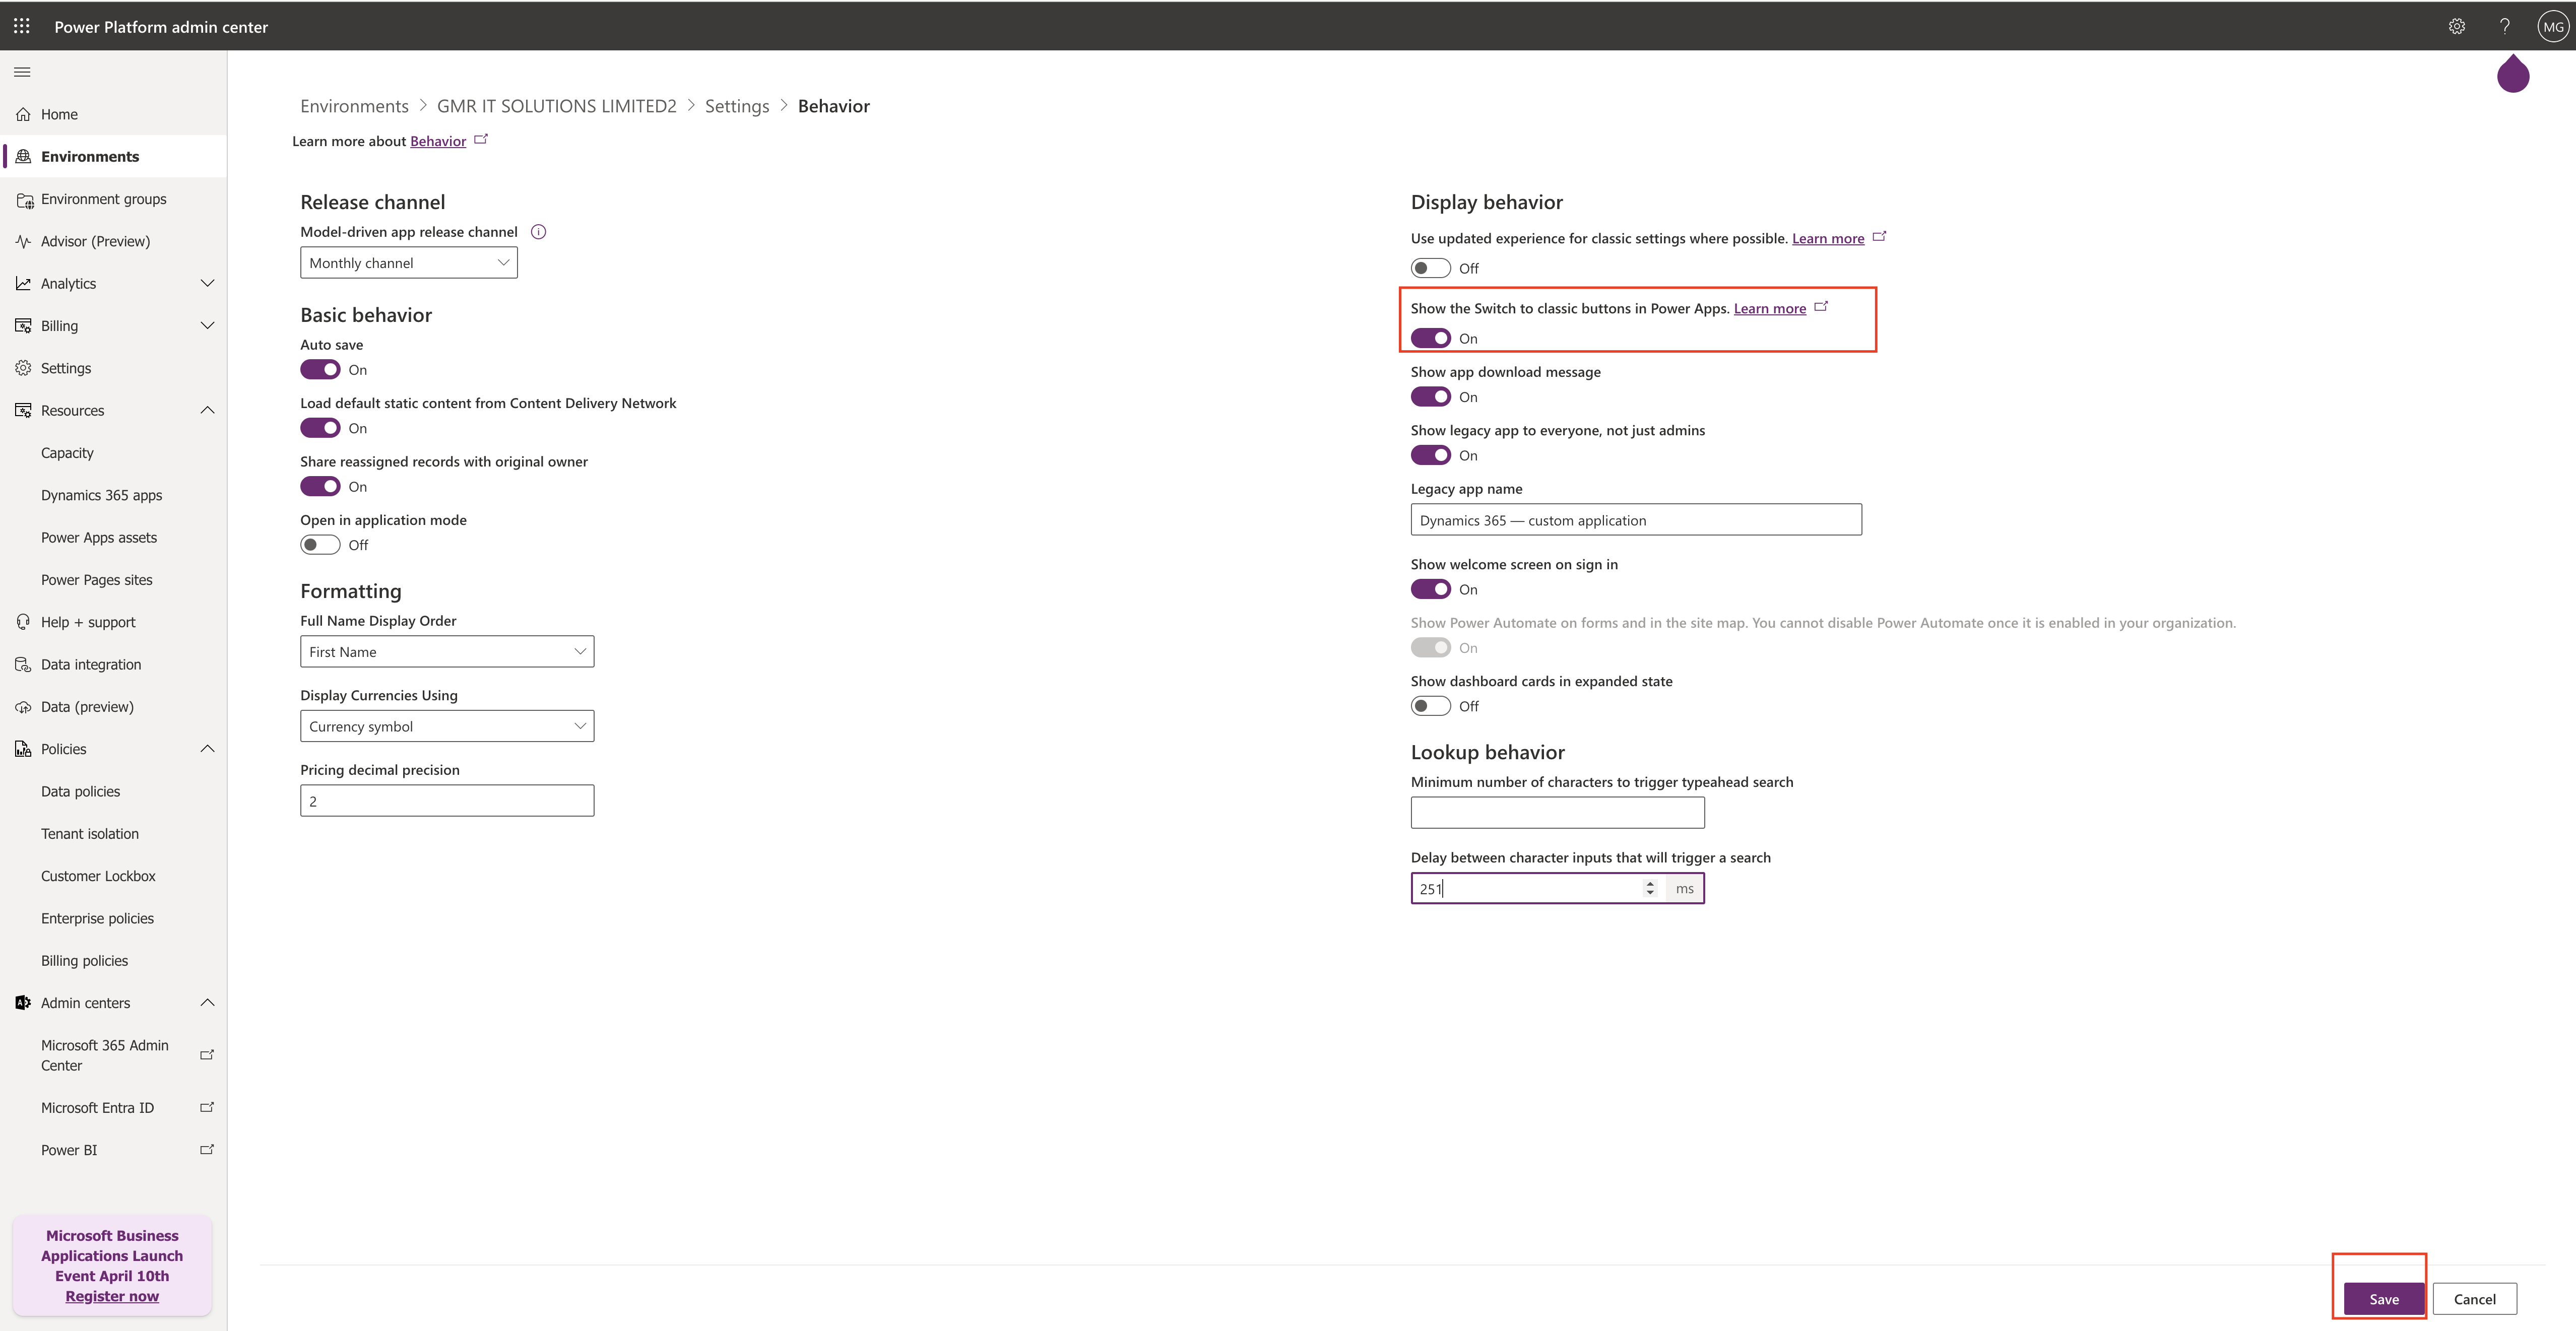
Then settings – Behavior:

Show the switch to classic buttons in Power Apps – ON

Save the changes.

That’s it for today.

I hope this helps.

Malla Reddy Gurram(@UK365GUY)
#365BlogPostsin365Days

Share this:

{Customer Insights} Advanced bot protection for integrity of data

Hello Everyone,

Today i am going to share my thoughts on the advanced bot protection for integrity of data on customer insights.

Let’s get’s started.

Advanced bot protection is a crucial aspect of ensuring the integrity of data and operational efficiency. Let’s delve into how it enhances reliability and safeguard your business processes.

1. Enhanced Data Accuracy:

By implementing advanced bot protection, you can improve the quality of your insights. The data you collect will be more accurate, representing genuine human interactions.

This reliability extends to your decision making processes, allowing you to make informed choices based on trustworthy information.

2. Minimized Disruptions:

Malicious bots can wreak havoc by inflating engagement metrics, triggering journeys incorrectly and skewing analytics.

With bot protection, you can elevate the customer experience by minimizing disruptions caused by these nefarious bots.

3. Specific Features:

Prevent Bot Clicks on Emails: Avoid inflated engagement metrics, incorrectly triggered journeys and skewed analytics by ensuring that only legitimate clicks are recorded.

Protect Web form submissions: Web forms are often targeted by bots submitting spam or malicious content. Bot protection ensures that only valid form submissions are recorded.

Accurate Event Attendance: Prevent false inflation of event attendance metrics by ensuring that only real attendances are recorded.

Remember, this advanced bot protection not only bolsters your insights but also contributes to a smoother customer experience.

That’s it for today.

I hope this helps.

Malla Reddy Gurram
#365blogpostsin365days

Share this: