Hello Everyone,
Today i am going to show how to share your canvas app on IoS Andriod or Google Play Store.
Lets gets started.
Where do you see this “WRAP” on canvas app?
Login into www.make.powerapps.com
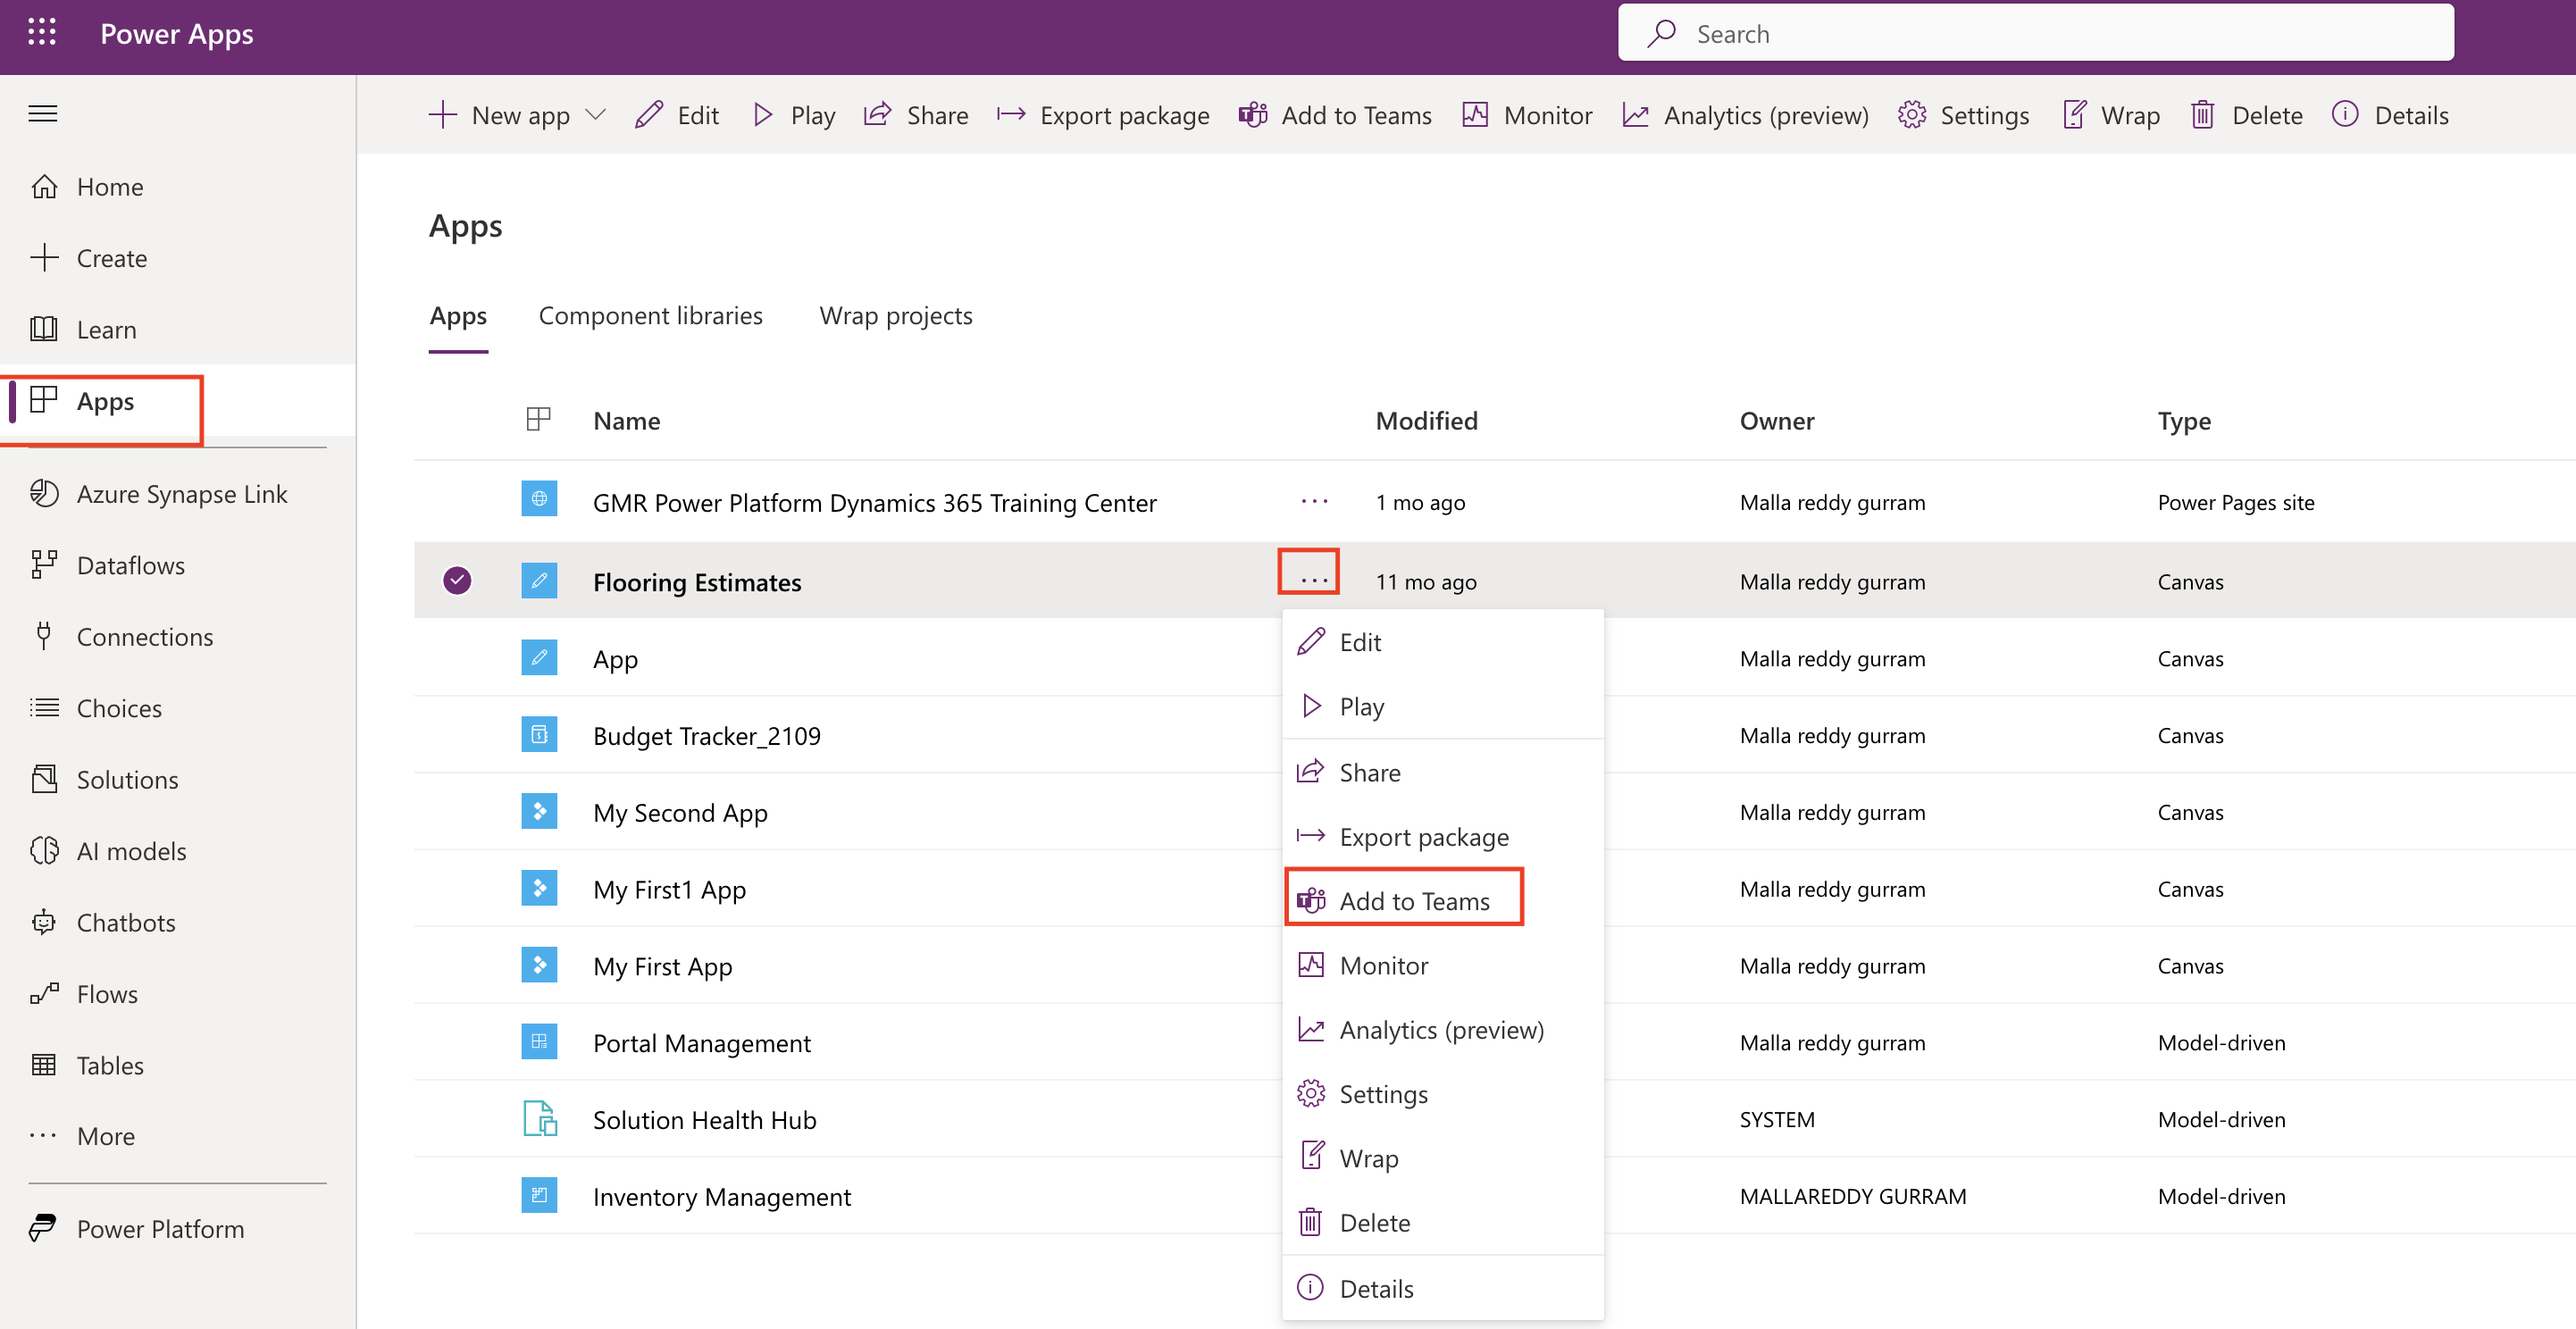
Click on App and if you have created canvas app before then you can see on the middle screen see below screen shot and select the “…” then you will see the WRAP.
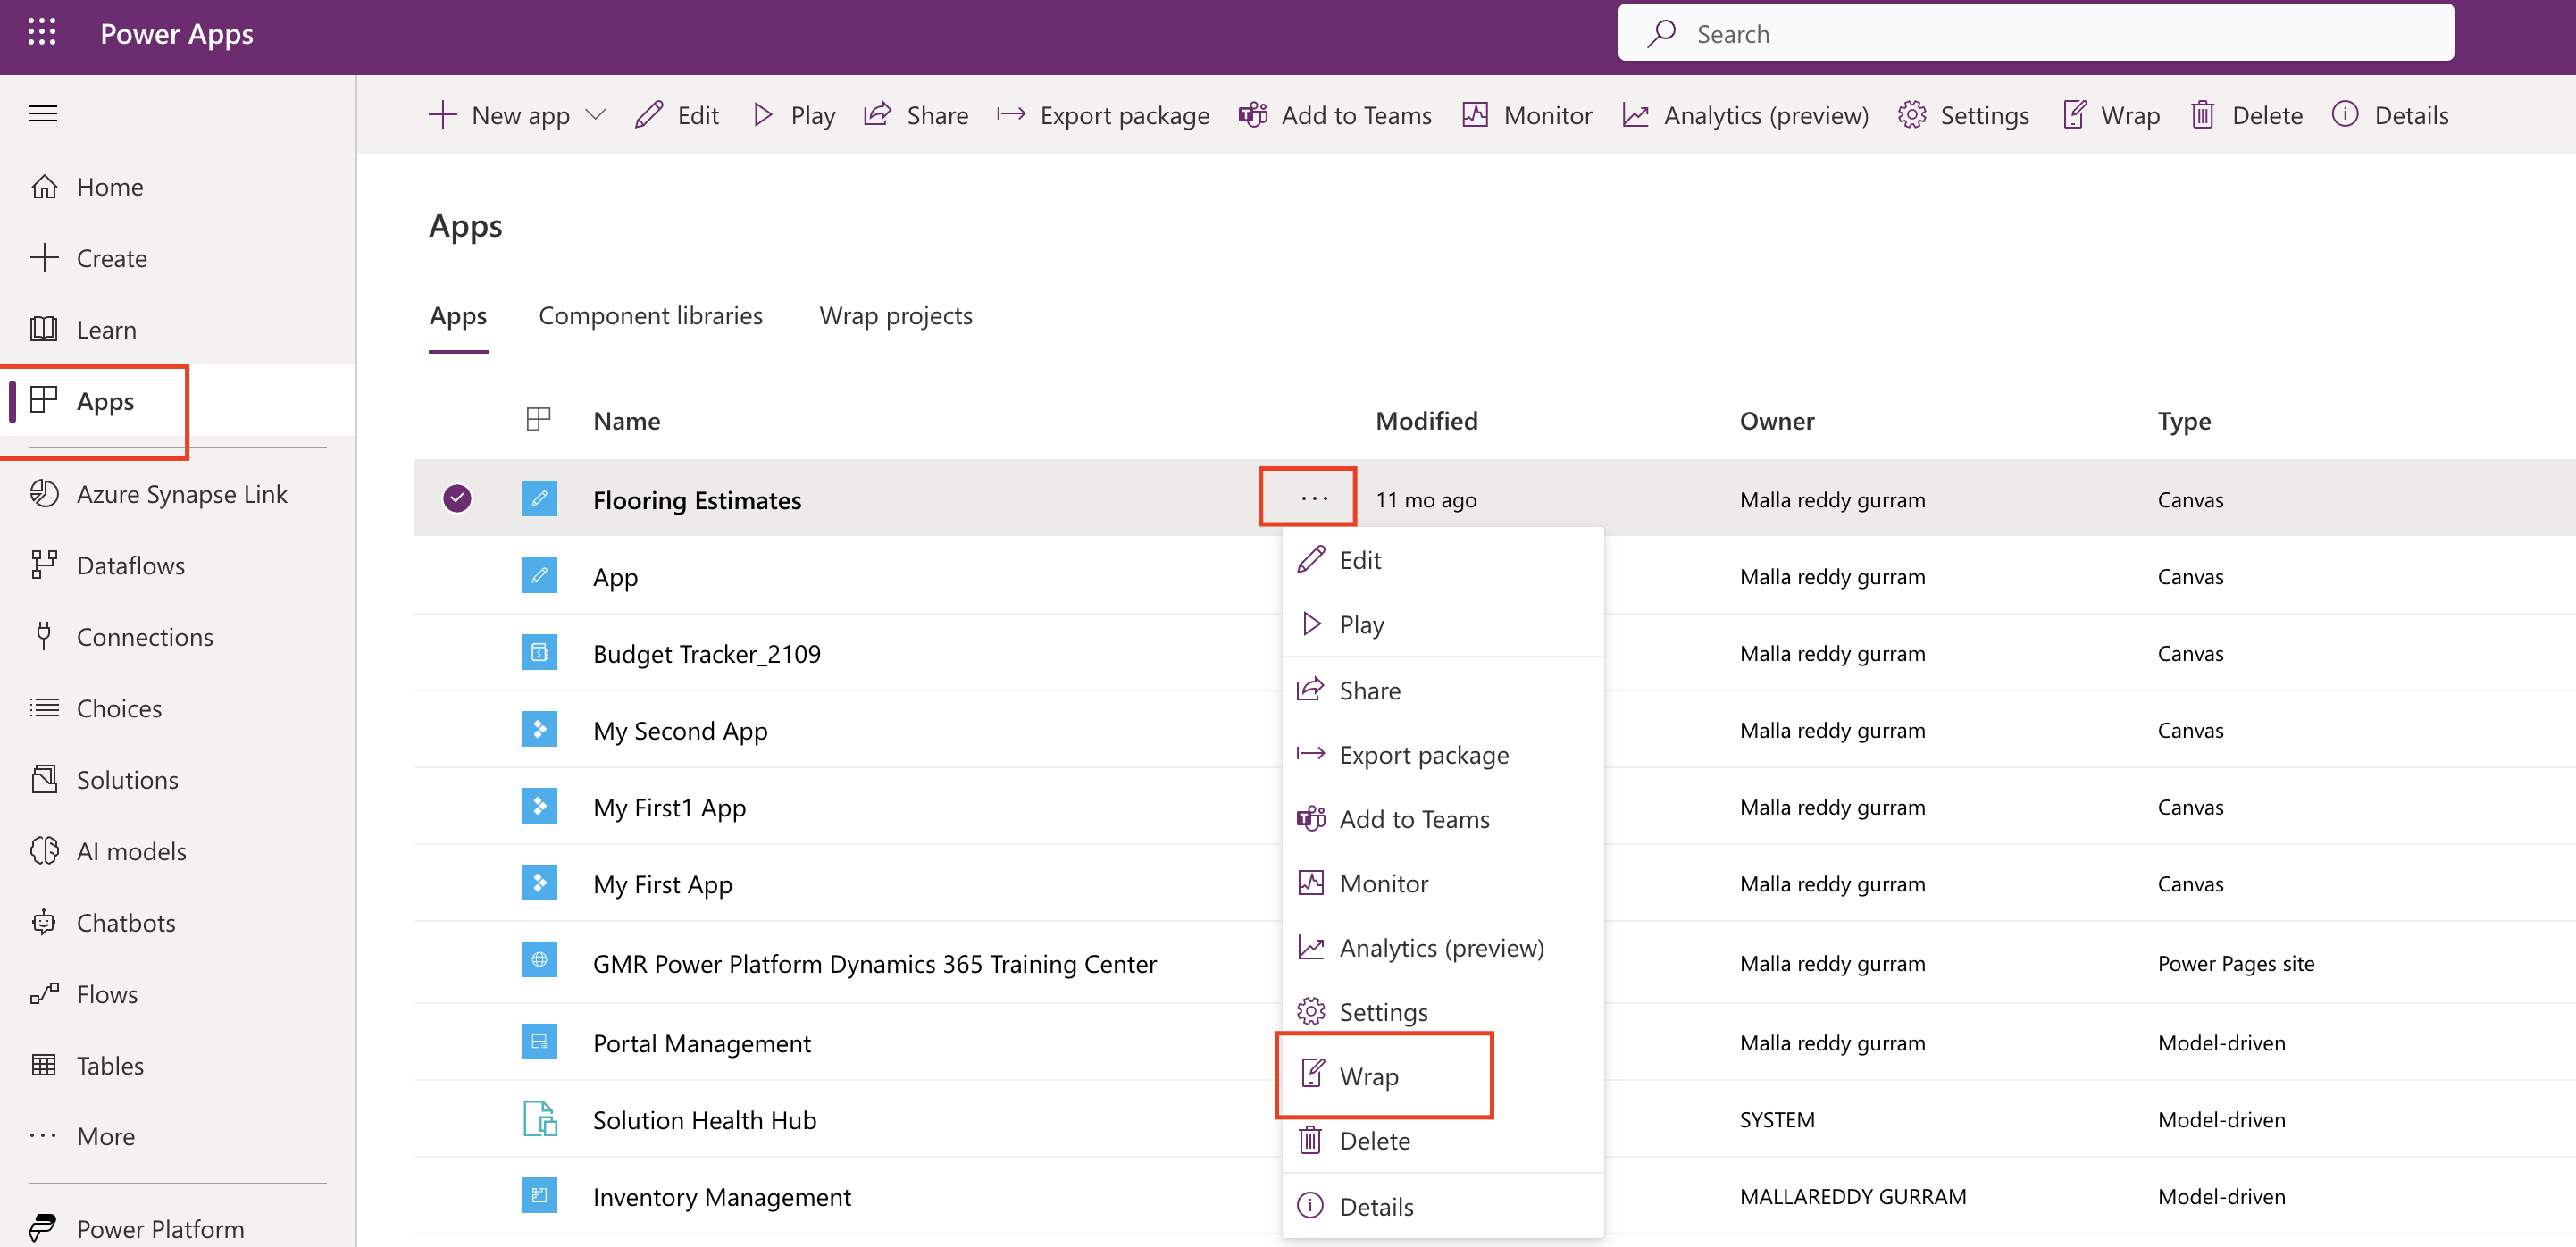
What the WRAP Feature does?
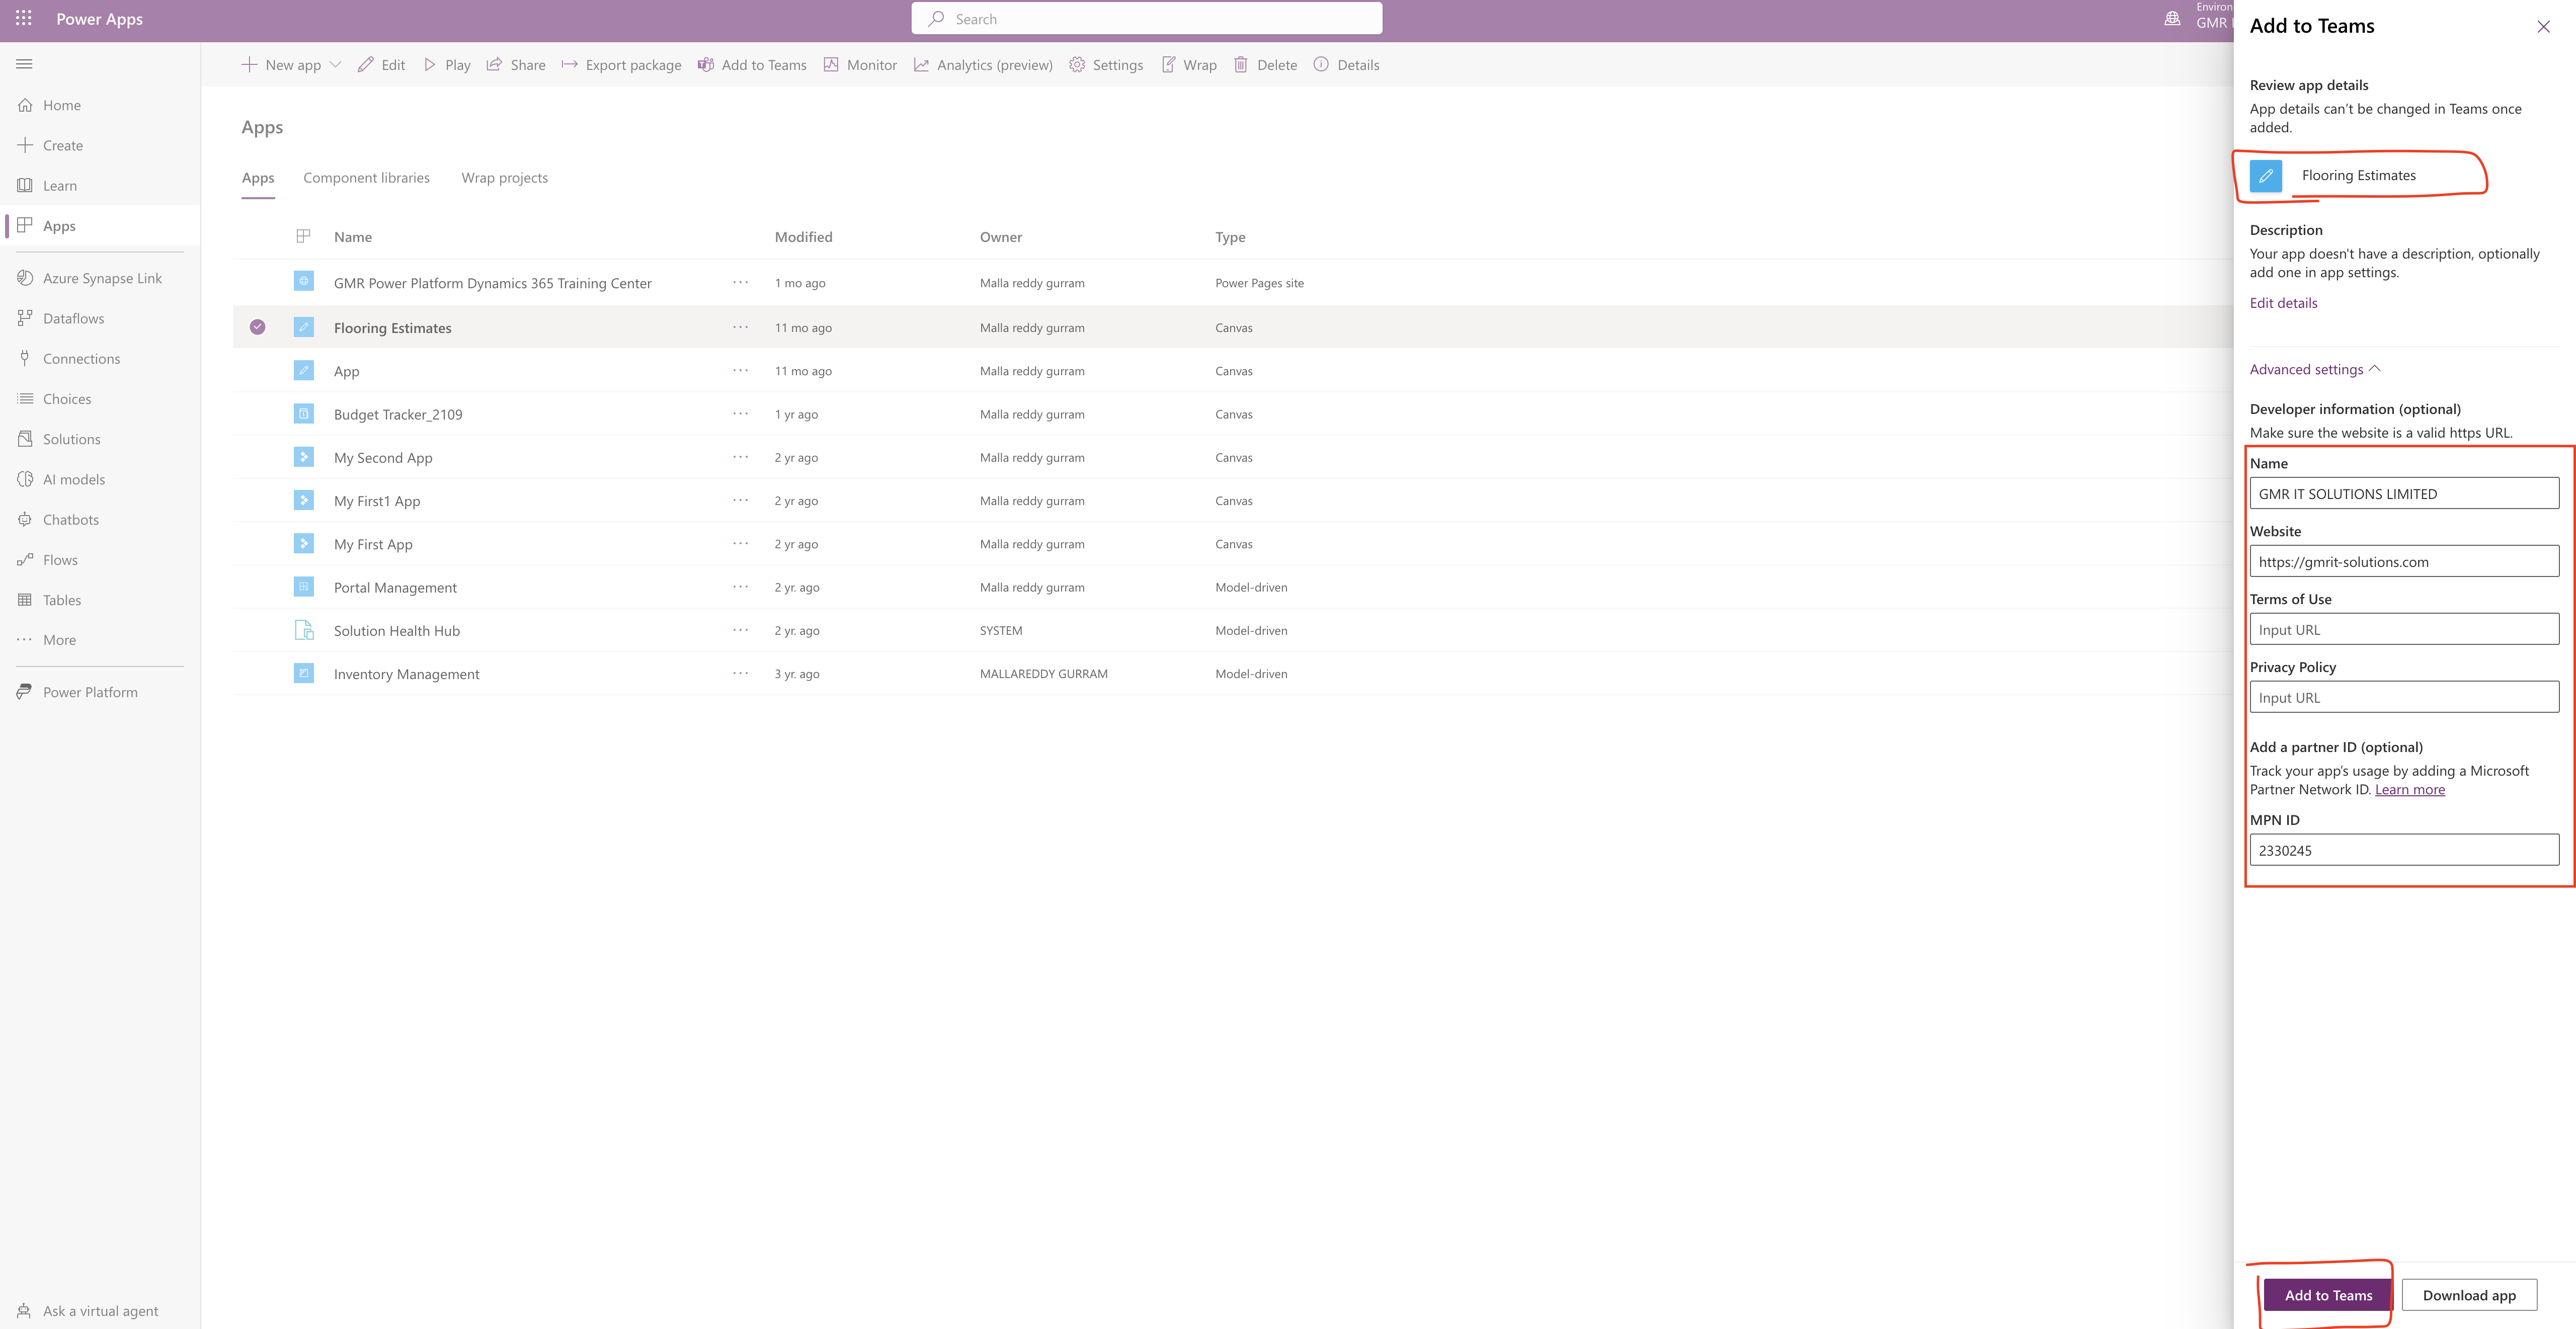
It packages one or more canvas apps as a single native mobile app package using step by step wizard.
It lets power app create native mobile versions of your canvas apps as custom branded andriod and iOS Mobile apps.
You can distribute such wrapped native mobile apps to the end users through Microsoft Intune, Microsoft App Center, Google Play or Apple Business Manager or other native distribution methods.
How to wrap a canvas app and what are prerequisites and step by step guide here
Thats it for today.
I hope this helps.
Malla Reddy(@UK365GUY)
#365BlogsPostsin365Days