Hello Everyone,
Today I am going to share my thoughts on capture responses from external third party forms dynamics 365 customer insights.

Let’s get’s started.
Certainly! In Dynamics 365 Customer Insights – Journeys, you can now capture form submissions from any external forms and use them to create new leads or contacts.

Here’s how it works:
1.Maximize Potential: If you have custom-built forms on your website, you can leverage them to generate more leads and contacts for your business.
The best part? You don’t need to recreate these forms within Customer Insights – Journeys.
2. Automatic Creation: When users submit forms on your website(whether they’re third-party forms), the system will automatically create new leads or contacts in Customer Insights – Journeys.
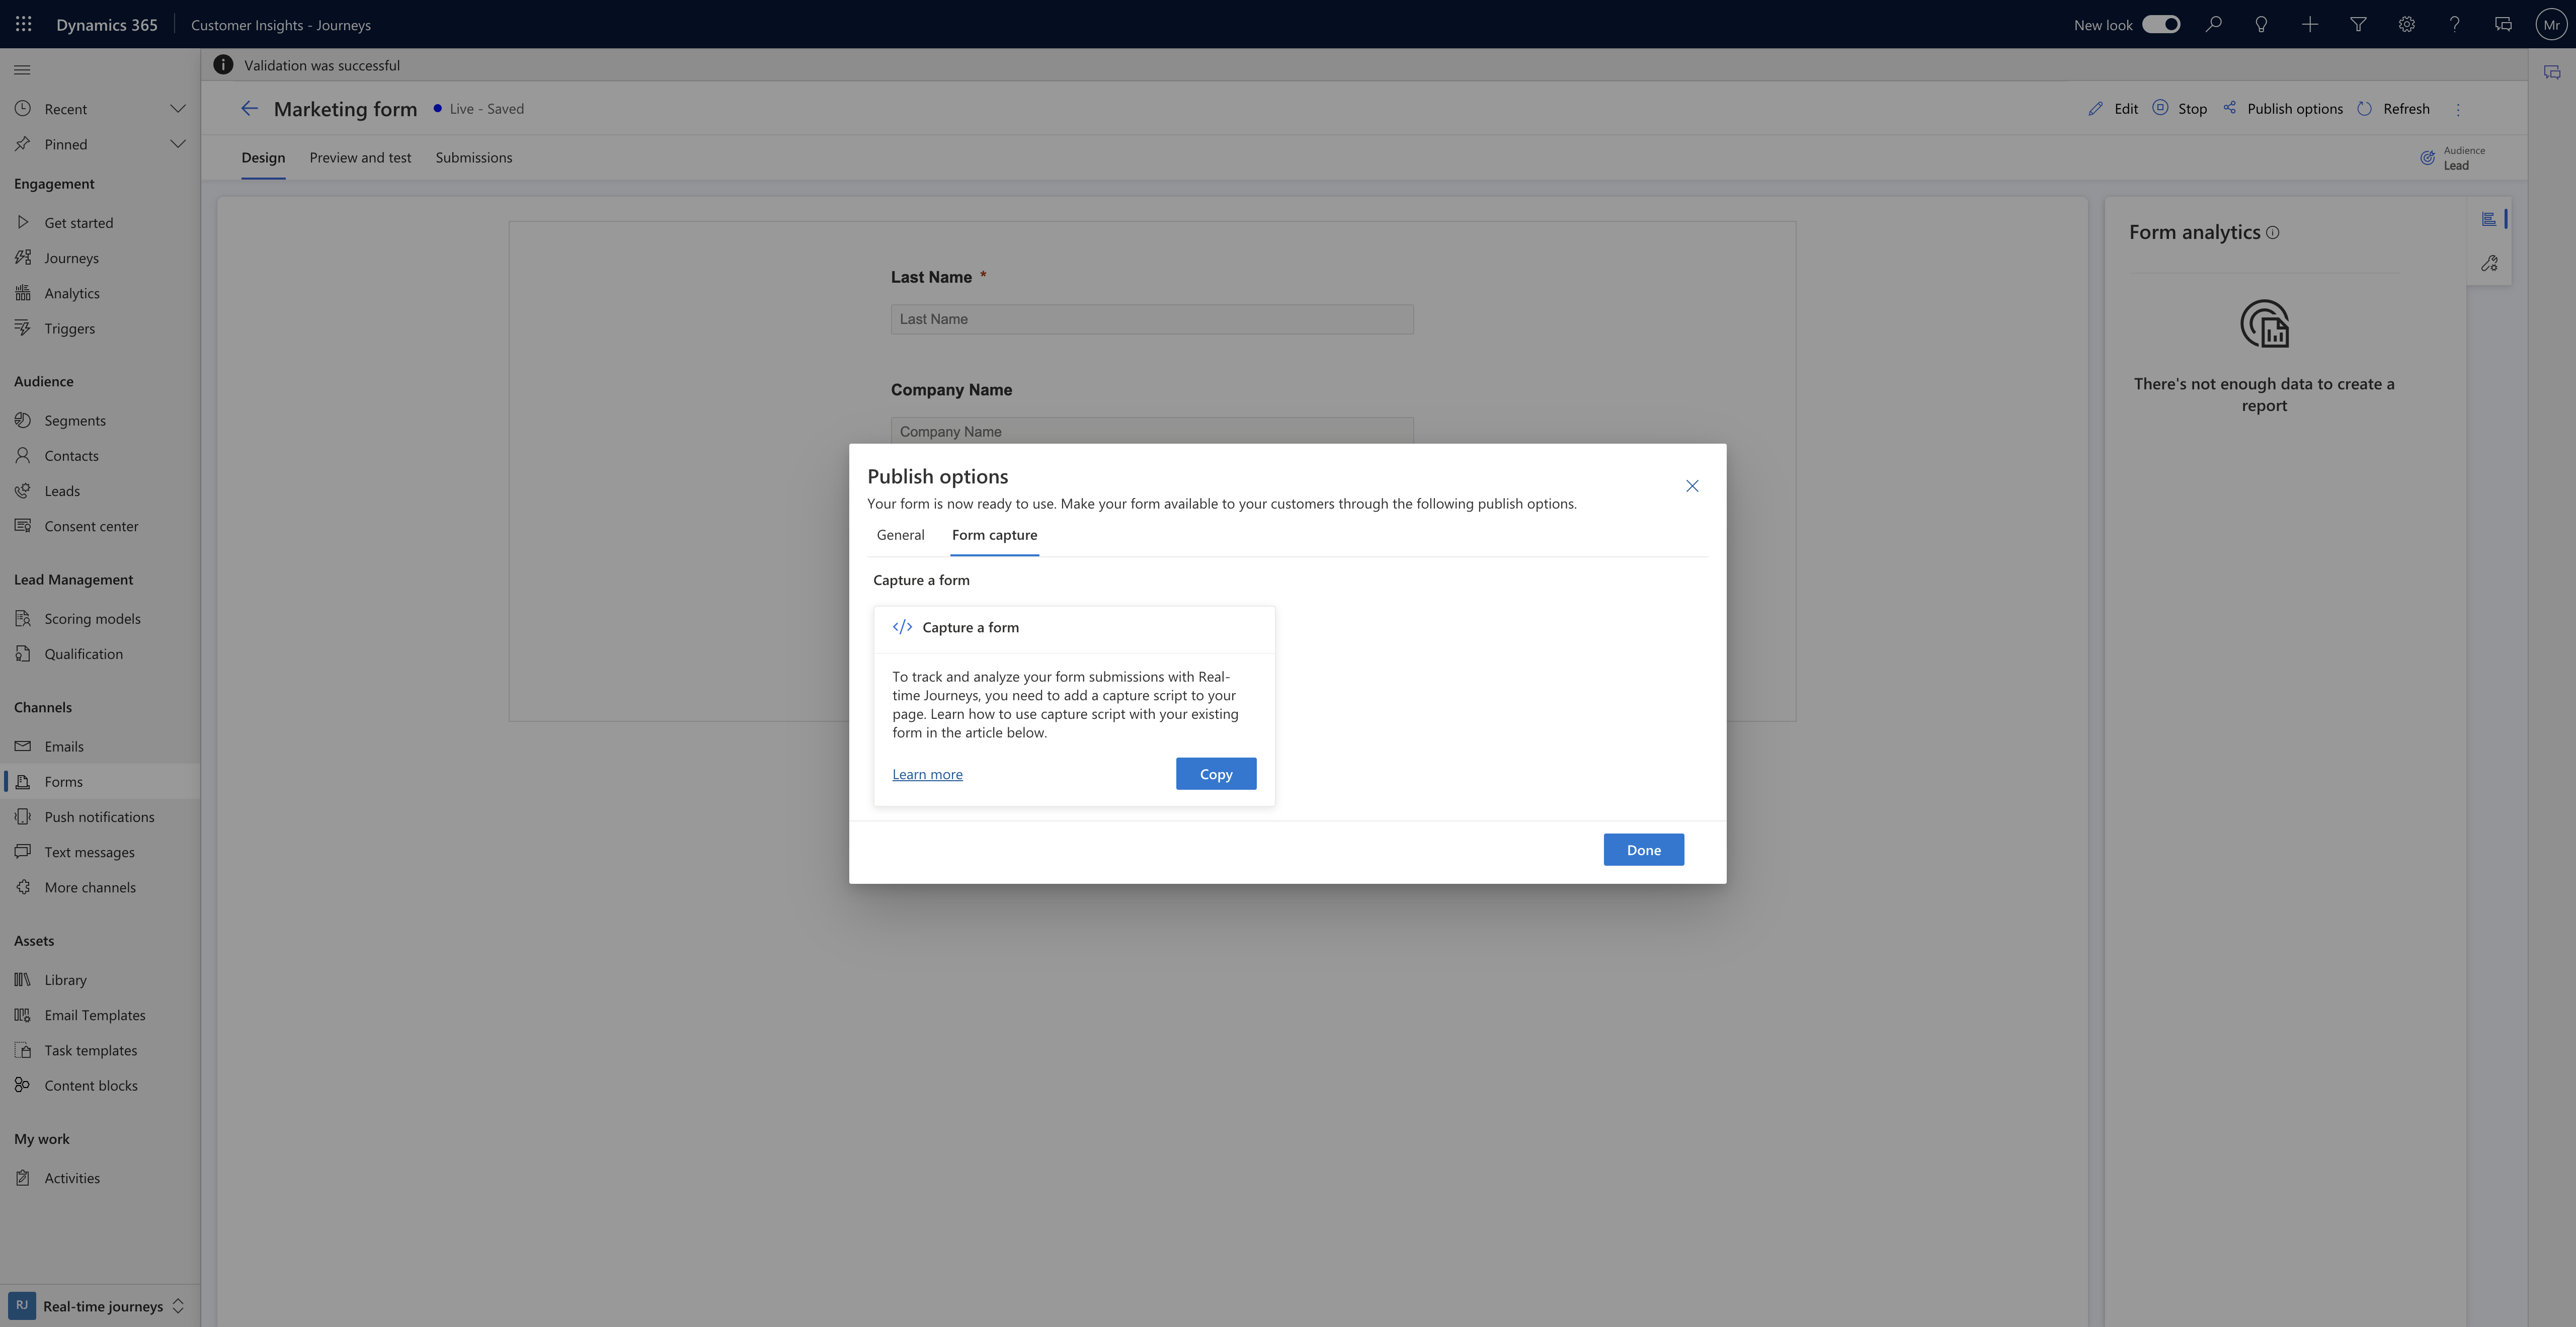
3. Mapping Fields: You can easily create JavaScript with mapping of your form fields to existing entity attributes. This ensures that the captured data aligns correctly with your existing records.
4. Embed the script: To implement this, embed the capture script into multiple pages containing the same form. This way, you can seamlessly collect data from various parts of your website.
By capturing responses from external forms, you empower yourself to better understand your audience, target them more accurately, and follow up effectively. It’s a powerful feature that seamlines your lead generation process!.
That’s it for today.
I hope this helps.
Malla Reddy Gurram(@UK365GUY)
#365BlogPostsin365Days